Hop into the spirit of Easter with this adorable origami bunny! In this tutorial, you’ll learn how to fold a cute Easter bunny from a single square of paper. With just a few simple folds, your paper transforms into a charming little rabbit that’s perfect for spring decorations, Easter baskets, or fun holiday crafts. It’s an easy and delightful project for beginners, kids, and anyone who loves festive paper creations.
How to Make a Cute Easter Origami Bunny
Difficulty: Intermediate
Follow our clear step-by-step instructions to create a cute little Easter origami bunny and bring this festive paper craft to life.
Step 1

1
Start with a square sheet of origami paper. I am using an 7×7 inches origami paper.
If you only have regular paper, follow these instructions on how to make a square origami paper.
If you only have regular paper, follow these instructions on how to make a square origami paper.
Step 2
2
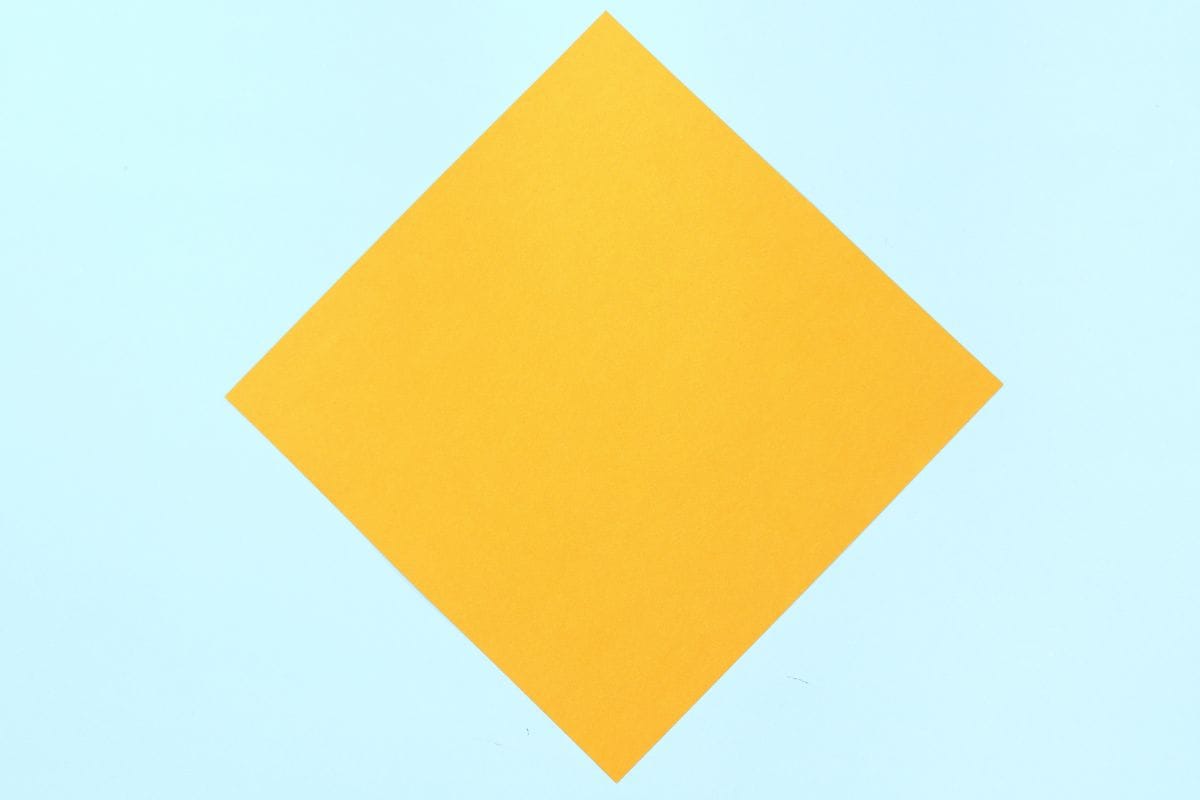
Rotate the paper to make it resemble a diamond.
Step 3
3
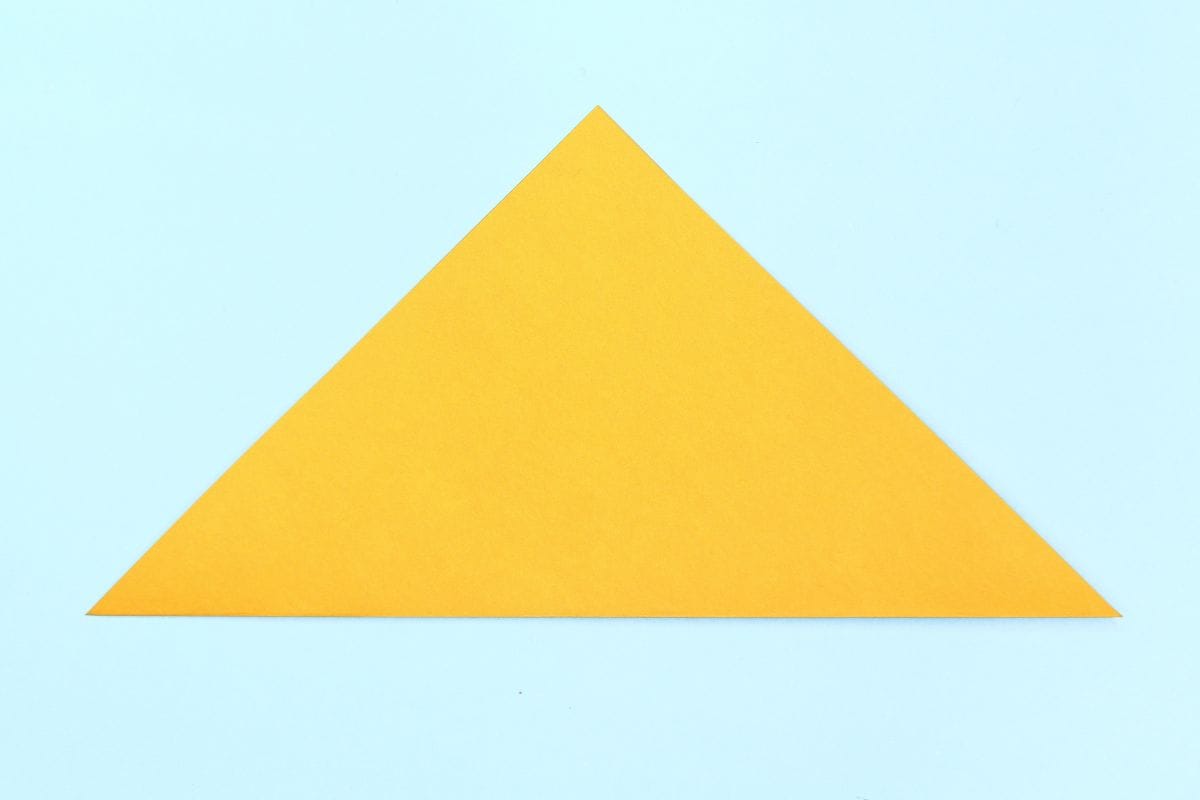
Fold the bottom corner to the top corner.
Step 4
4
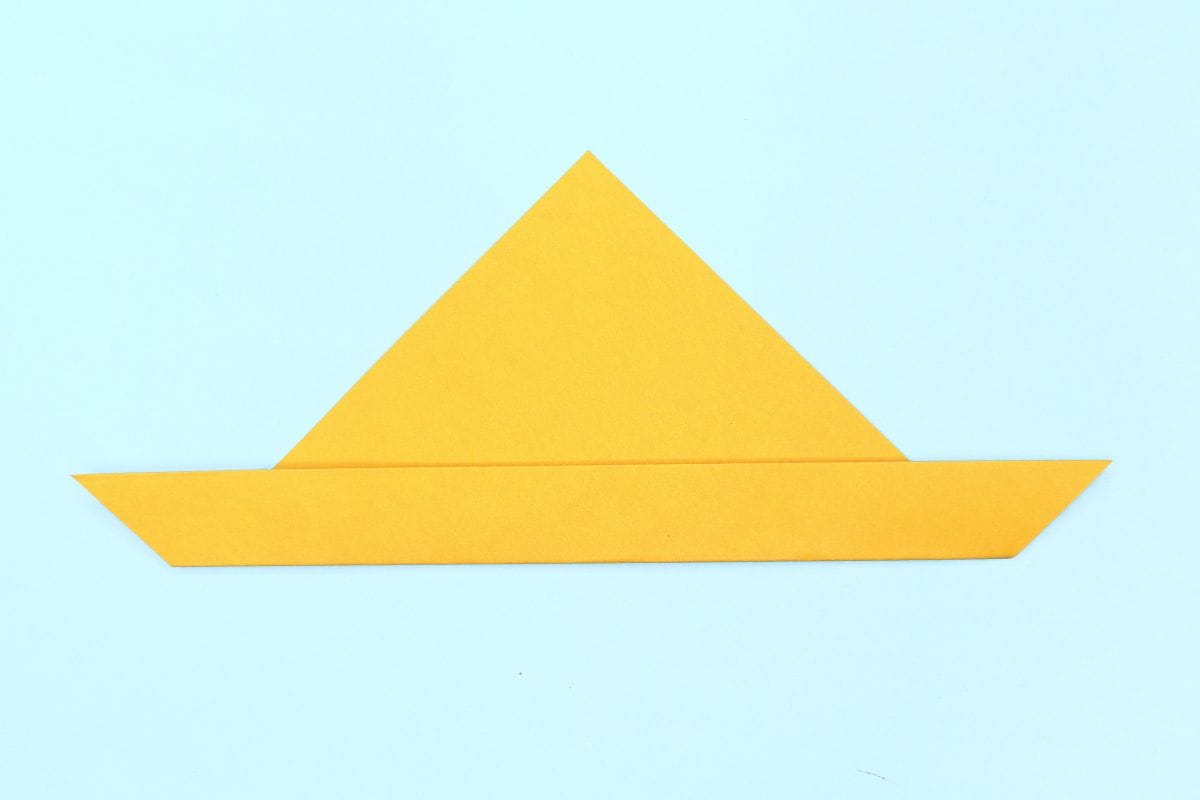
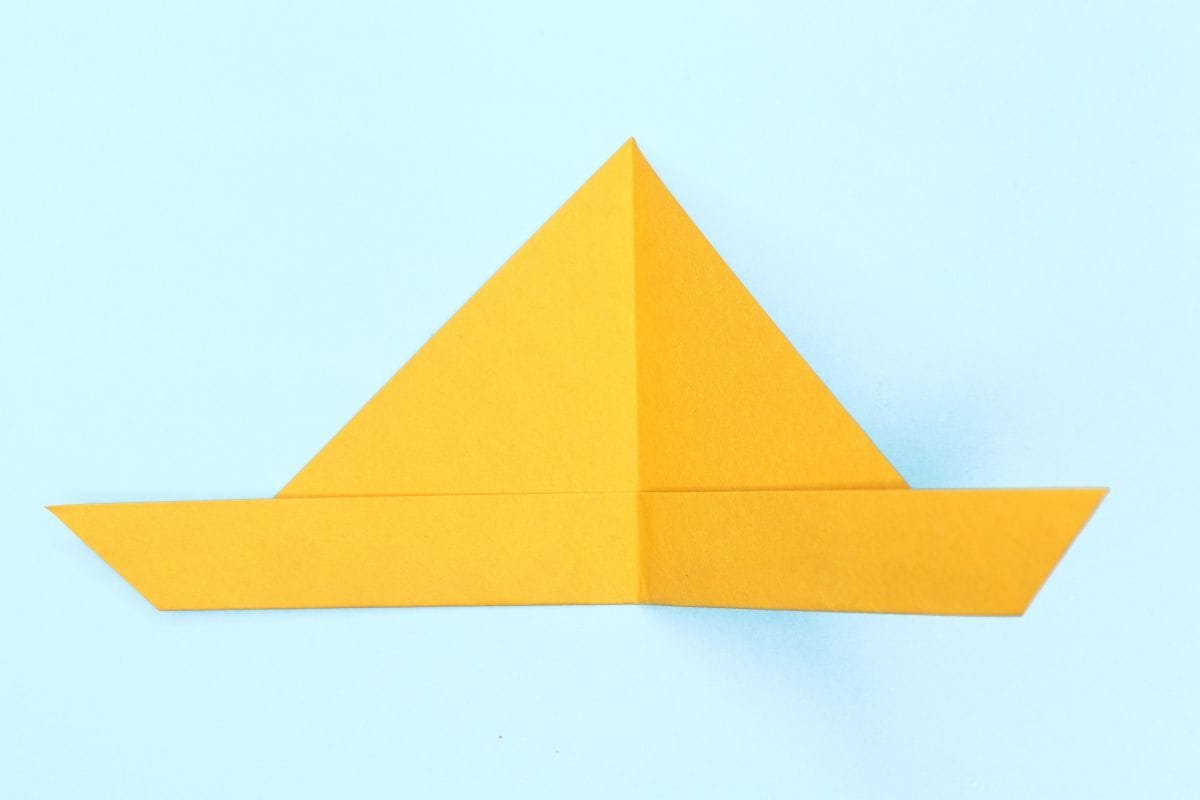
Fold the bottom edge upward by 1 inch.
Step 5

5
Fold the right corner toward the left corner.
Step 6
6
Unfold.
Step 7

7
Fold the bottom right edge to the midline.
Step 8
8
Fold the bottom left edge to the midline.
Step 9

9
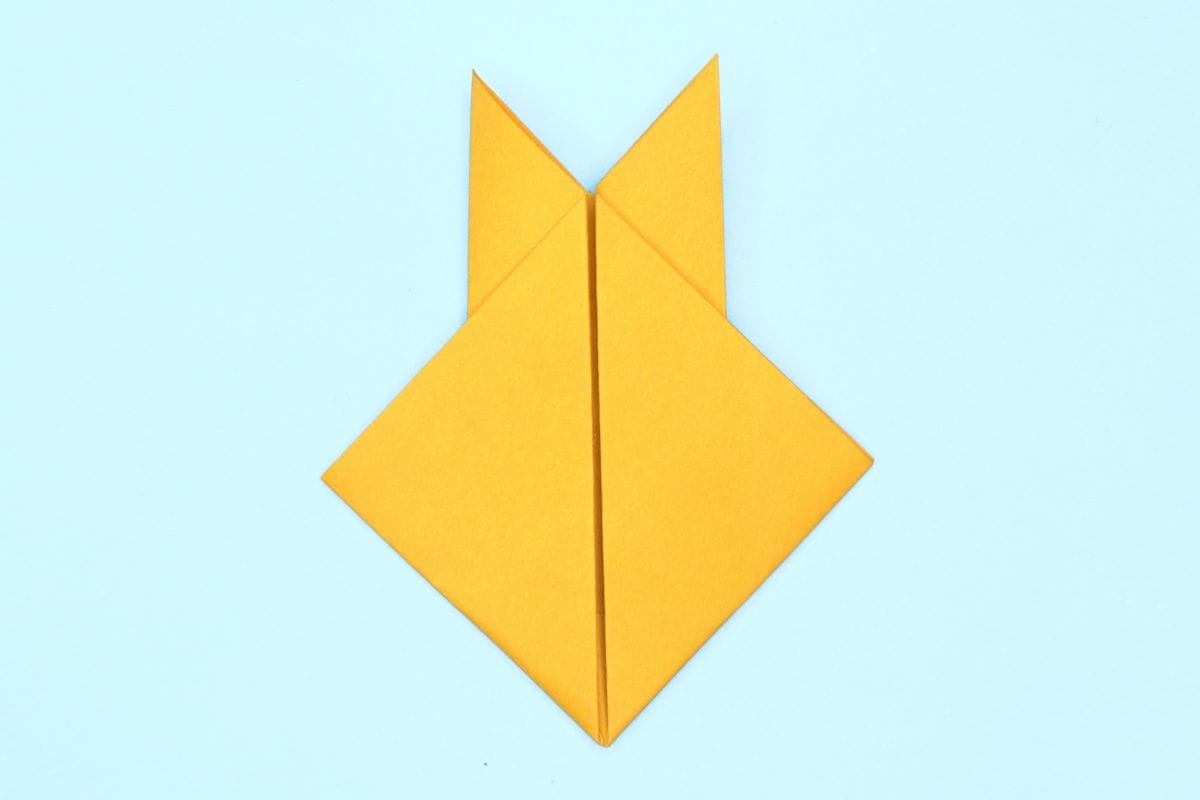
Fold the right corner slightly toward the right.
Step 10
10
Fold the left corner slightly toward the right.
Step 11
11
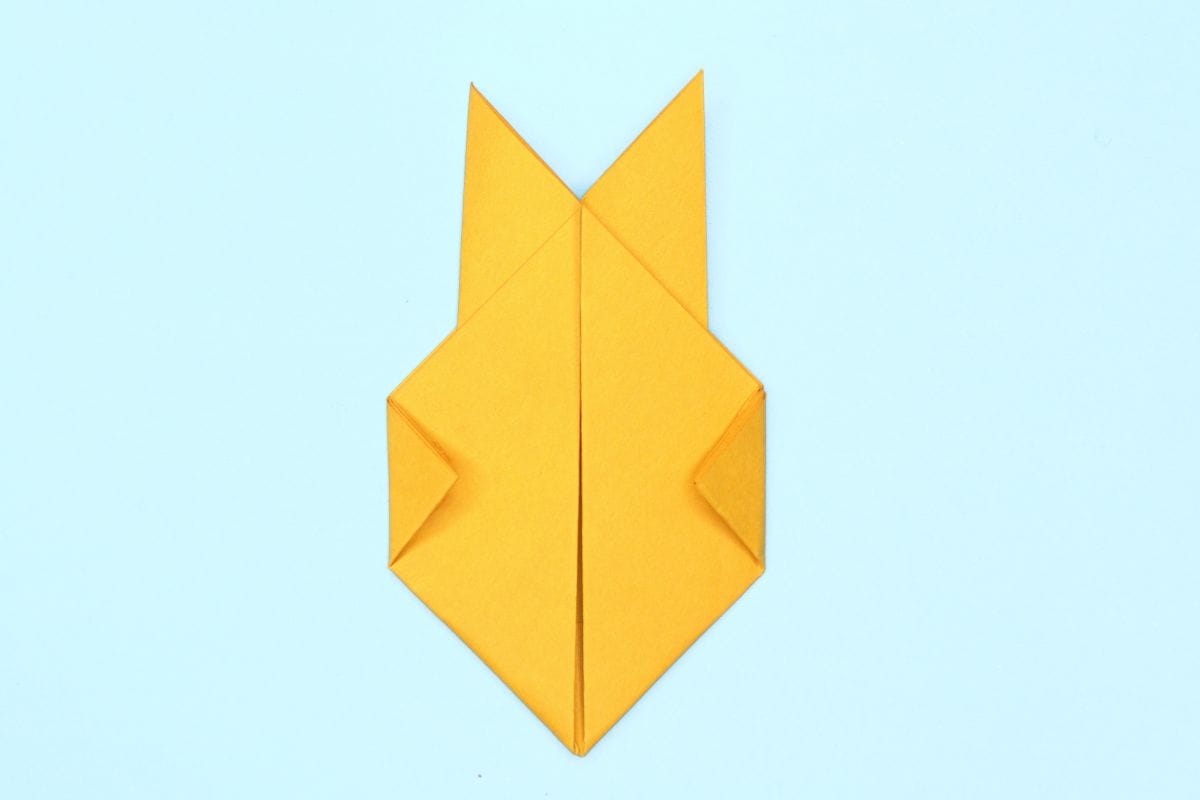
Fold the bottom corner to the top.
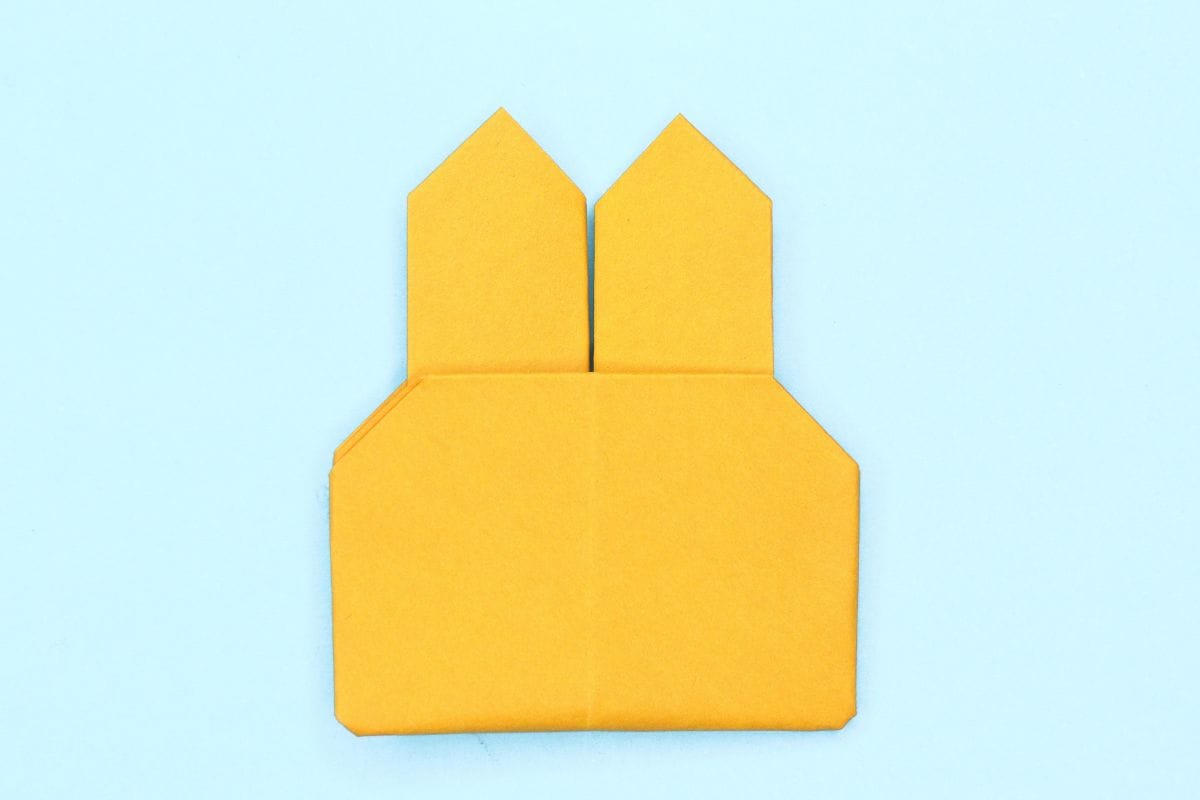
Step 12
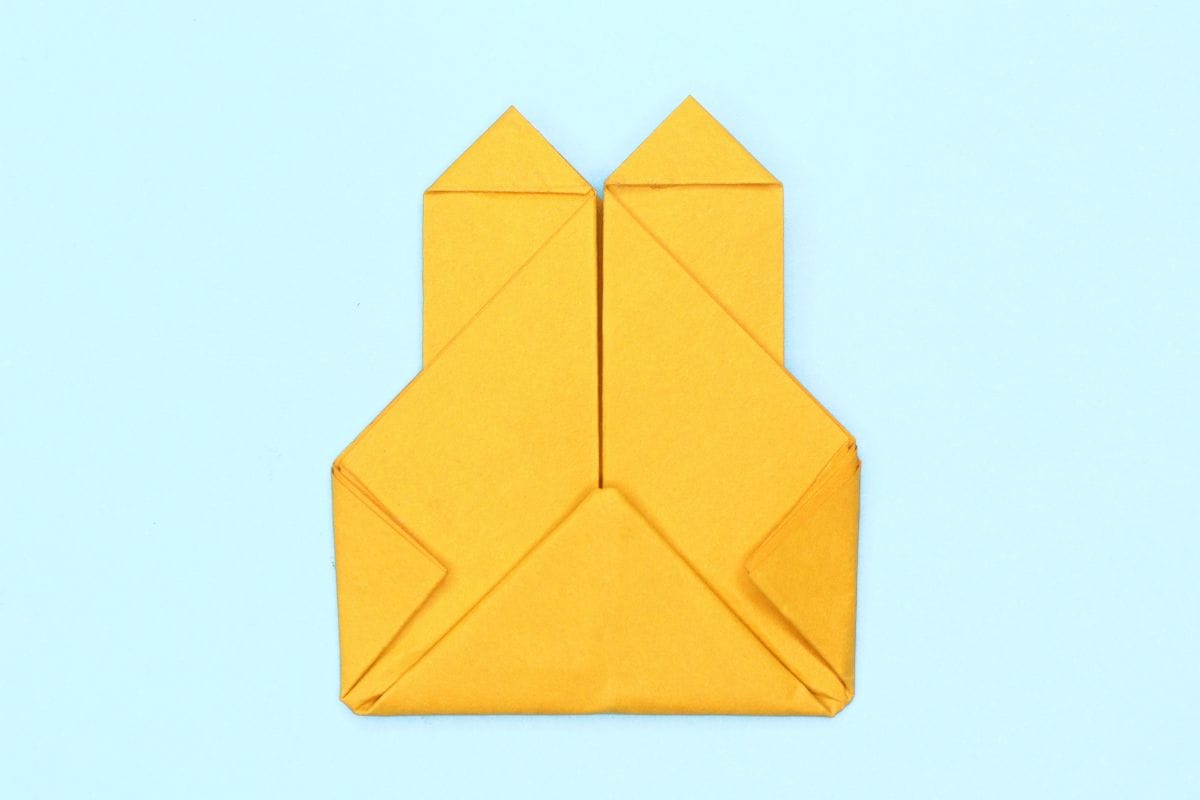
12
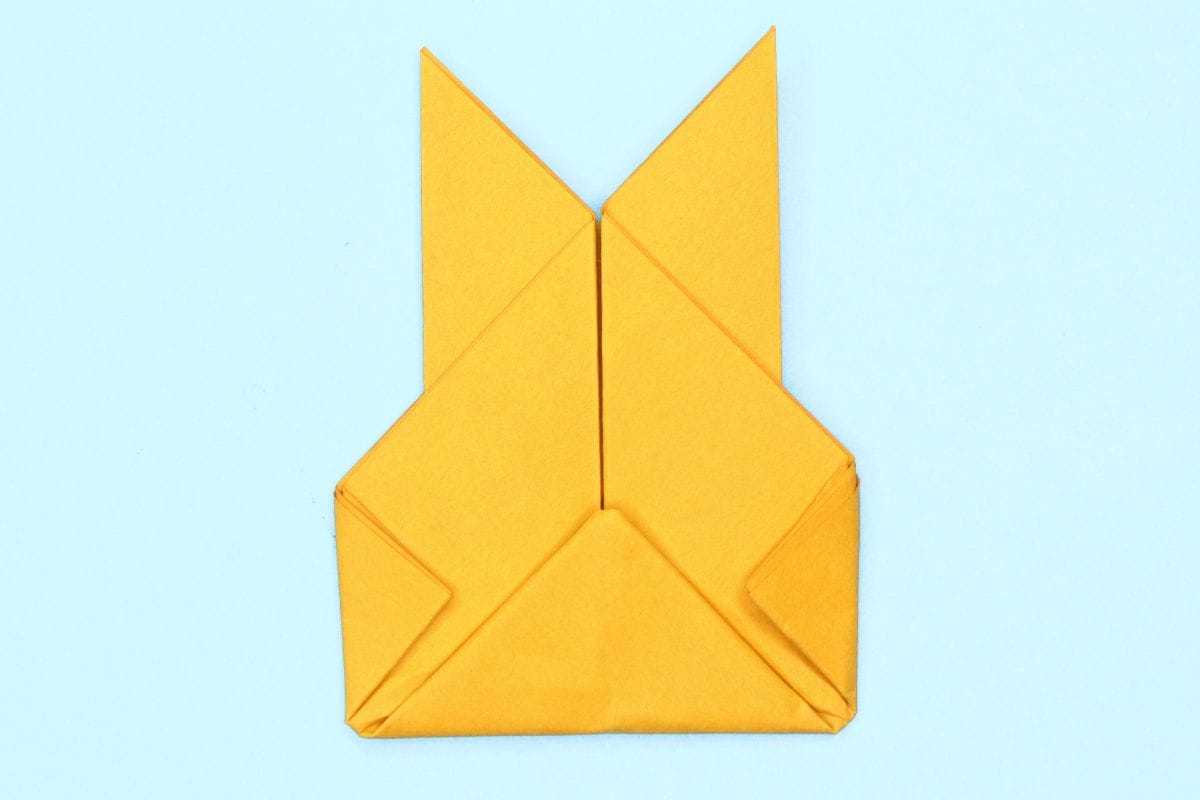
Fold the tip of ears toward the center.
Step 13
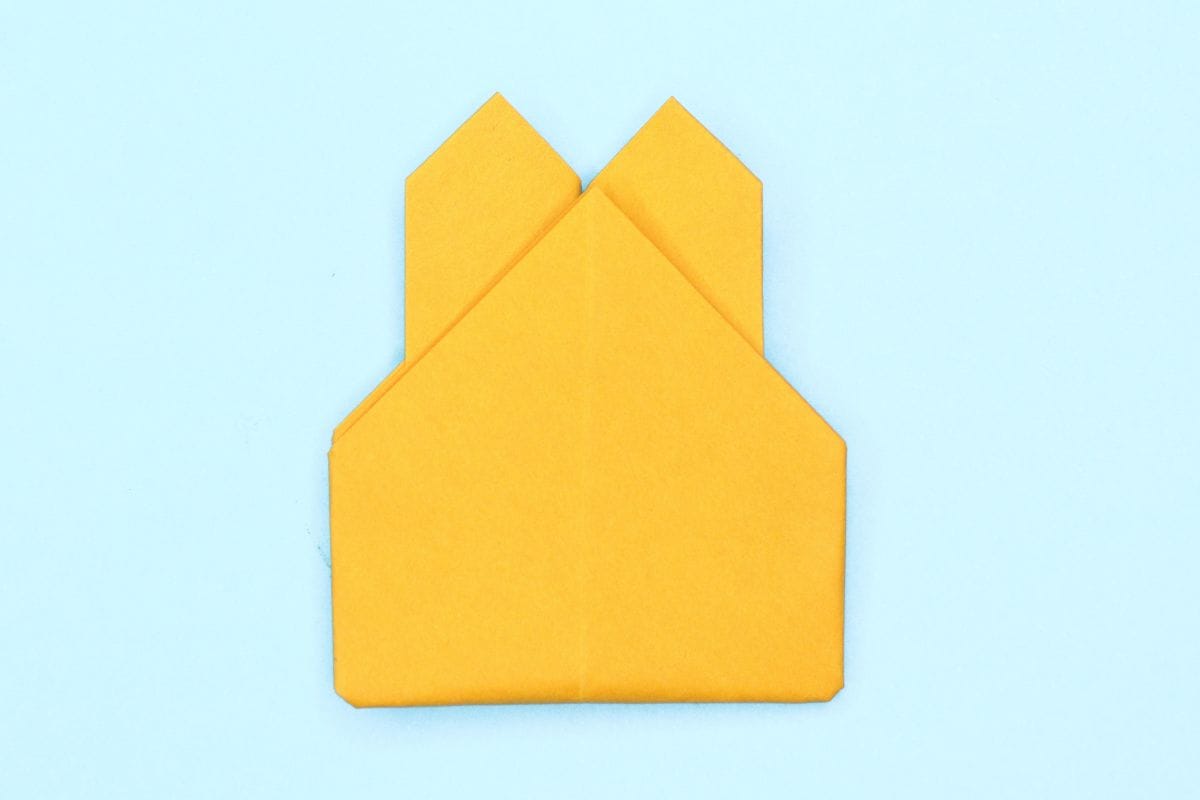
13
Turn the paper over.
Step 14
14
Fold down the tip of triangle.
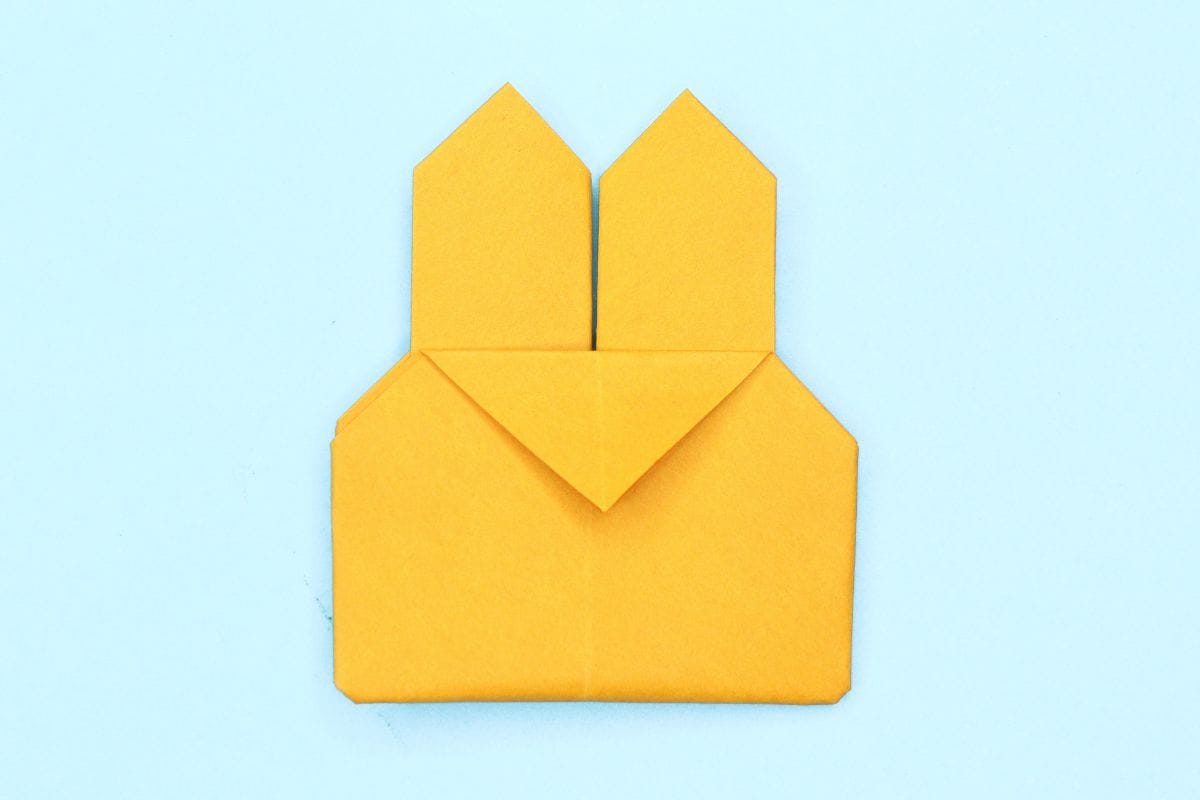
Step 15
15
Unfold.
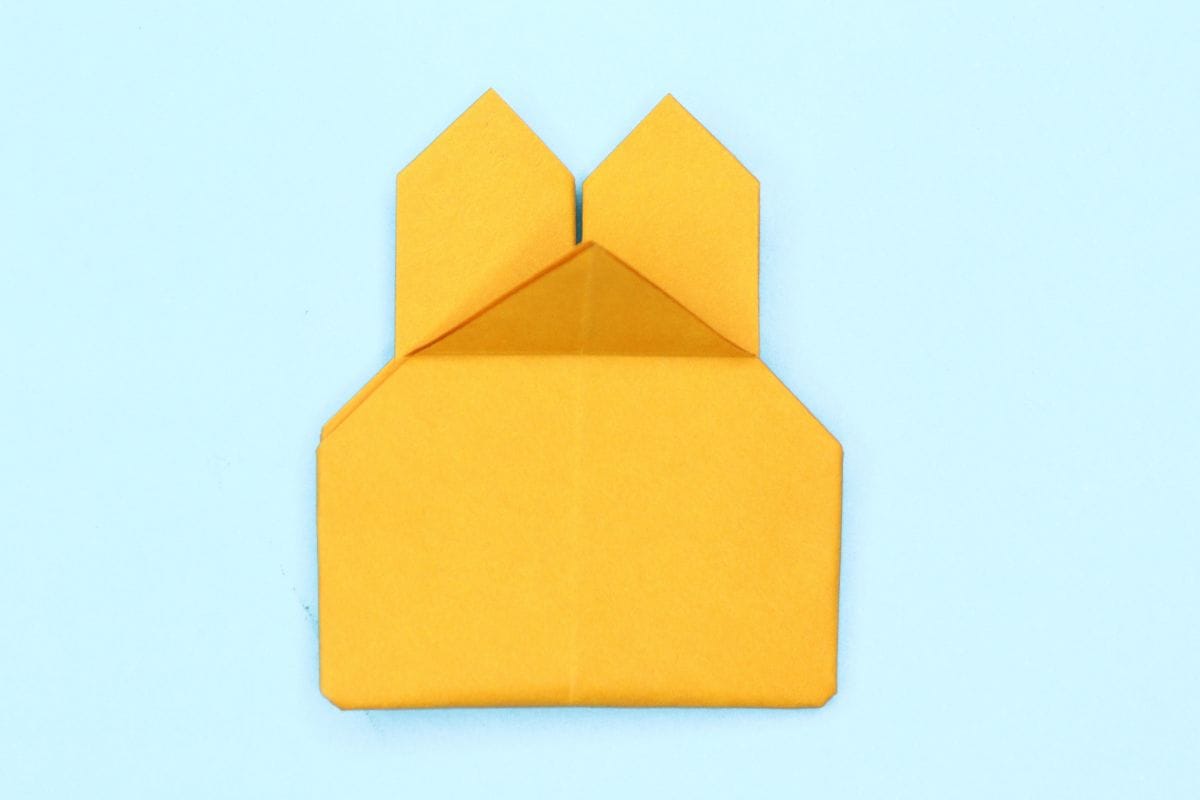
Step 16
16
Fold the top triangle back using the previously created crease as a guide.
Step 17
17
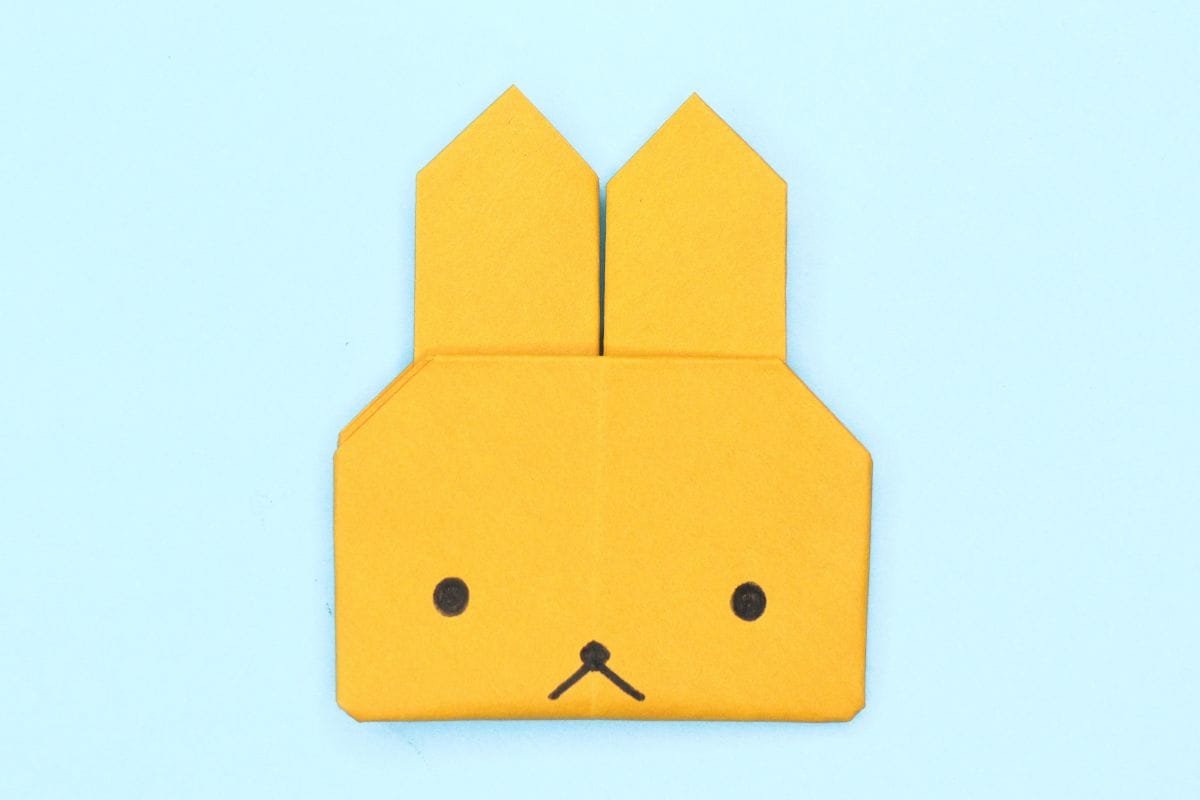
Draw the face and voila!
Share and Comment
We would love to see your creations! Scroll down to the comments section and share a photo of your origami.
Leave a Reply