Ready for launch? In this tutorial, you’ll learn how to fold an easy yet surprisingly realistic origami rocket using just a single square of paper. With a few simple folds, your paper will transform into a sleek little rocket that looks ready to blast off.
Easy Realistic Origami Rocket
Difficulty: Easy
Learn how to make an origami rocket with clear, step-by-step instructions that guide you through every fold for a fun and satisfying paper craft.
Step 1

1
Start with a square piece of origami paper. I am using an 7×7 inches origami paper.
If you only have regular paper, follow these instructions on how to make a square origami paper.
If you only have regular paper, follow these instructions on how to make a square origami paper.
Step 2

2
Fold in half vertically.
Step 3

3
Unfold. We just needed a crease line.
Step 4

4
Fold the right edge to the center crease.
Step 5

5
Fold the left edge to the center crease.
Step 6

6
Unfold.
Step 7
7
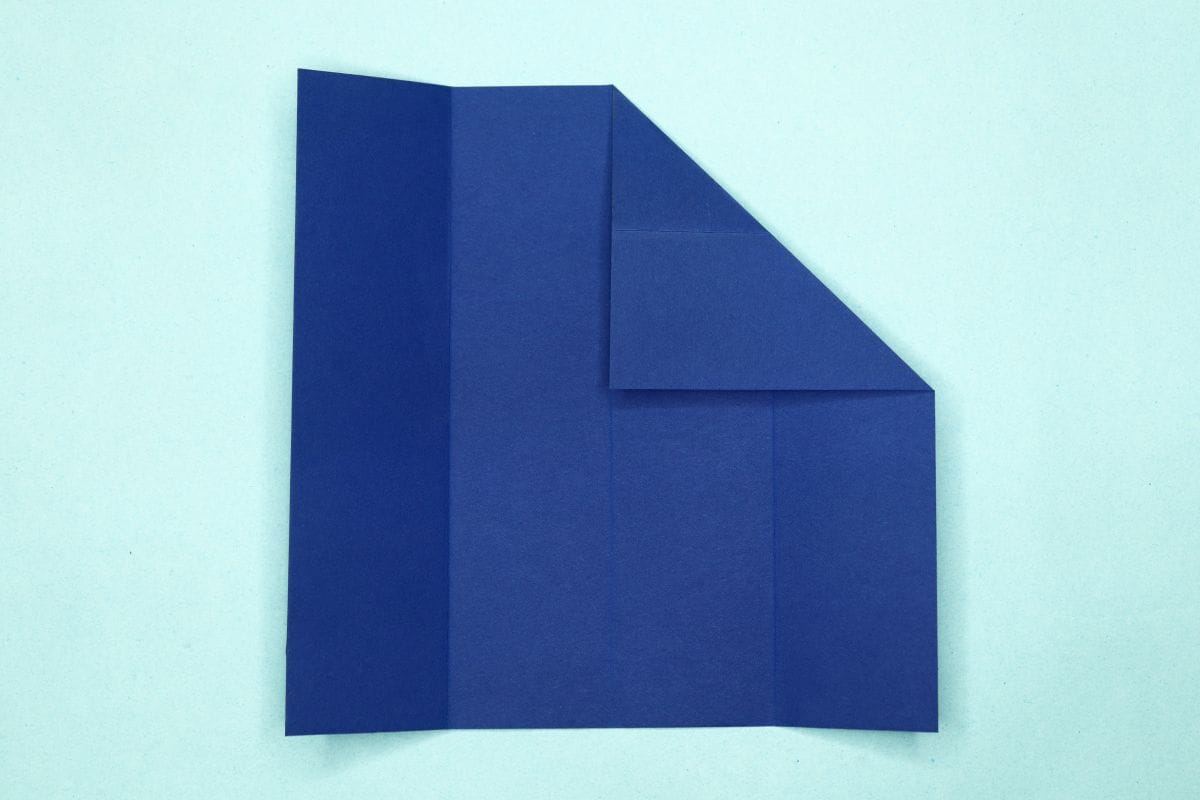
Fold the right corner diagonally to meet the center crease.
Step 8

8
Fold the left corner diagonally to meet the center crease.
Step 9

9
Fold the right edge left to meet the first vertical crease from the center.
Step 10

10
Fold the same edge to the right again along the existing crease.
Step 11

11
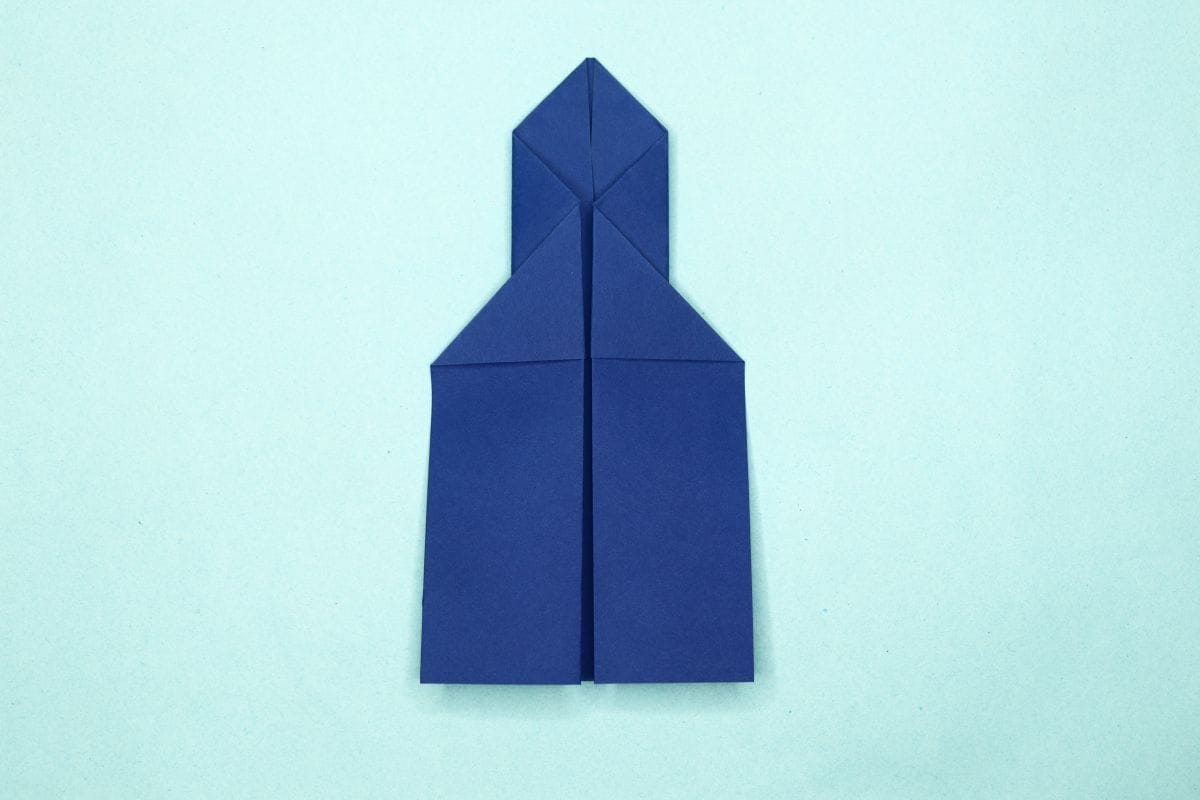
Fold the left edge right to align with the other flap.
Step 12
12
Fold the same edge to the left again along the existing crease.
Step 13

13
Cut along the dotted lines to form the rocket’s tail.
Step 14
14
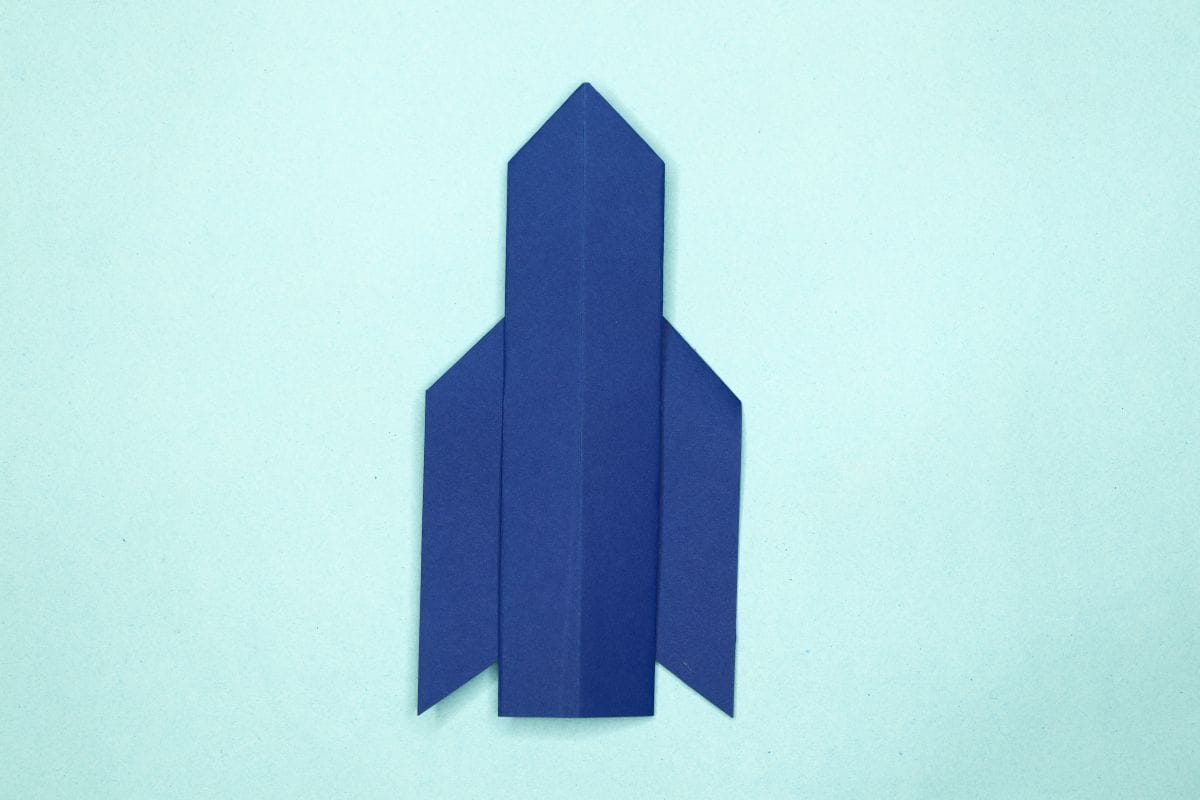
Turn the model over and your rocket is ready.
Share and Comment
We would love to see your creations! Scroll down to the comments section and share a photo of your origami.
Leave a Reply