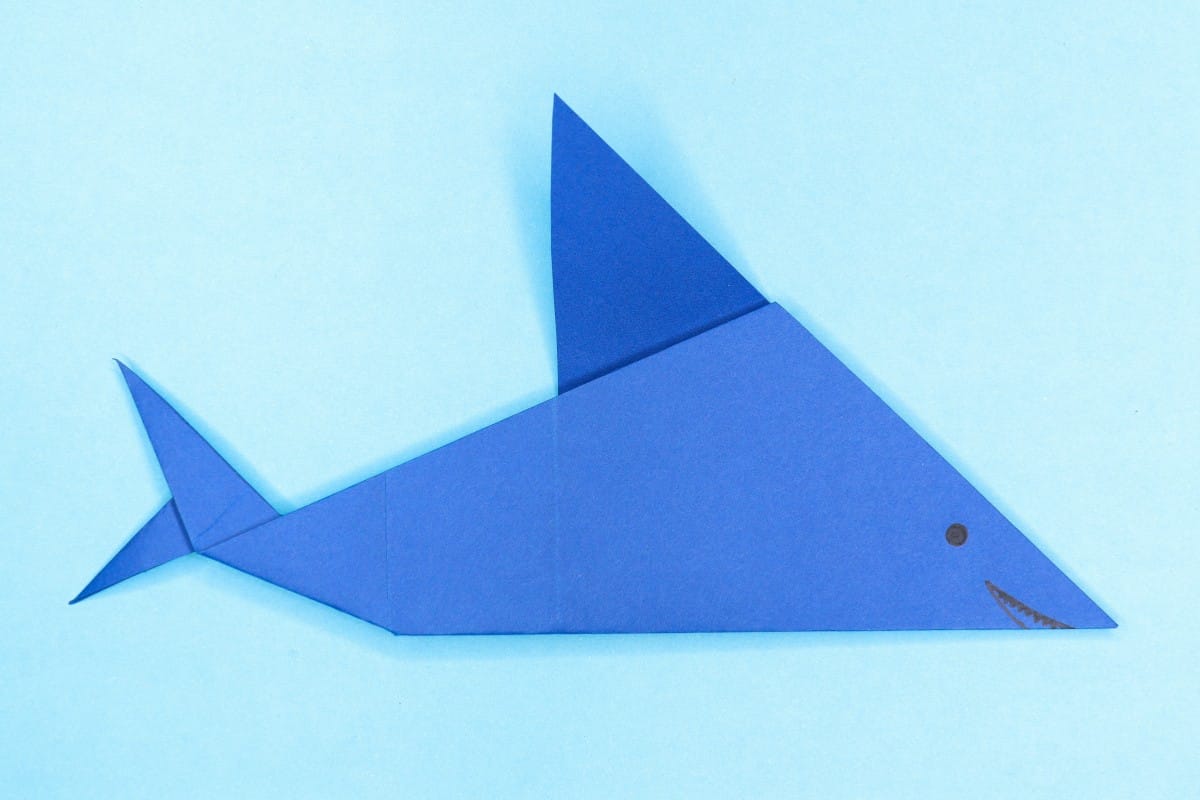
Get ready to fold your own friendly ocean predator! This cartoon-style origami shark is a fun and easy project that turns a simple square of paper into a playful sea creature. With its bold shape and charming look, this little shark feels like it swam right out of a cartoon. Whether you’re building a paper ocean scene or just looking for a creative craft, this fold is sure to make a splash.
How to Make a Fun Origami Shark
Category: Origami Animals
Difficulty: Intermediate
Create a fun cartoon-style origami shark with our guide featuring clear step-by-step instructions that help you fold every detail with ease.
Step 1
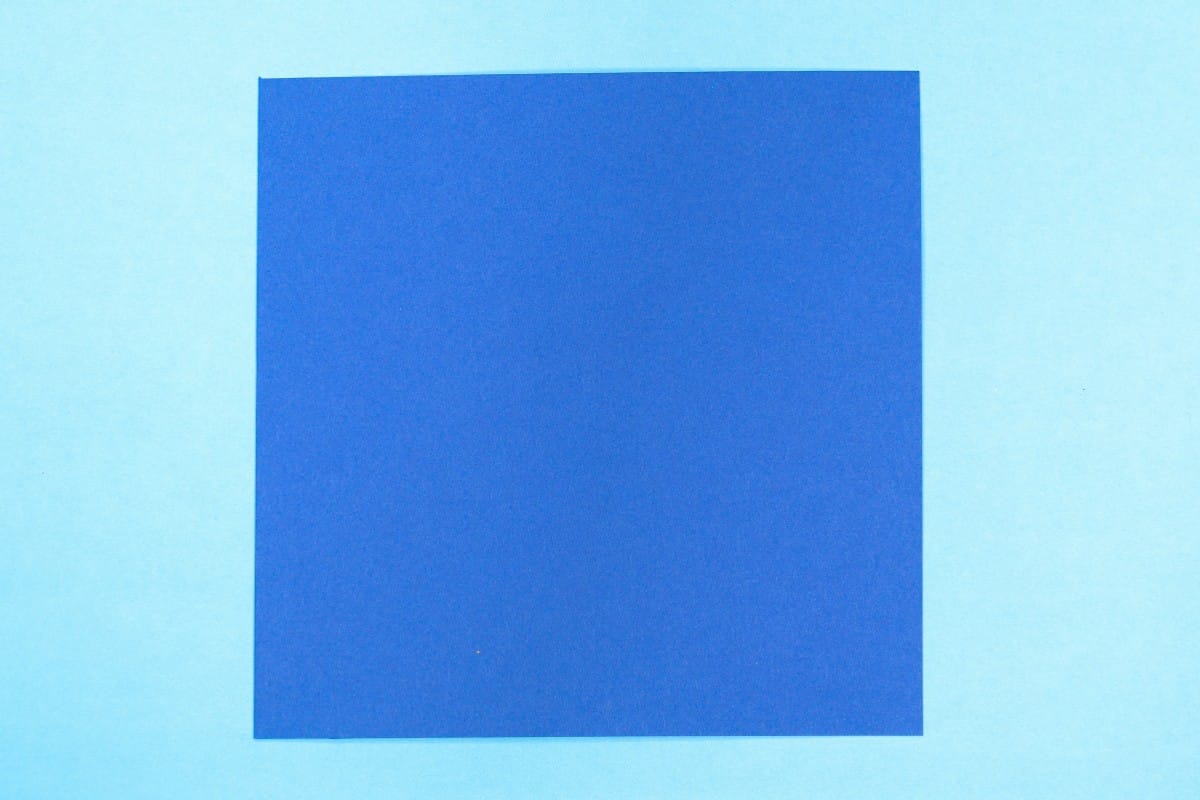
1
Start with a square sheet of origami paper. I am using an 7×7 inches origami paper.
If you only have regular paper, follow these instructions on how to make a square origami paper.
If you only have regular paper, follow these instructions on how to make a square origami paper.
Step 2
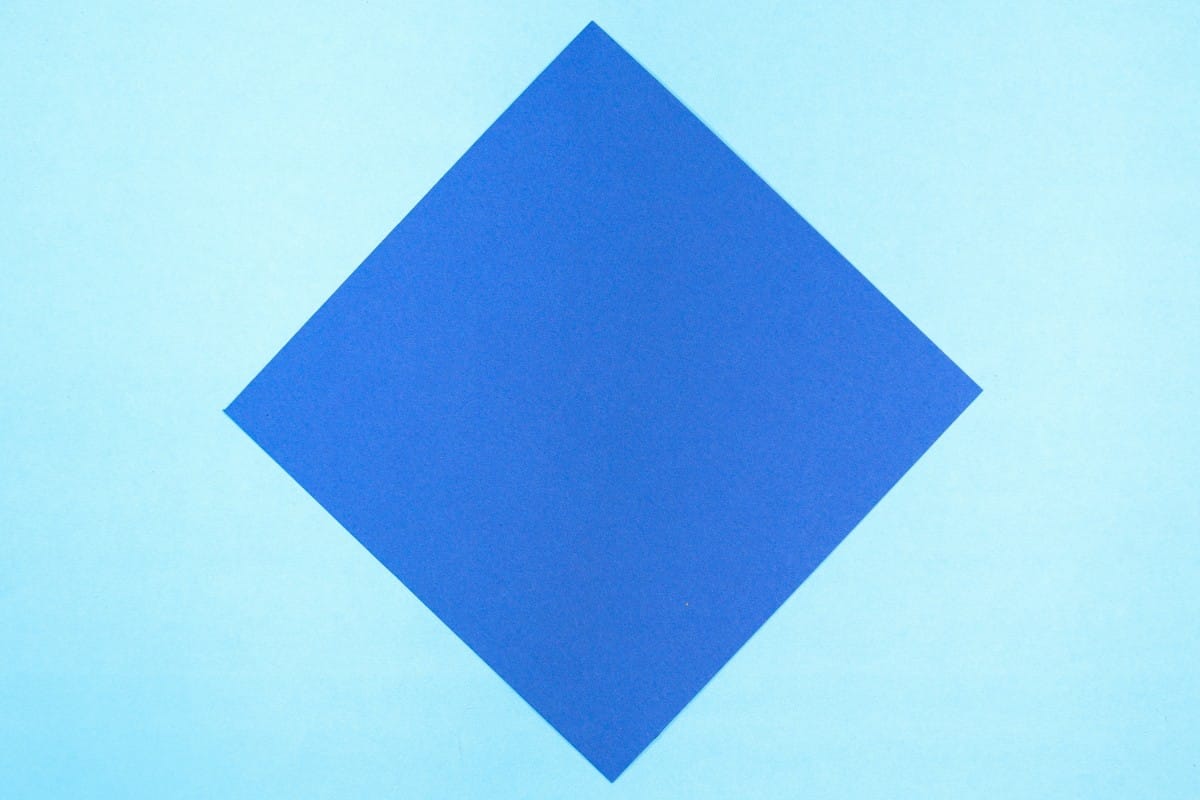
2
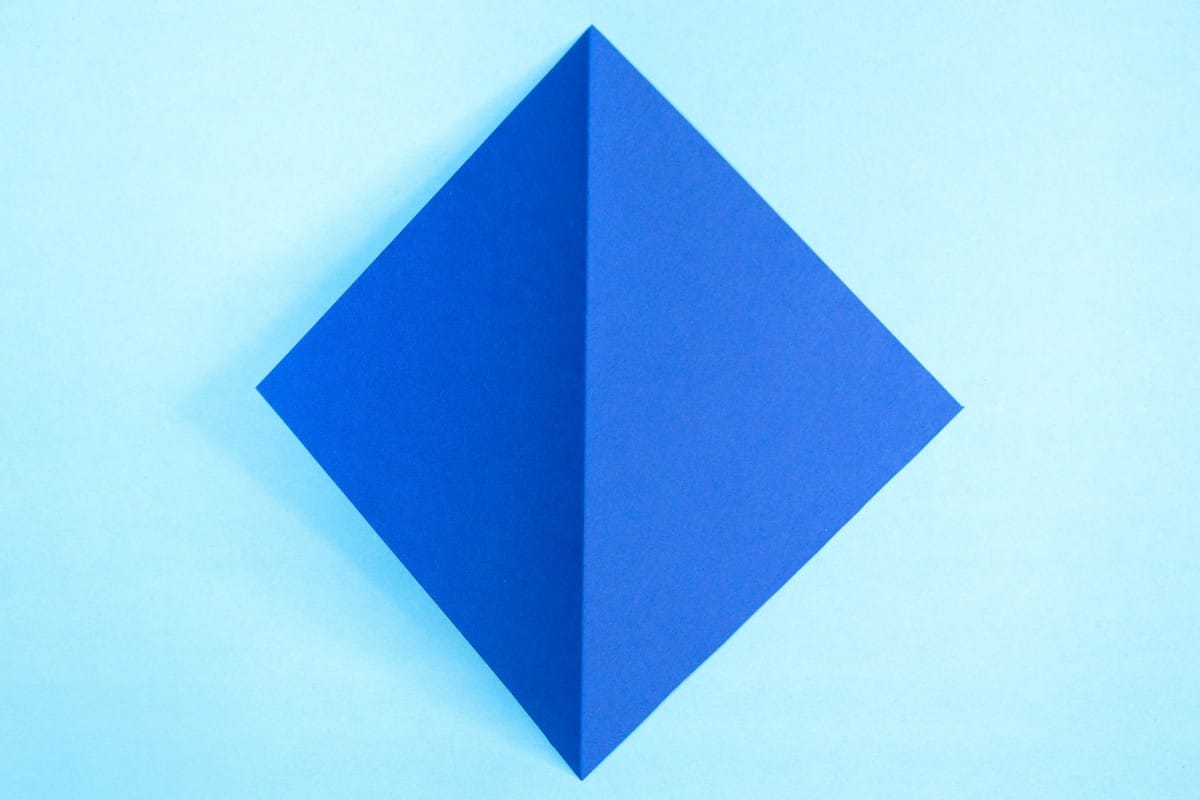
Rotate the paper to make it resemble a diamond.
Step 3
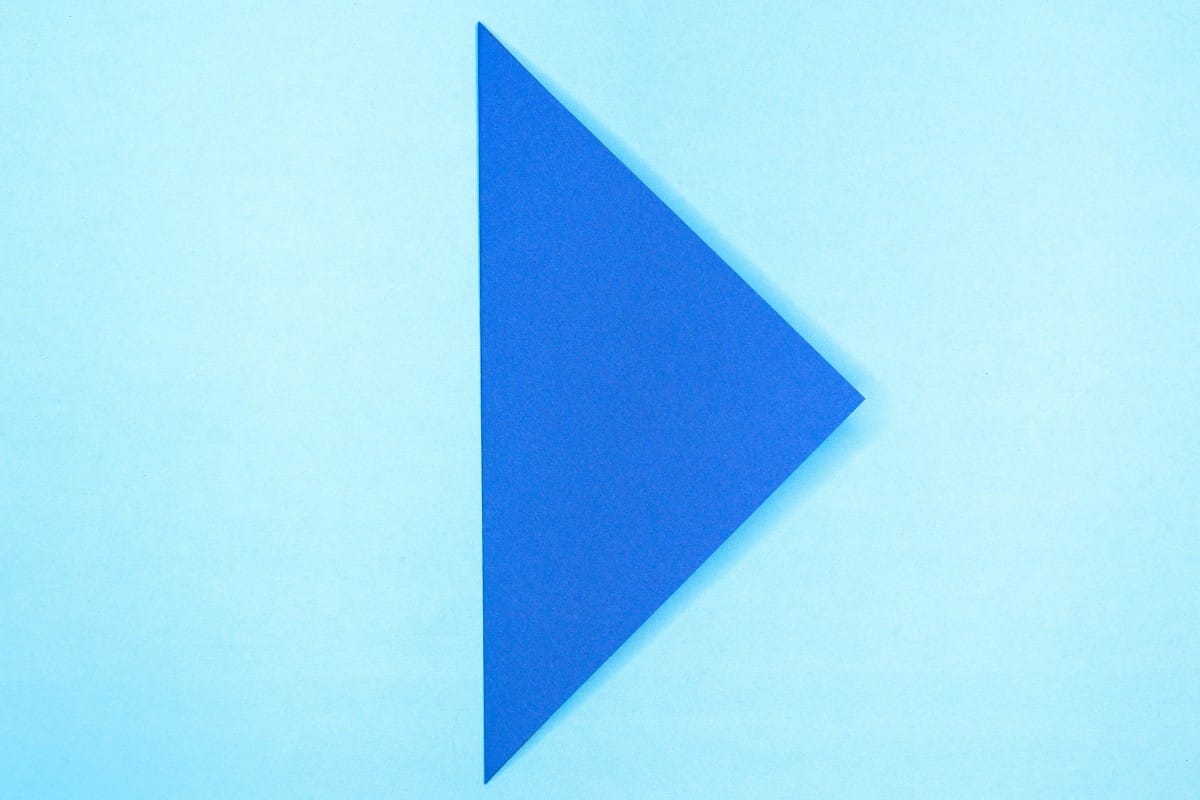
3
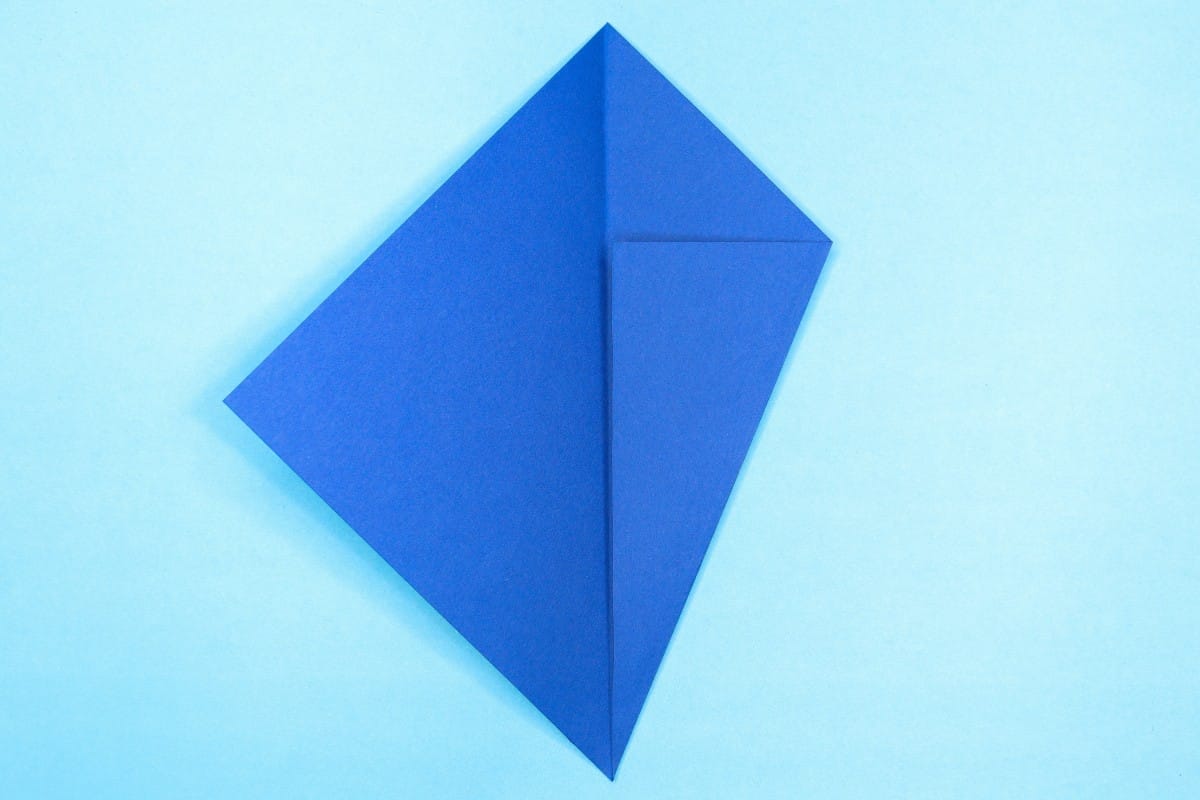
Fold it in half by moving the left corner toward the right.
Step 4
4
Unfold.
Step 5
5
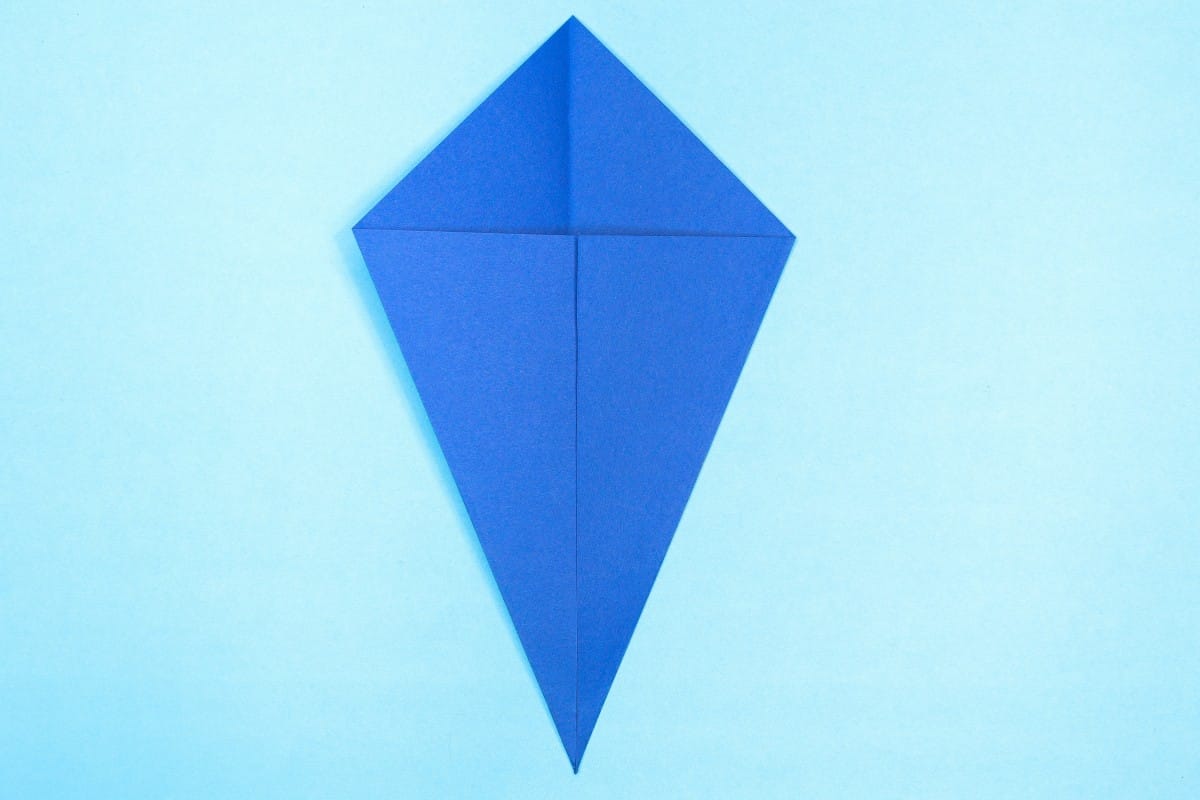
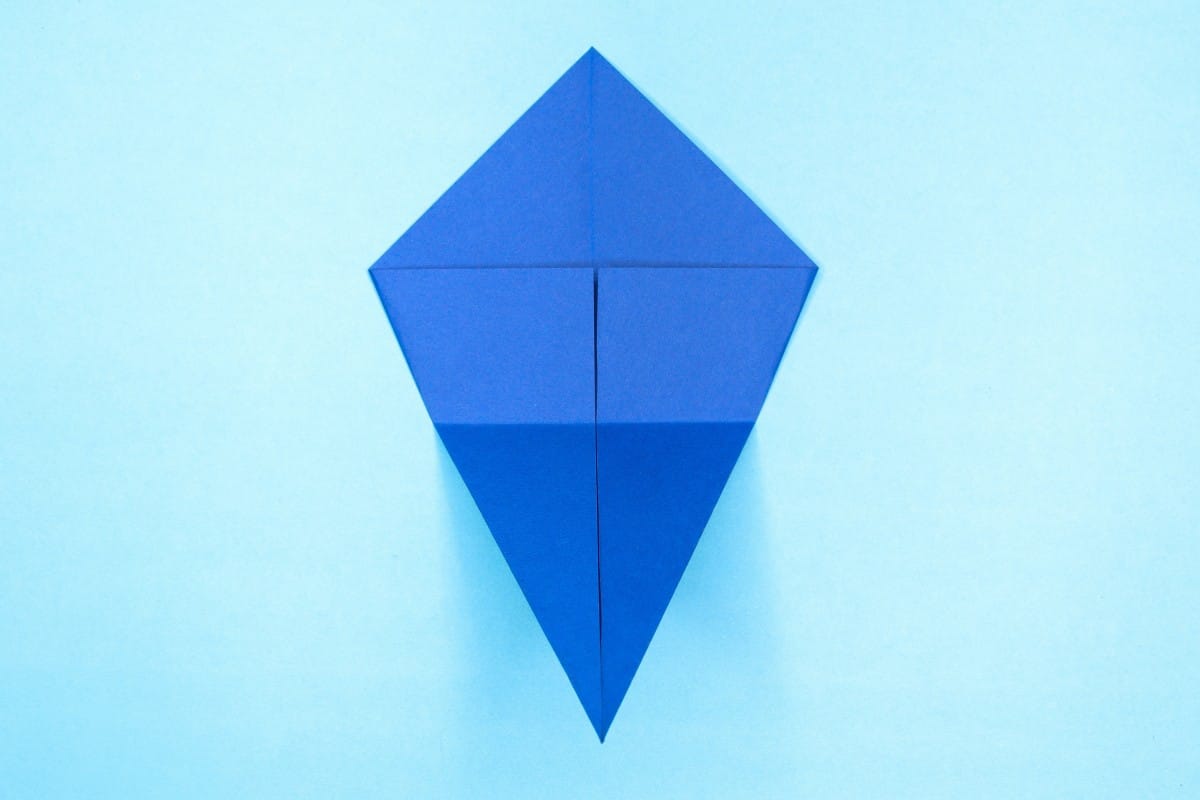
Fold the bottom right edge toward the midline.
Step 6
6
Fold the bottom left edge toward the midline.
Step 7
7
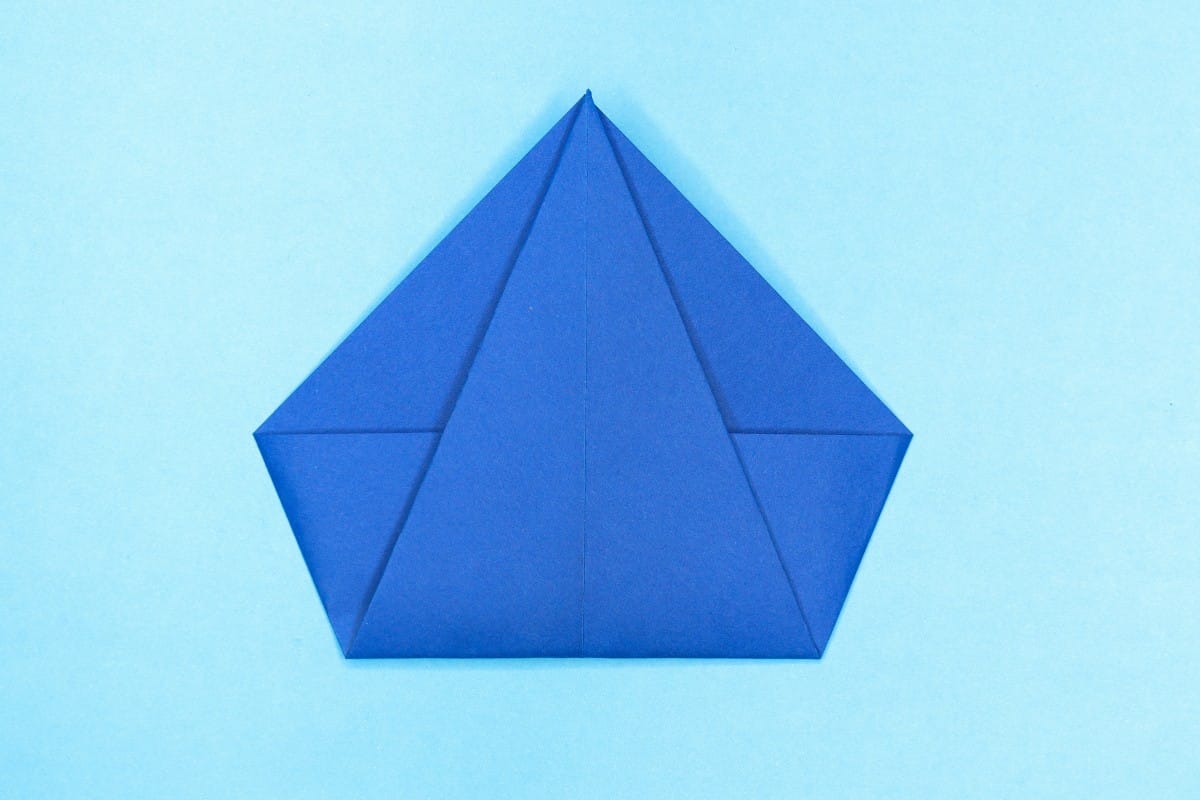
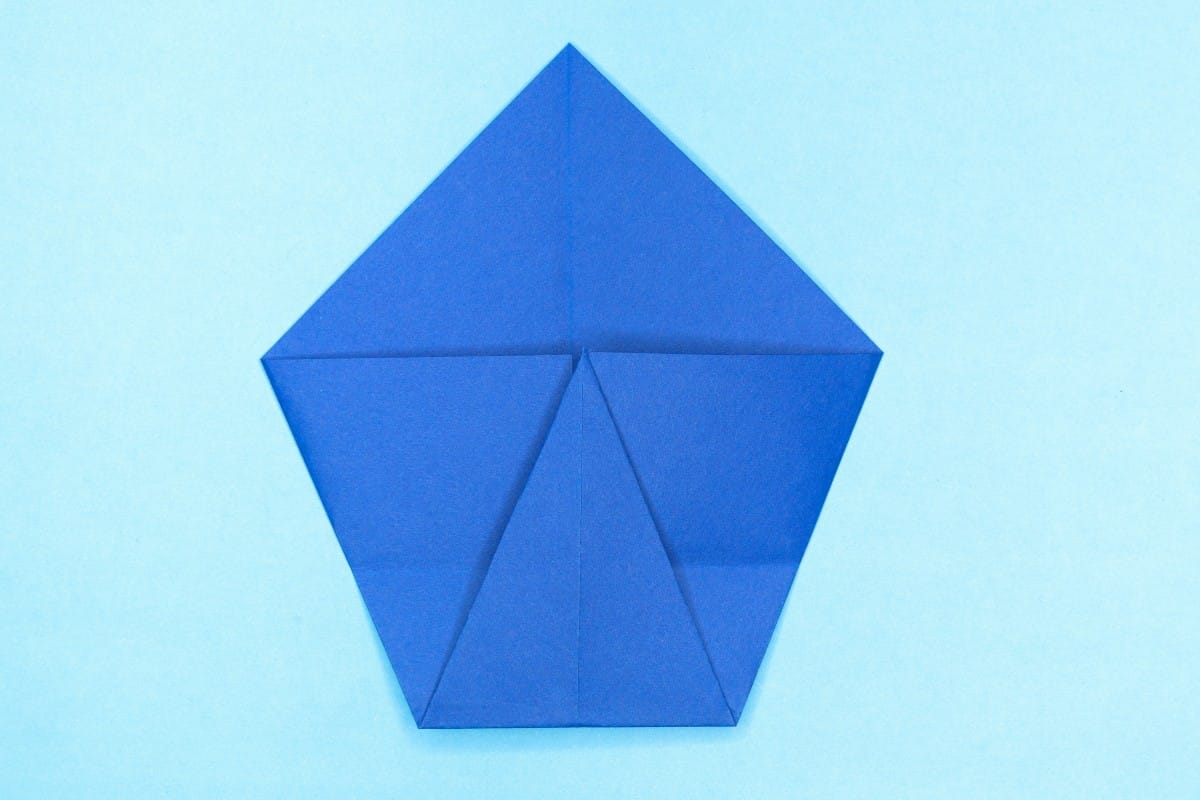
Fold the bottom corner to the top corner.
Step 8
8
Unfold.
Step 9
9
Fold the bottom corner to the first fold below the top corner.
Step 10
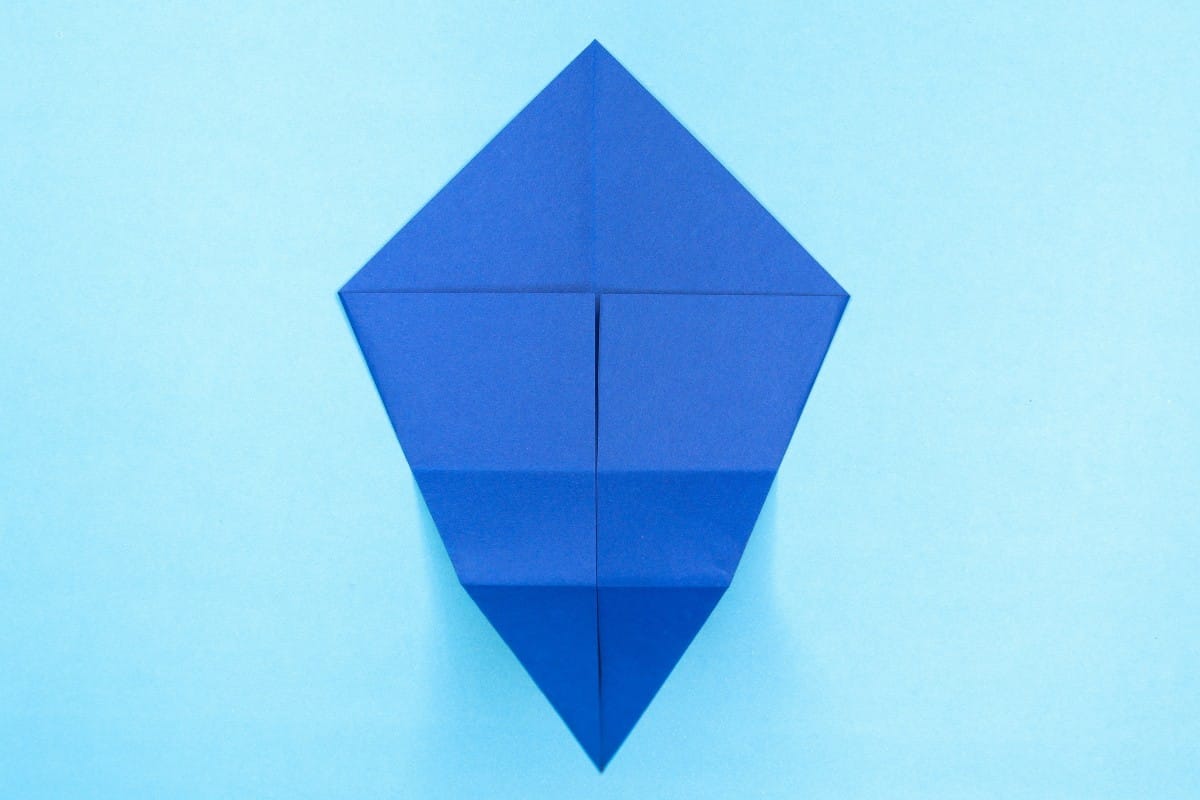
10
Unfold.
Step 11
11
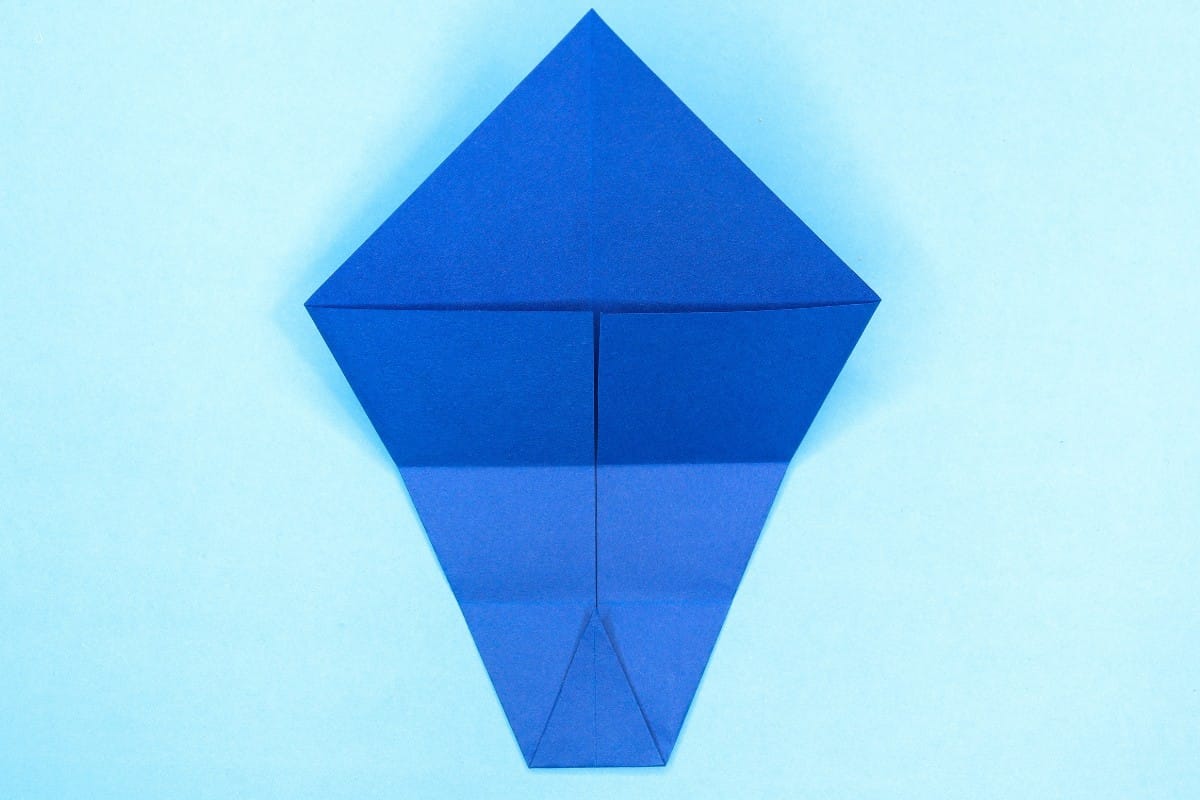
Fold the bottom corner to the first crease.
Step 12
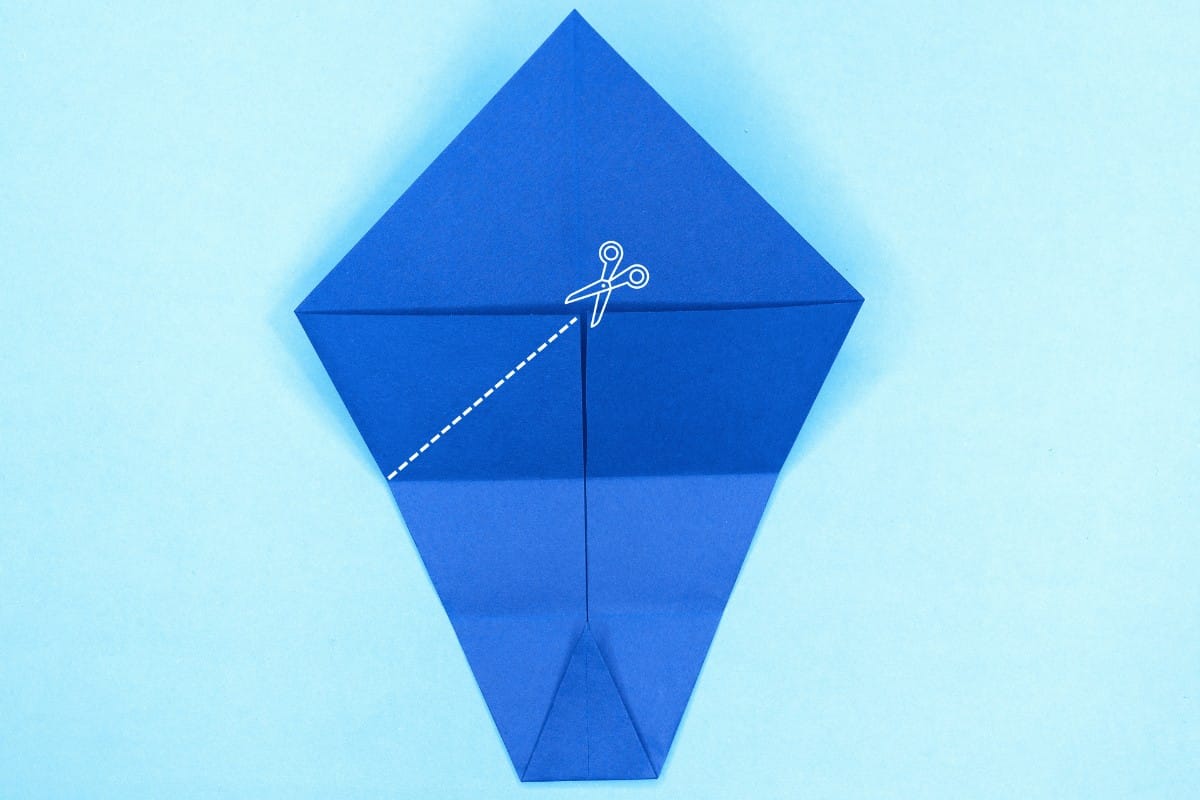
12
Cut along the marked dotted line on the top sheet.
Step 13

13
Make sure to cut only the top sheet along the line, just like in the image.
Step 14
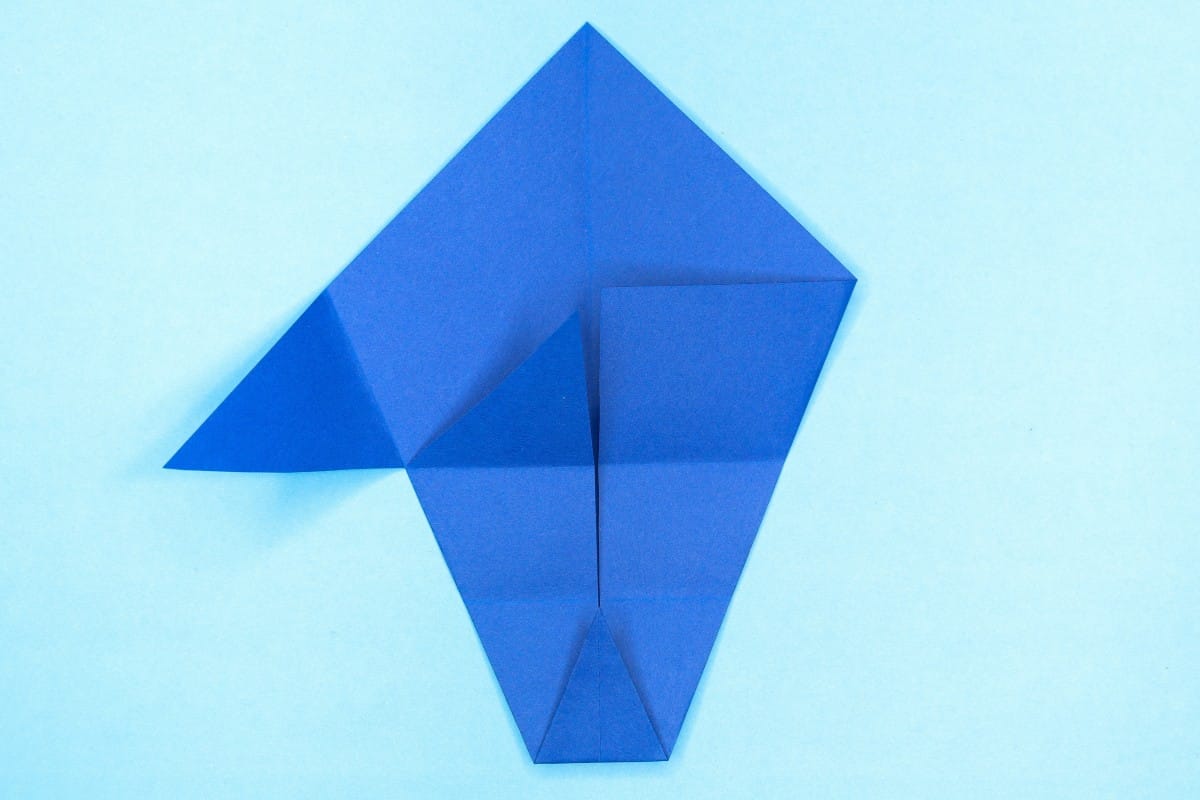
14
Fold the top flap to the left side.
Step 15
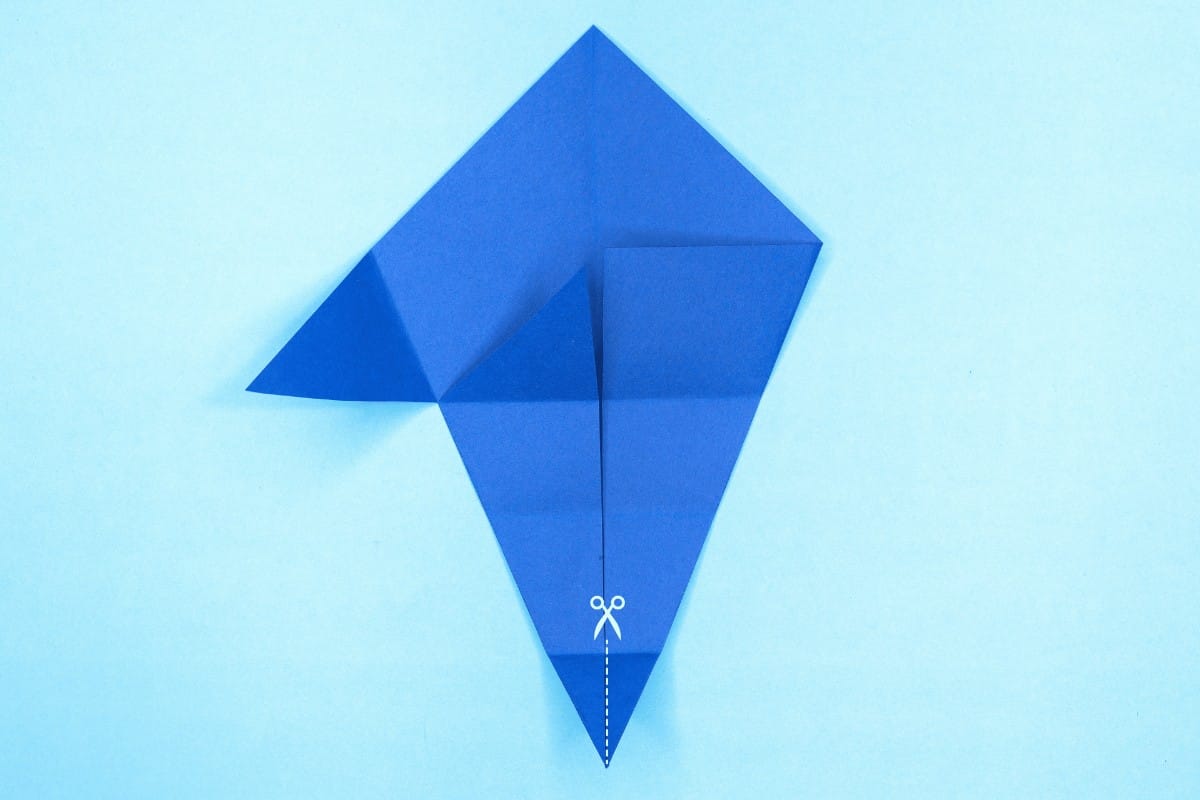
15
Cut along the marked dotted line on the bottom corner.
Step 16
16
Be careful not to cut too much—unless you want your shark to have a ridiculously long tail!
Step 17

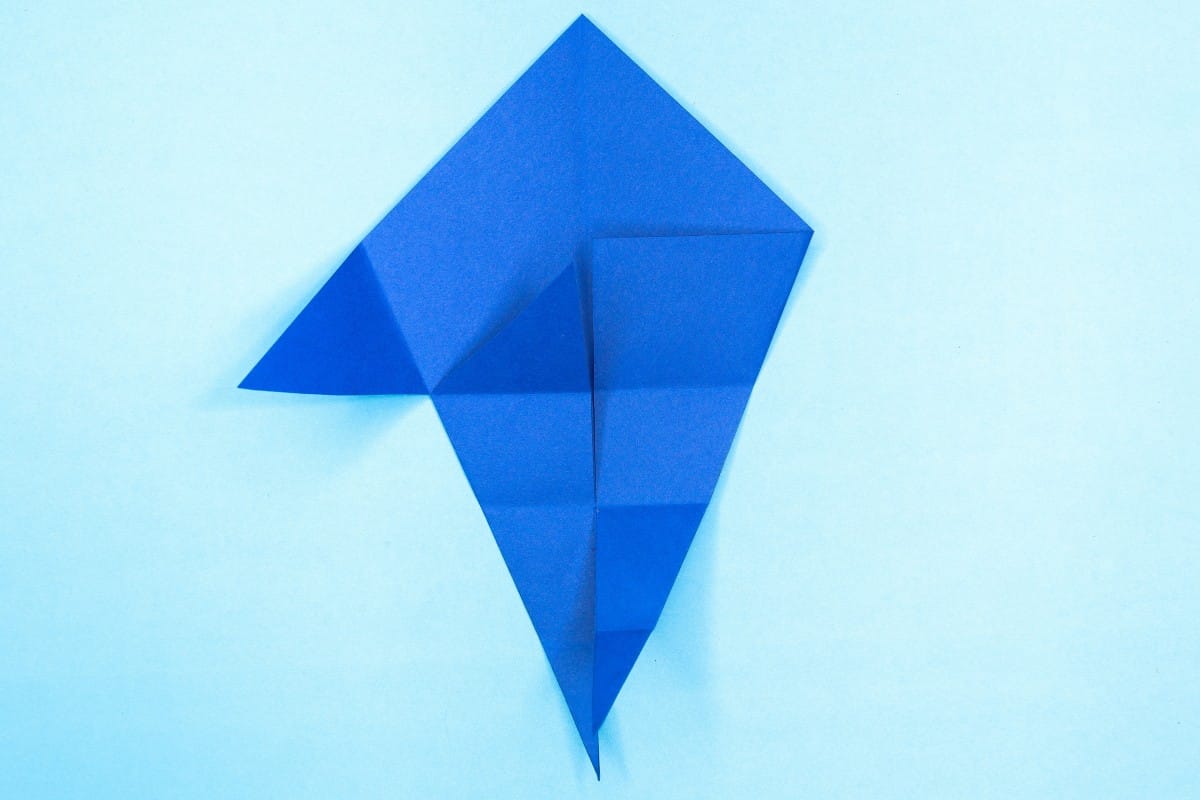
17
Fold the left edge to the right side at an angle.
Step 18
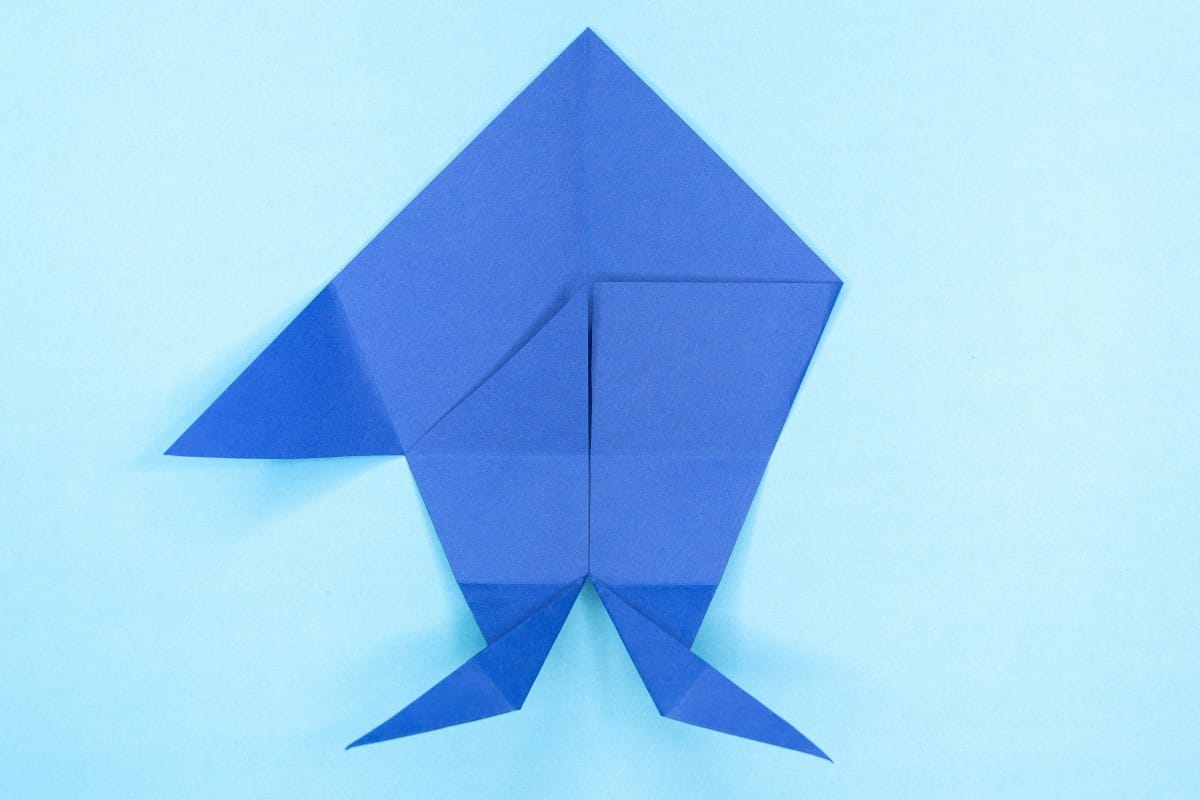
18
Fold the right edge to the left side at an angle.
Step 19

19
Fold in half by moving the left side over to the right.
Step 20
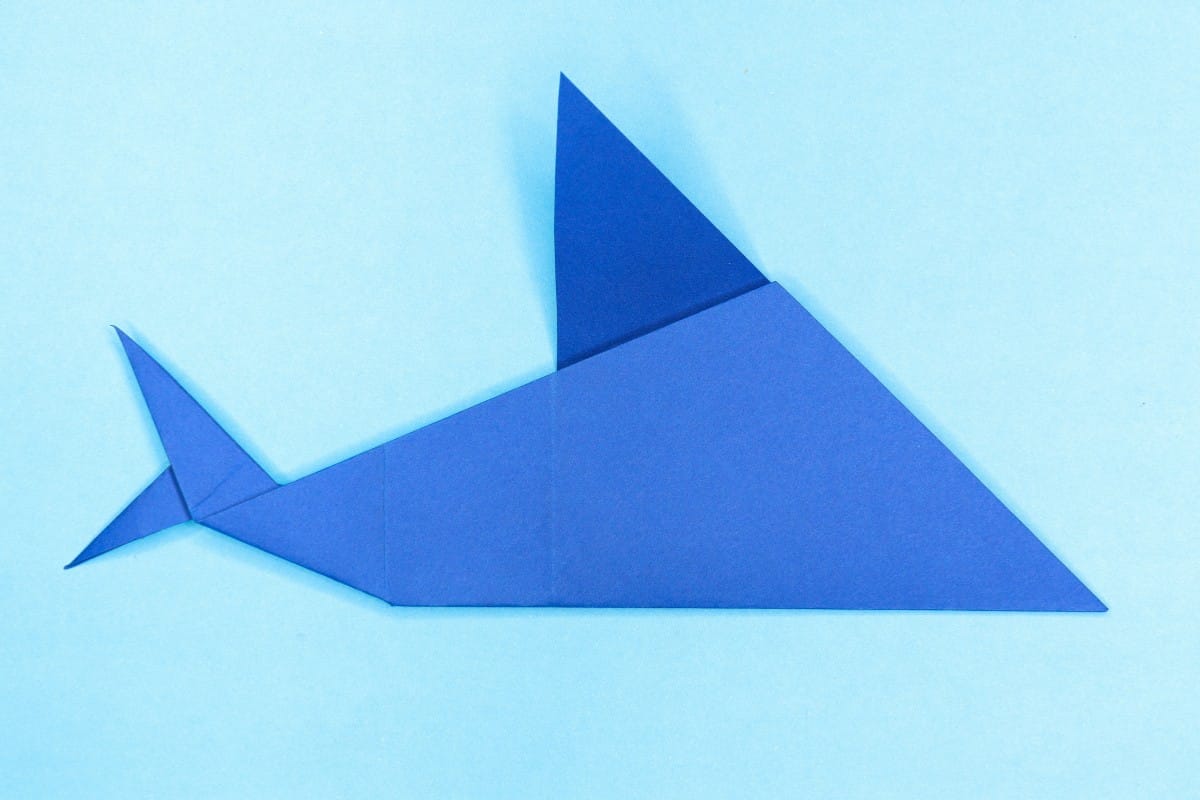
20
Rotate the paper as shown.
Step 21
21
Draw the final details, and voila! You’ve just created your very own origami shark, ready to swim into your imagination!
Share and Comment
We would love to see your creations! Scroll down to the comments section and share a photo of your origami.
Leave a Reply