Bows make everything better, gifts, cards, crafts, or even your room décor! With just a few folds, you can create a charming origami bow that’s perfect for decorating anything you like. It’s quick, easy, and oh-so-adorable. Ready to add a pop of flair to your creations? Let’s start folding and make a lovely little bow!
How to Make an Origami Bow
Category: Misc Origami
Difficulty: Easy
Fold a cute Origami bow in minutes! Follow our easy steps to fold the perfect paper accessory for any occasion.
Step 1

1
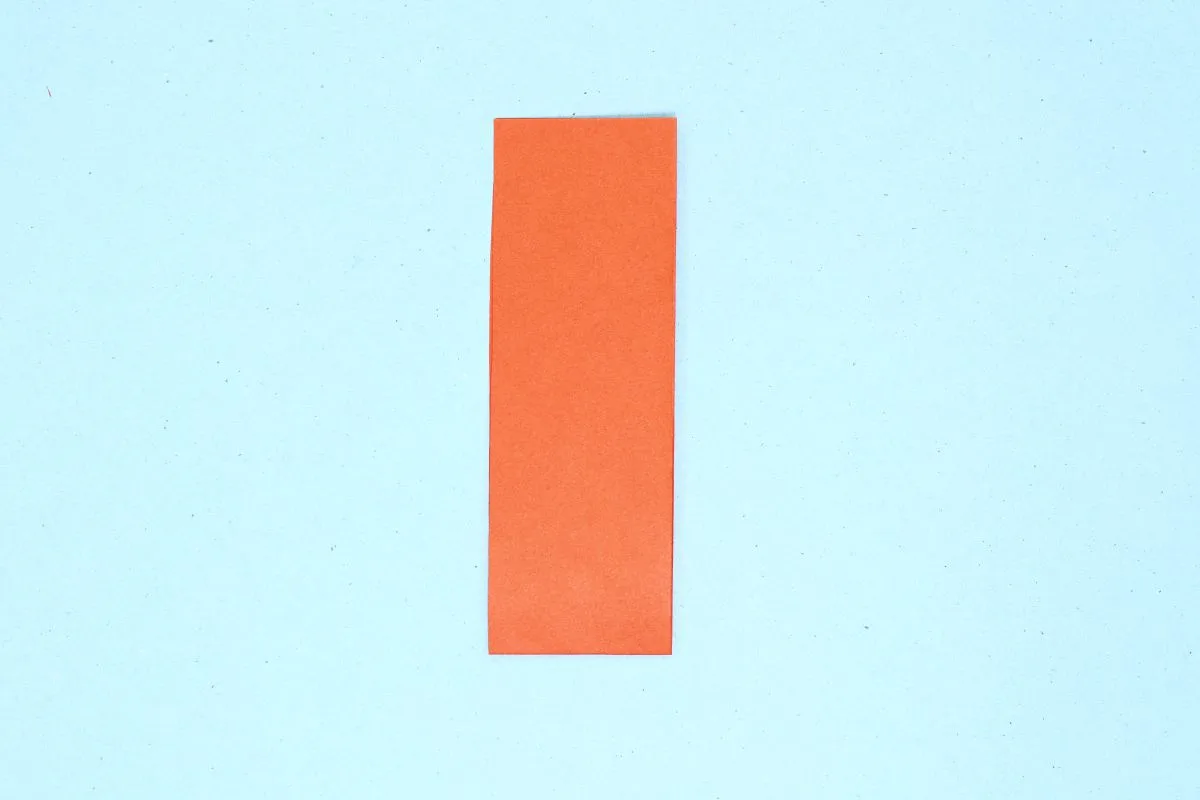
Start with a lengthwise sheet of paper with size of 8.5×1 inches.
Step 2
2
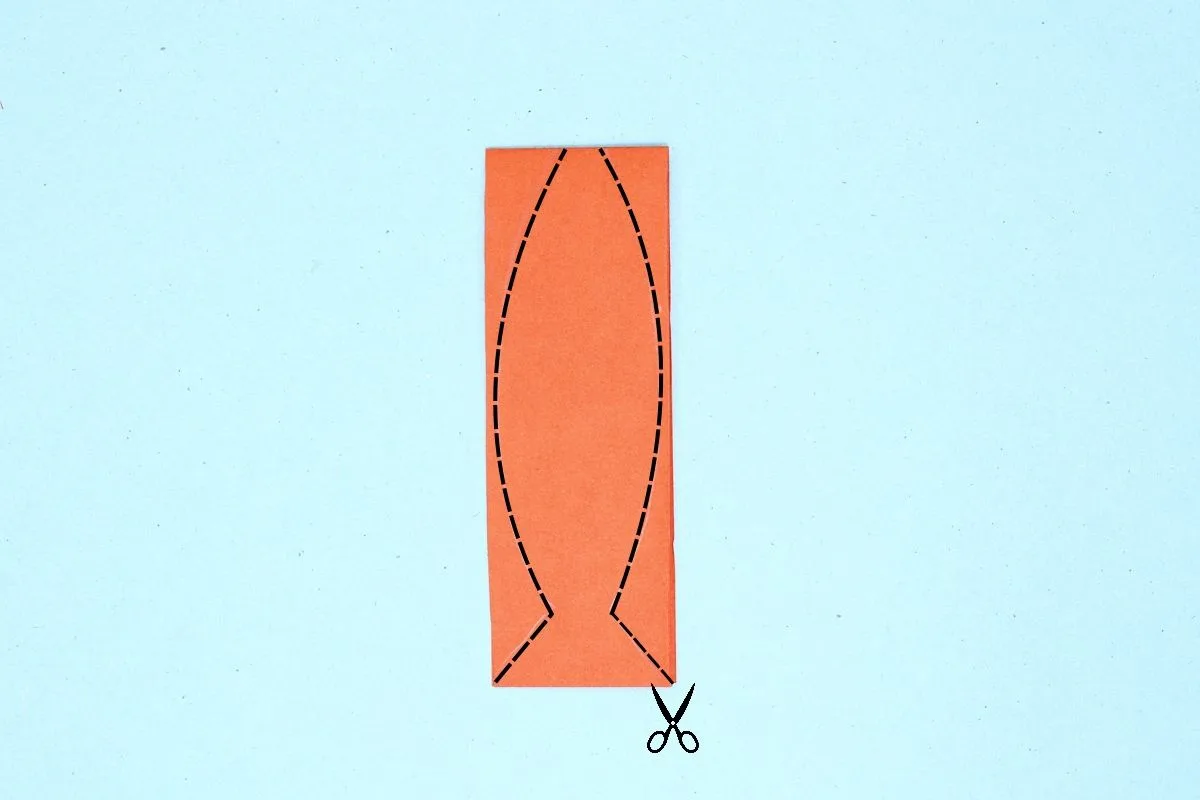
Fold the paper from the bottom edge to the top.
Step 3
3
Cut the paper like a fish shape.
Step 4

4
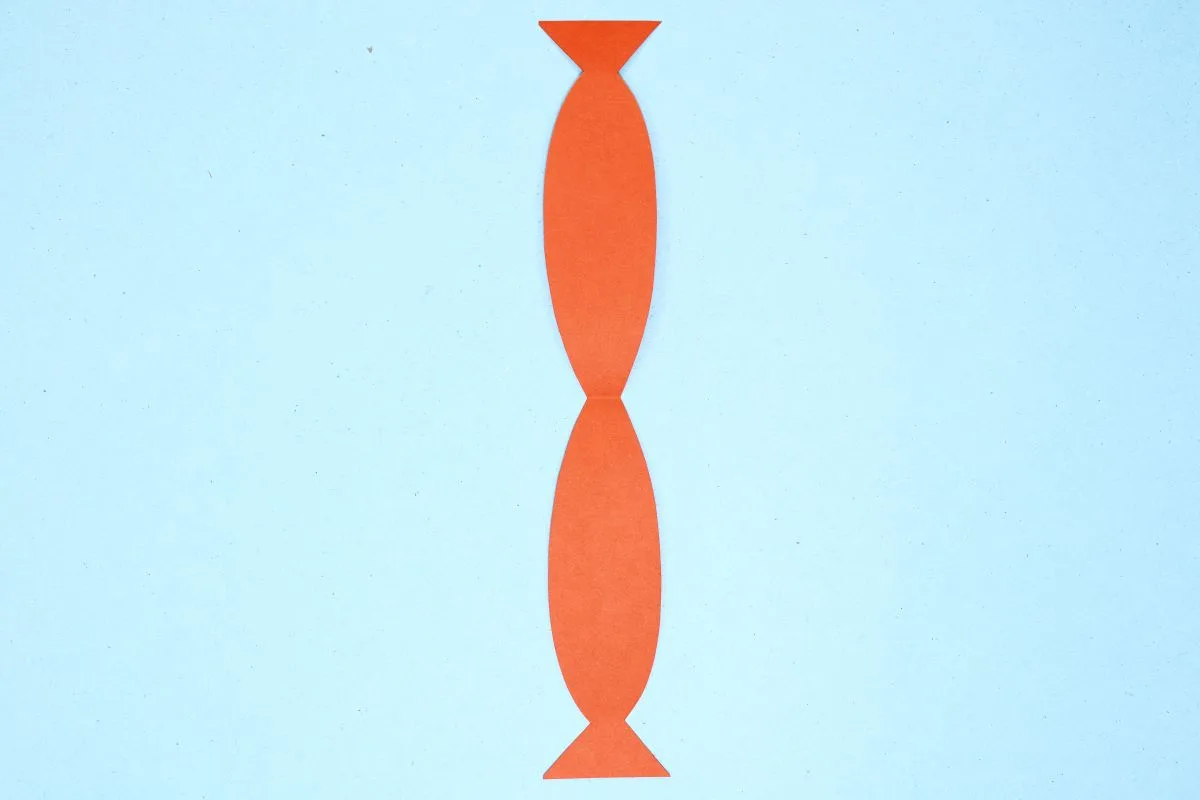
After cutting, your model should resemble the image.
Step 5
5
Unfold.
Step 6
6
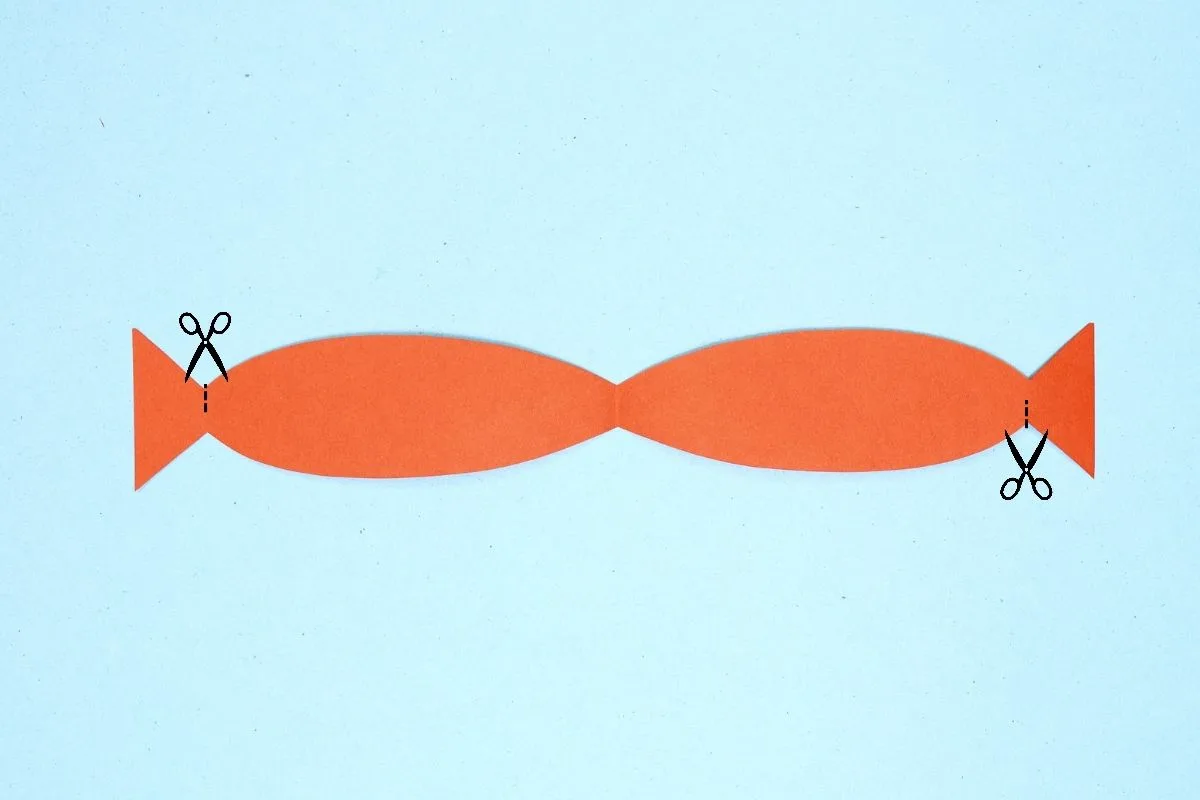
Cut a half portion before the edges.
Step 7

7
Bring the edges together.
Step 8

8
Insert them together.
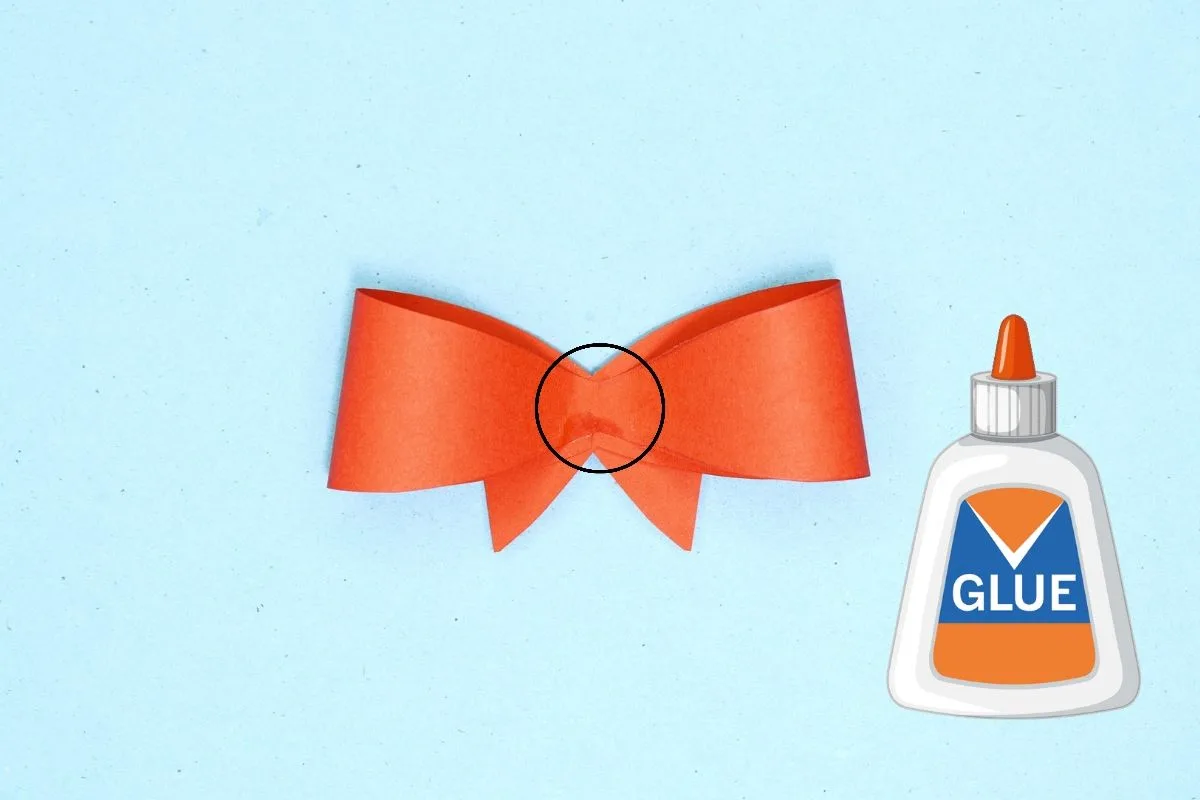
Step 9

9
Glue the center.
Step 10
10
Glue diagonally the remaining flaps at the back.
Step 11
11
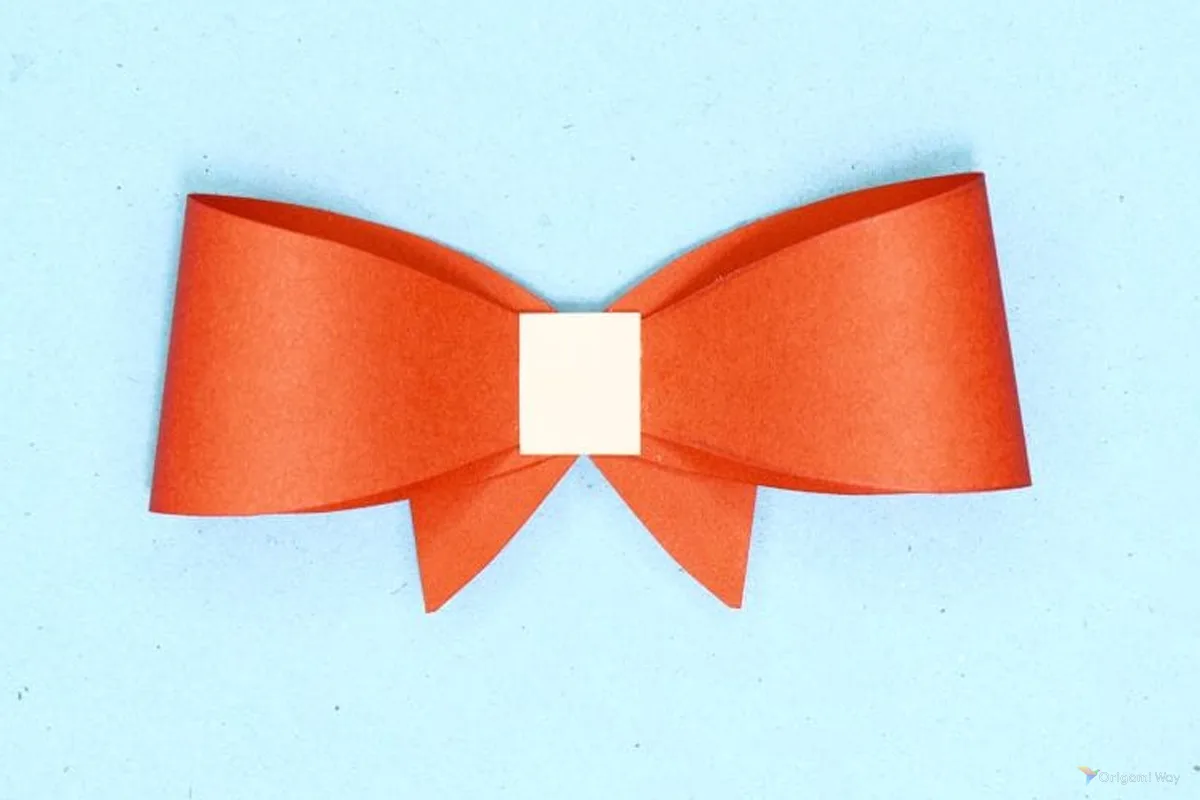
Glue a small white square at the center to represent the knot and you’re all done!
Share and Comment
We would love to see your creations! Scroll down to the comments section and share a photo of your origami.
Leave a Reply