Love dinosaurs and prehistoric adventures? Now you can travel back in time, paper-style! With just a few folds, you’ll create your very own origami dinosaur, ready to stomp, roar, and rule your craft table. Grab your paper and let’s bring this dino to life, one fold at a time!
How to Make an Origami Dinosaur
Category: Origami Animals
Difficulty: Hard
Fold your own paper dinosaur! Our step-by-step Origami tutorial makes it easy and fun for kids, beginners, and dinosaur fans!
Step 1
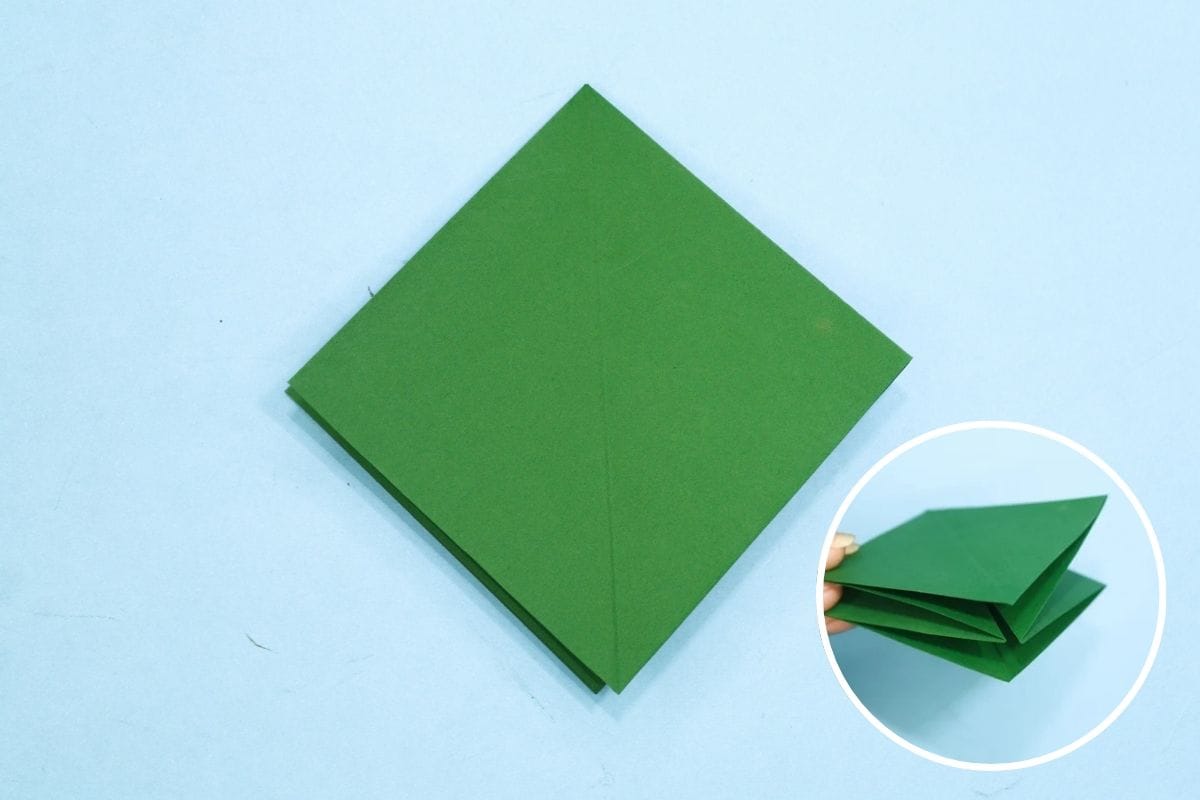
1
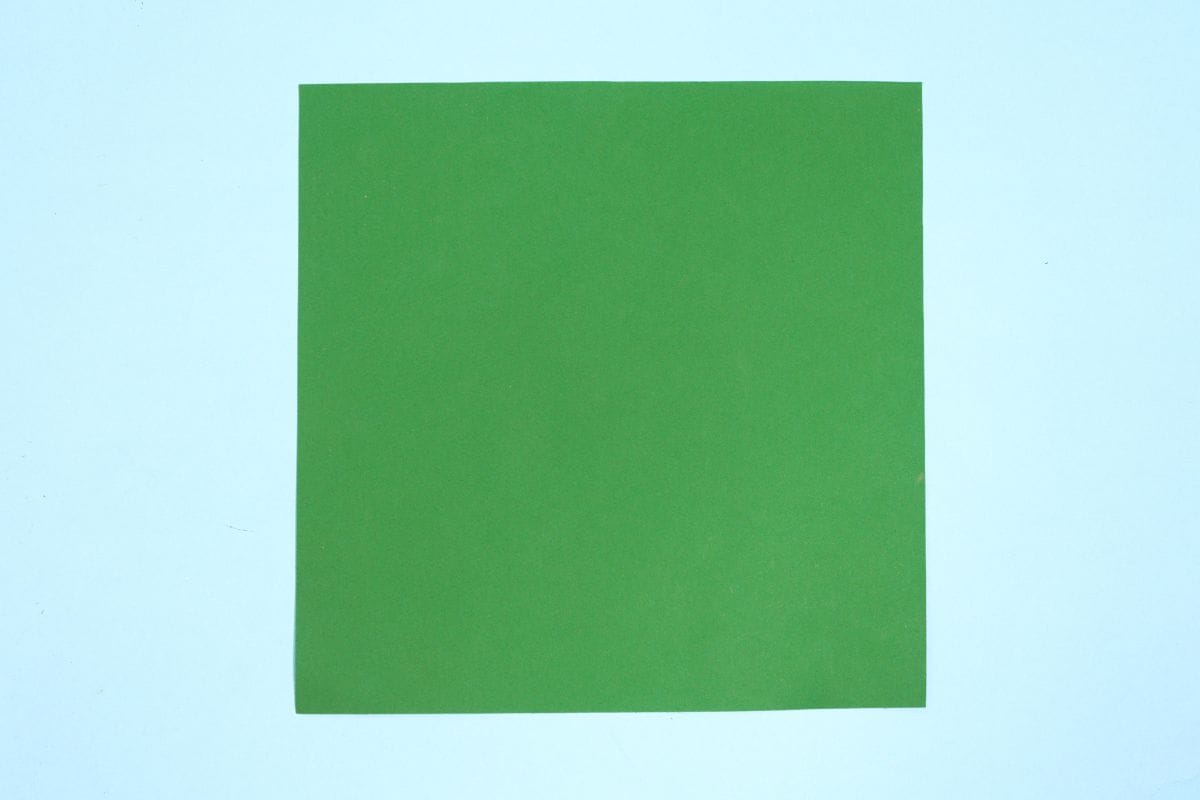
Start with a square sheet of origami paper. I am using an 7×7 inches origami paper.
If you only have regular paper, follow these instructions on how to make a square origami paper.
If you only have regular paper, follow these instructions on how to make a square origami paper.
Step 2
2
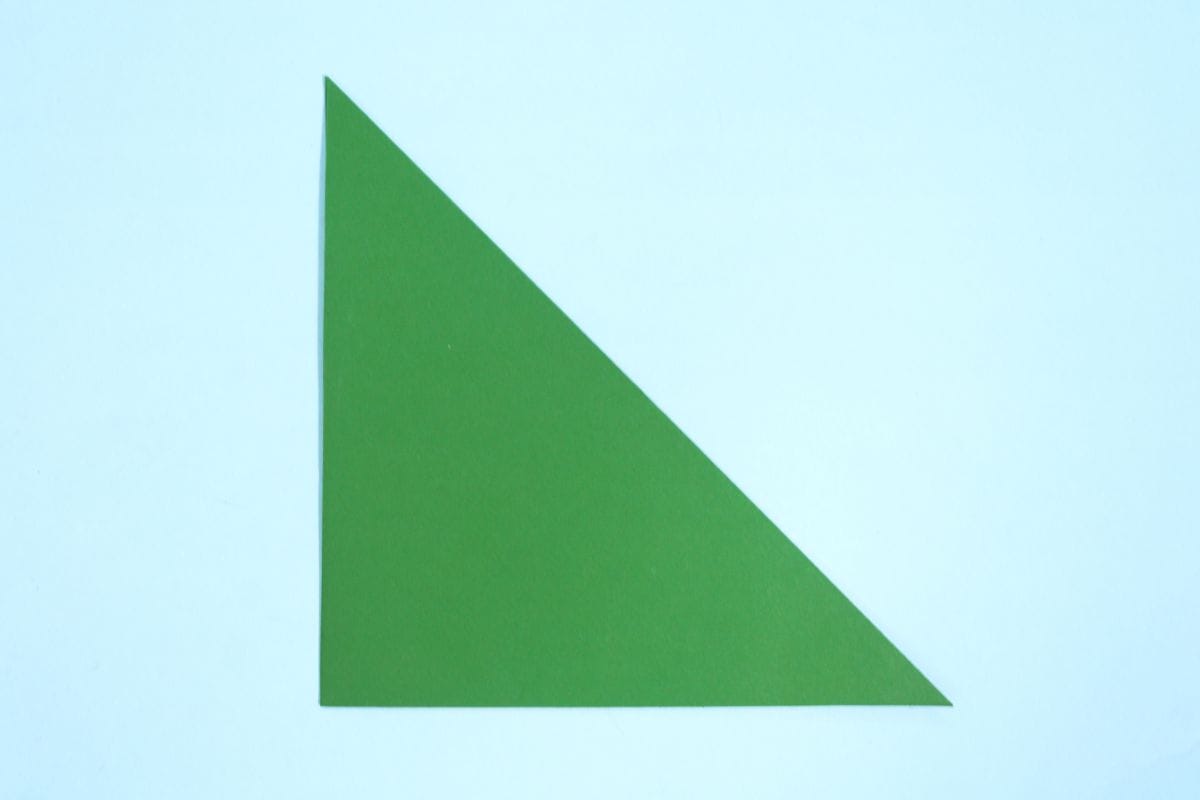
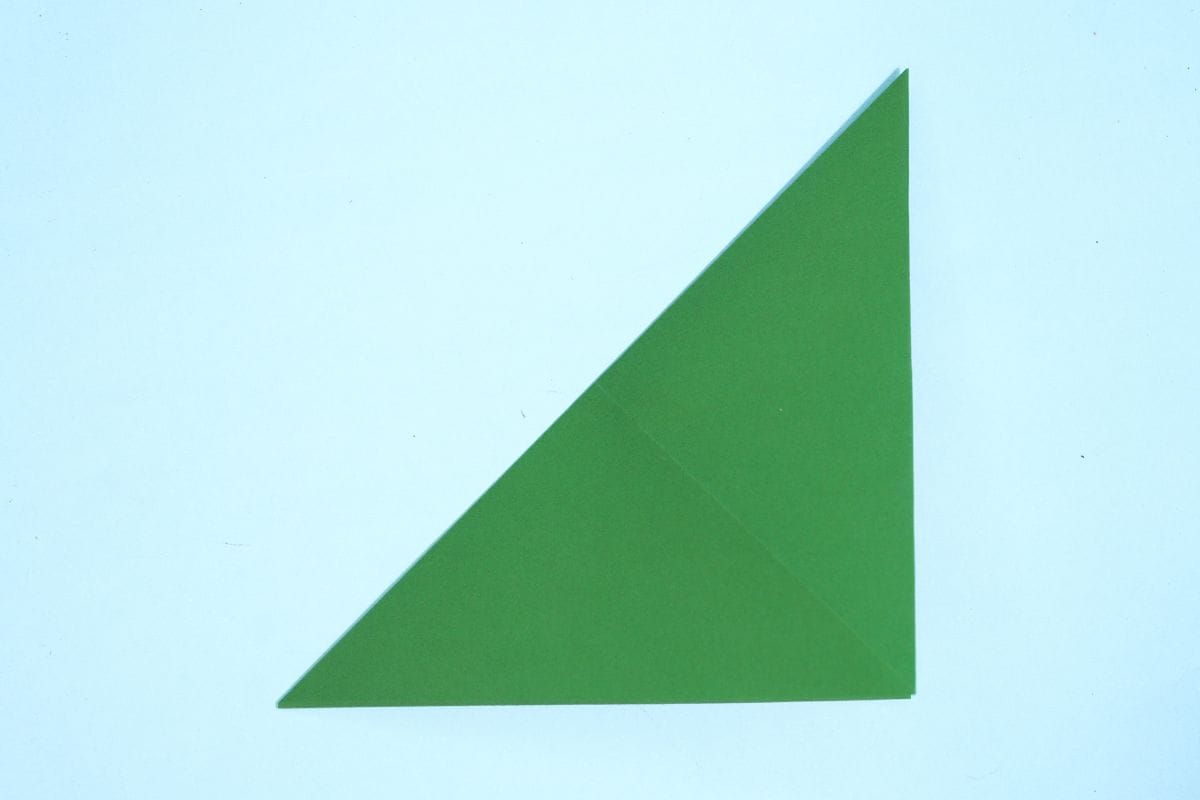
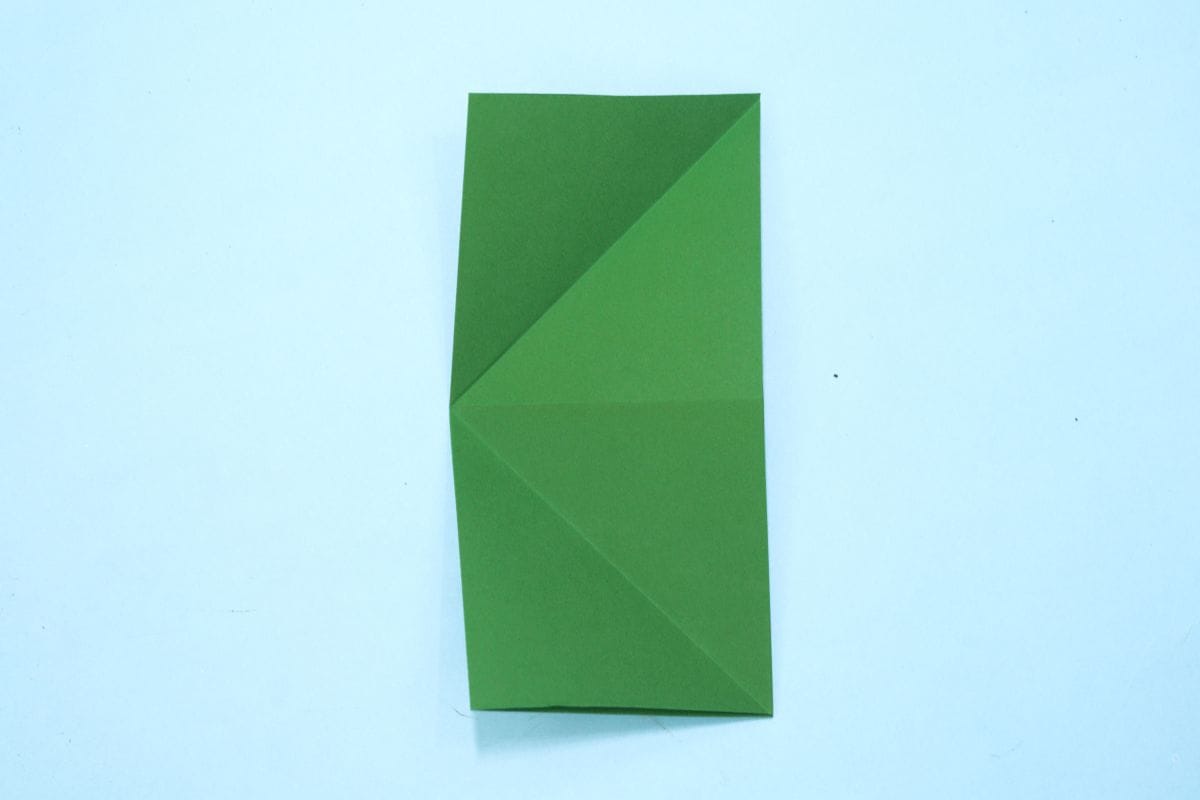
Fold the paper diagonally, bringing the top right corner to meet the bottom left corner.
Step 3
3
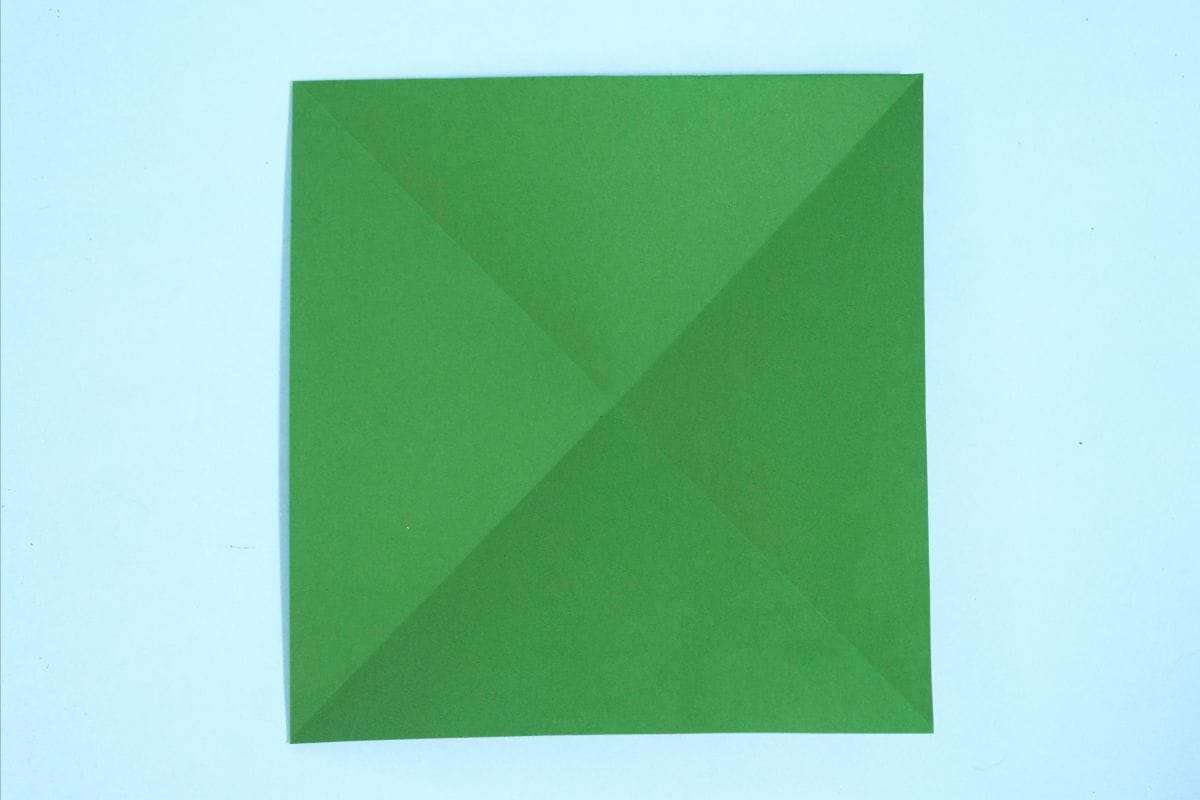
Unfold. We just needed a crease line.
Step 4
4
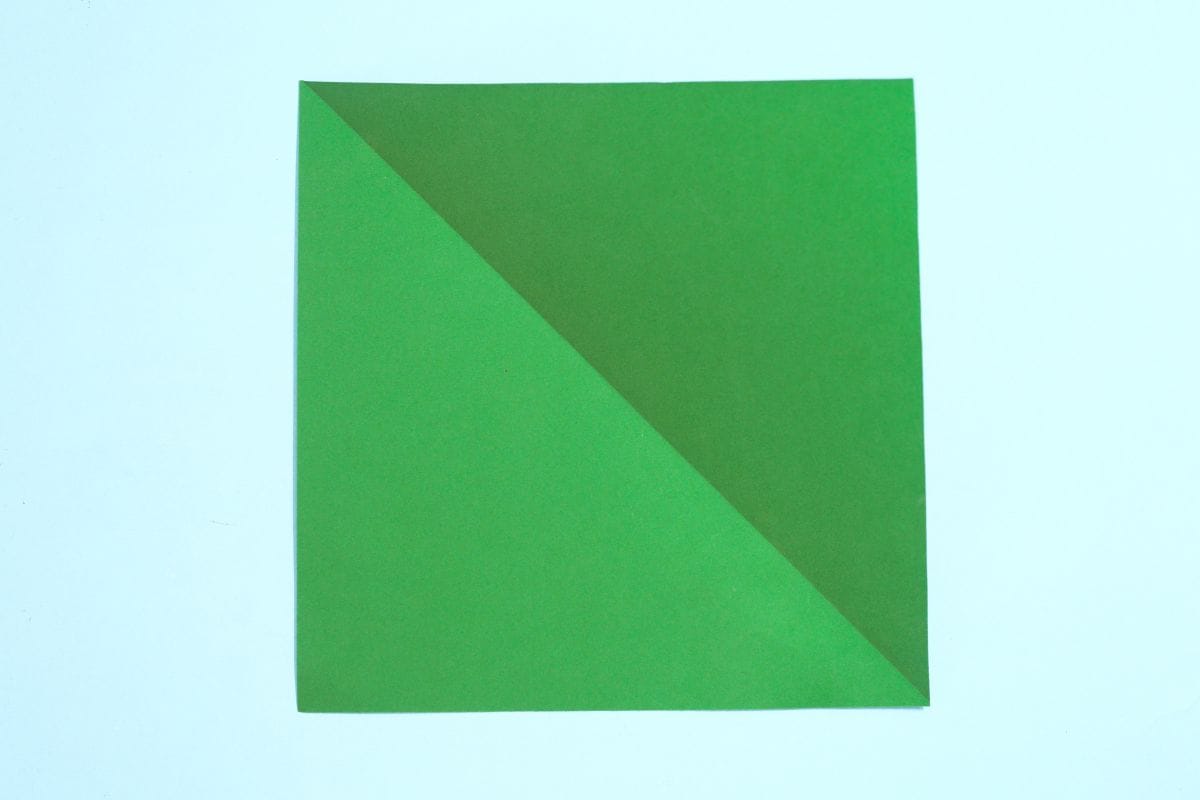
Fold the paper diagonally, bringing the top left corner to meet the bottom right corner.
Step 5
5
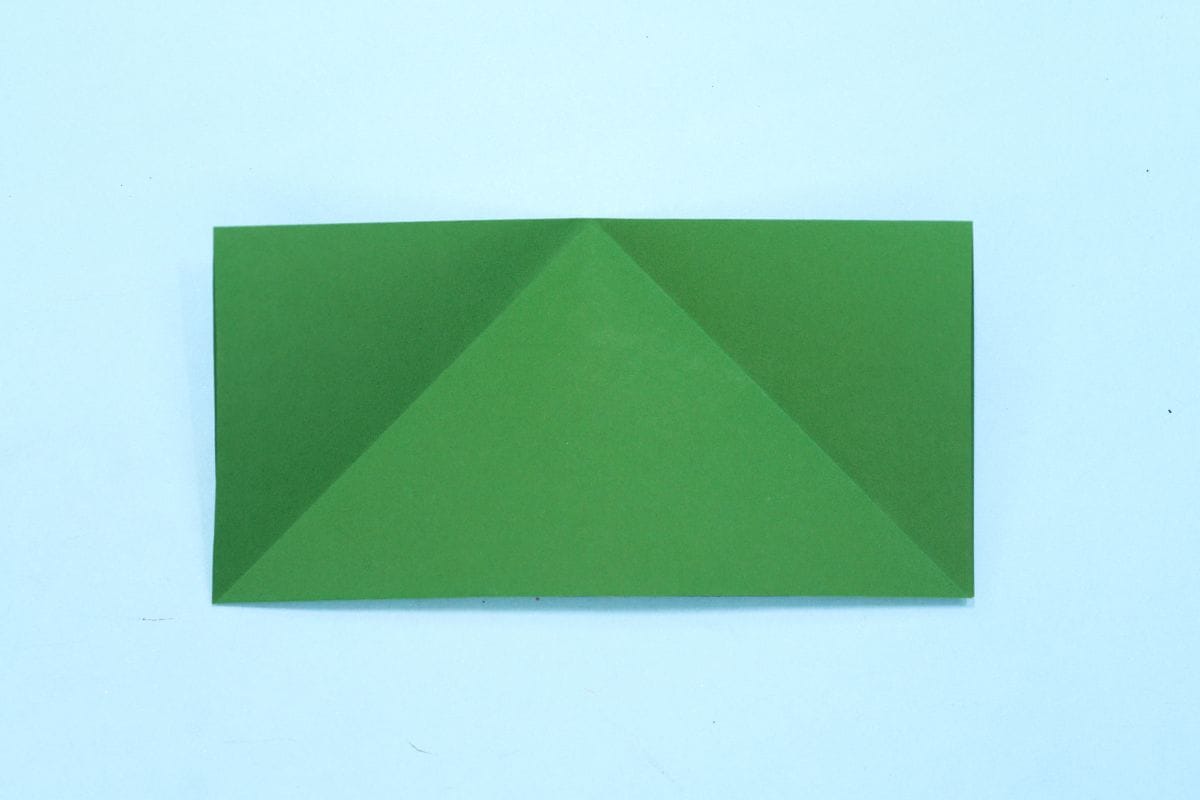
Unfold.
Step 6
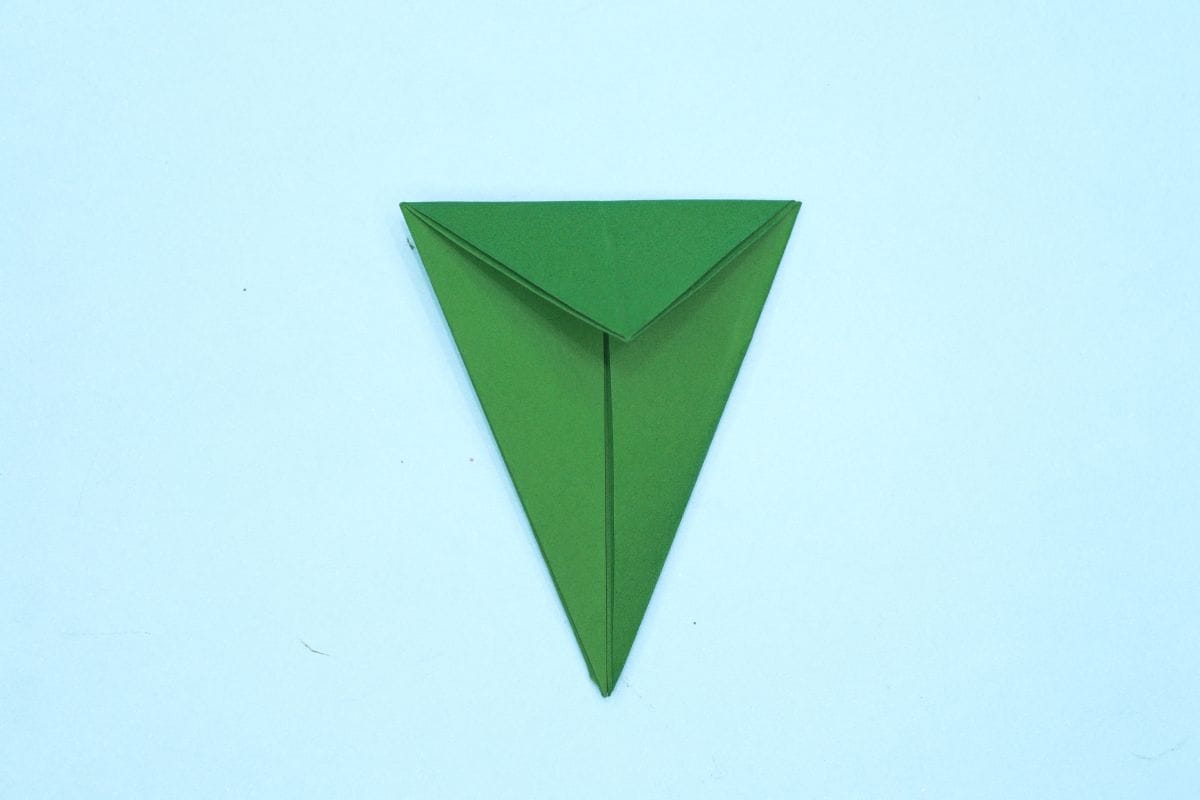
6
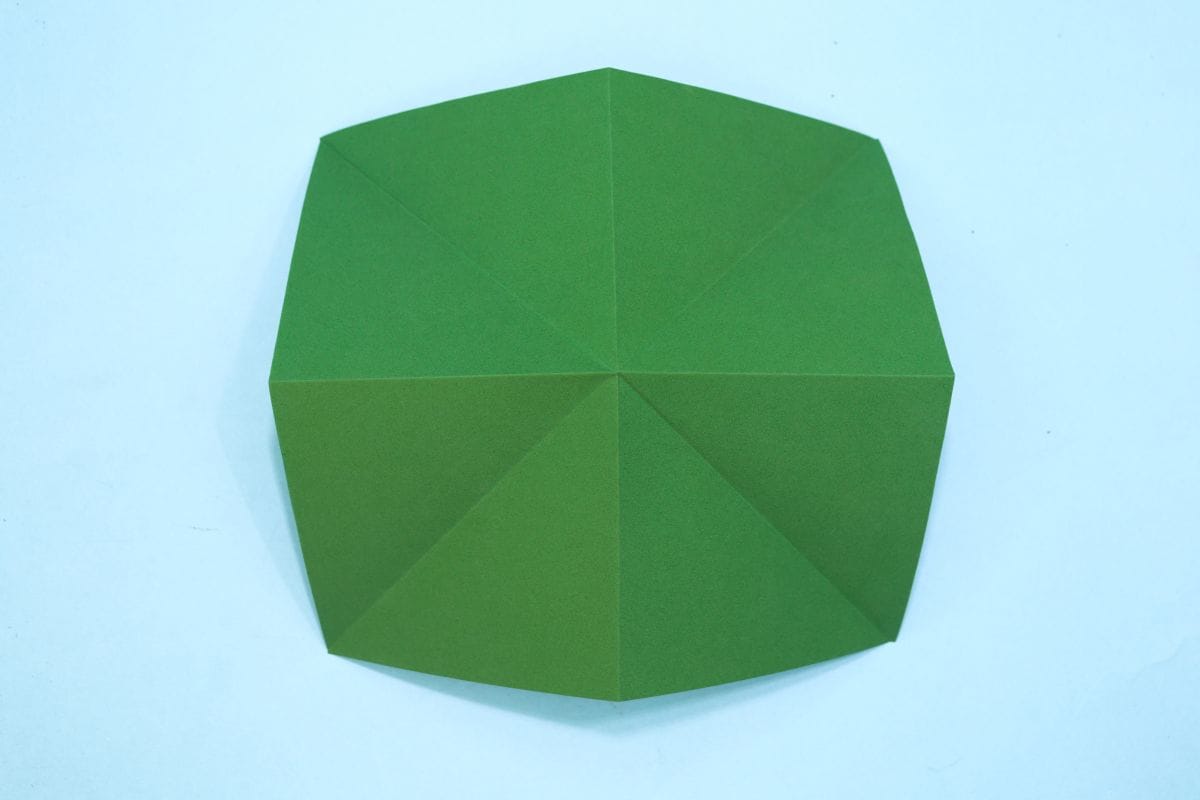
Make a backward fold by bringing the top edge down to the bottom edge.
Step 7
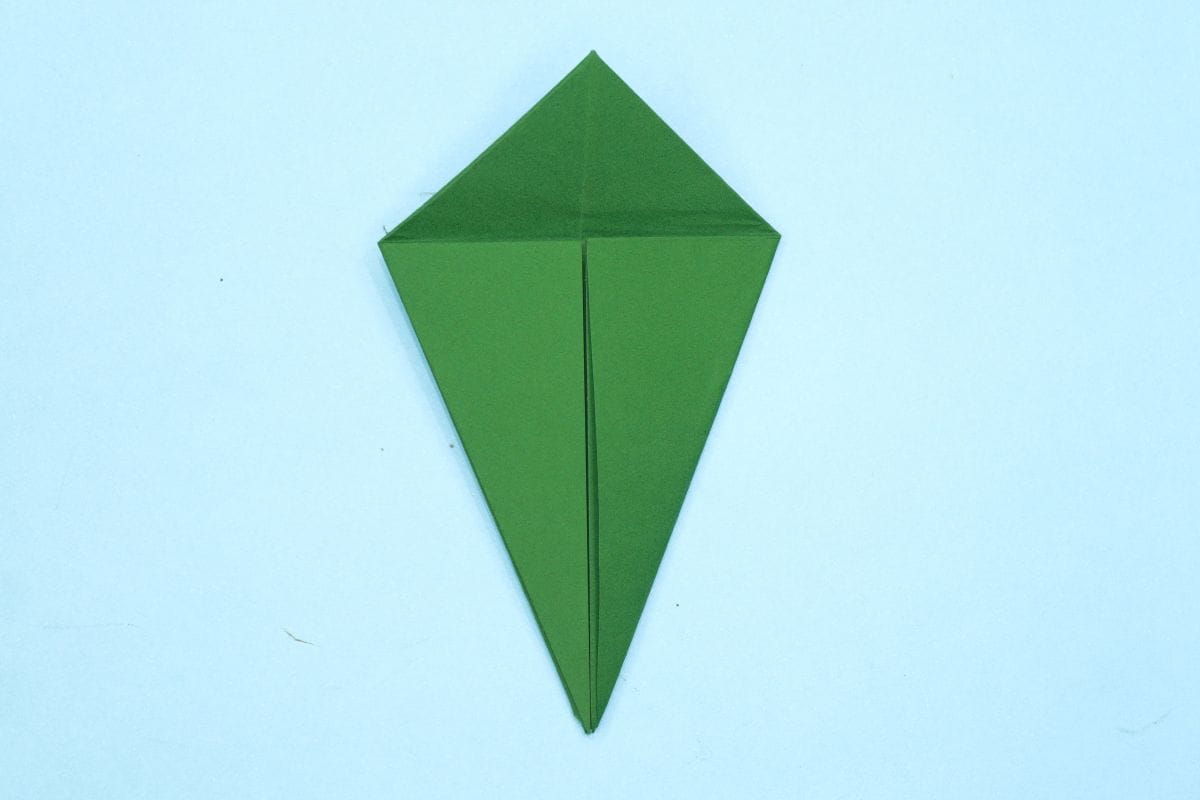
7
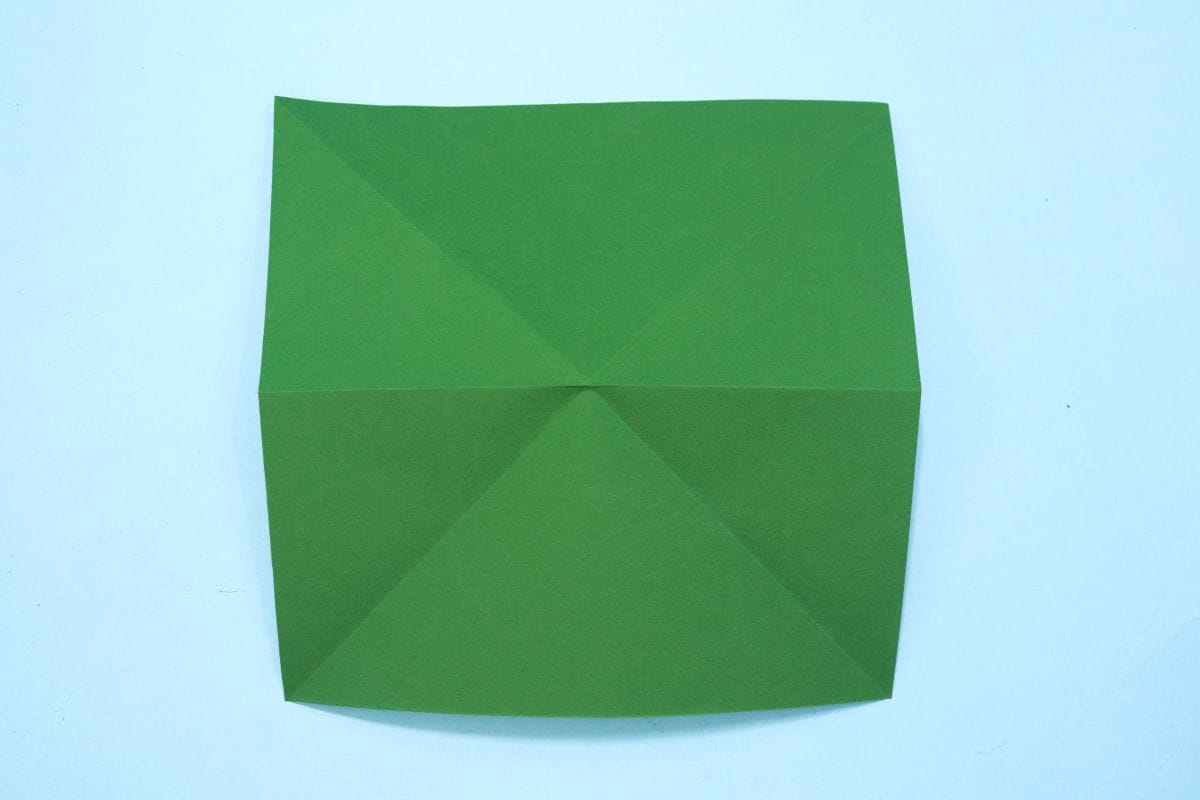
Unfold.
Step 8
8
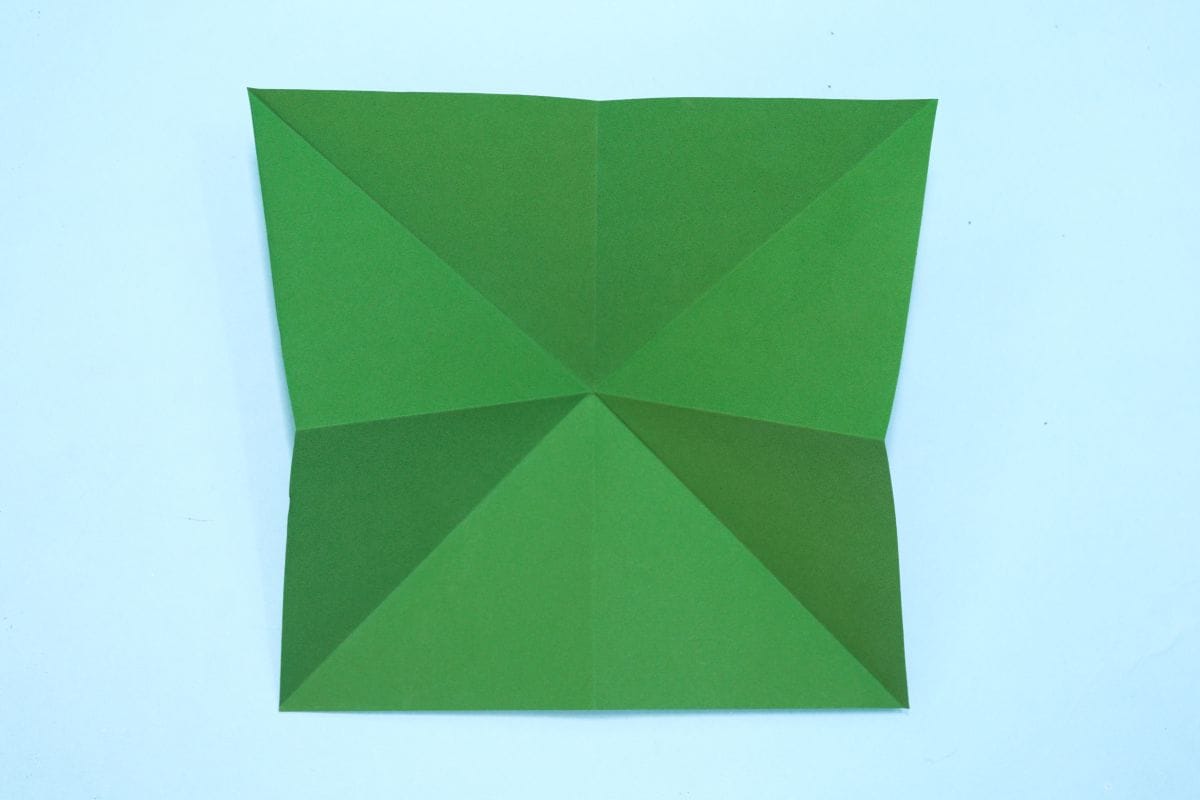
Fold the paper in half by bringing the left edge to meet the right edge.
Step 9
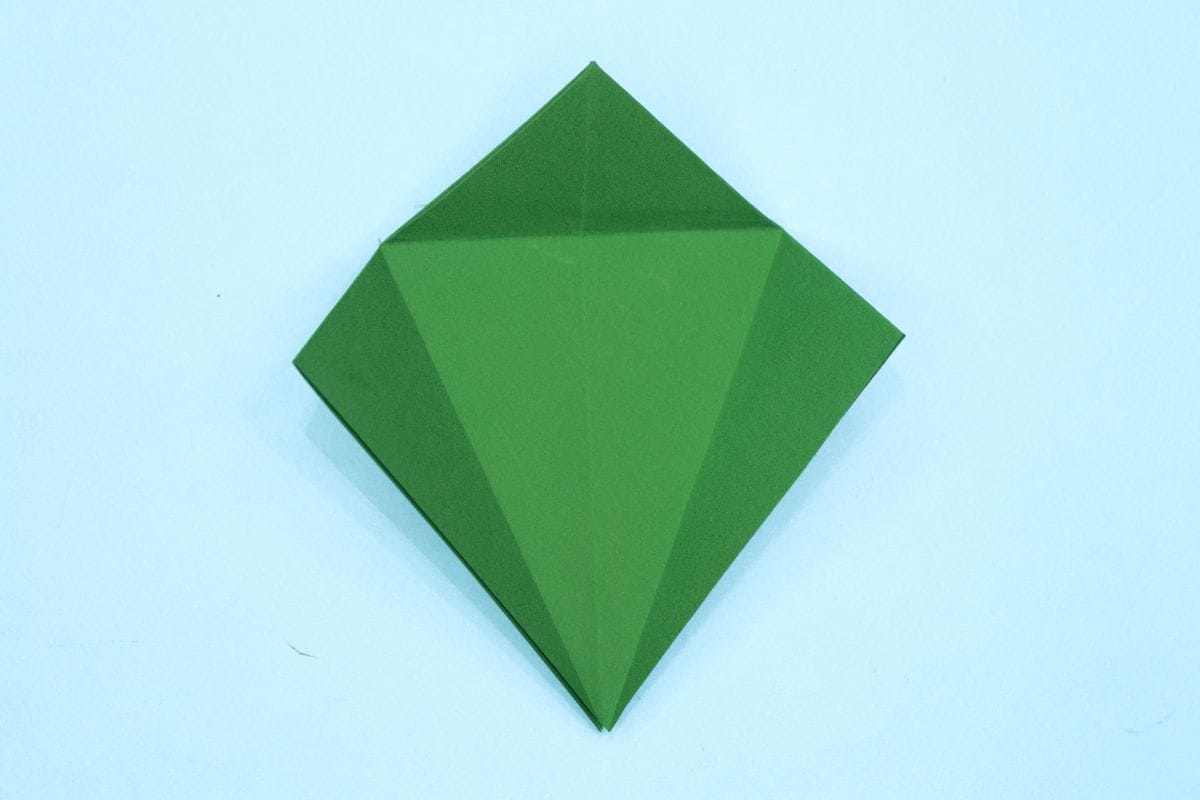
9
Unfold. We just needed a crease line.
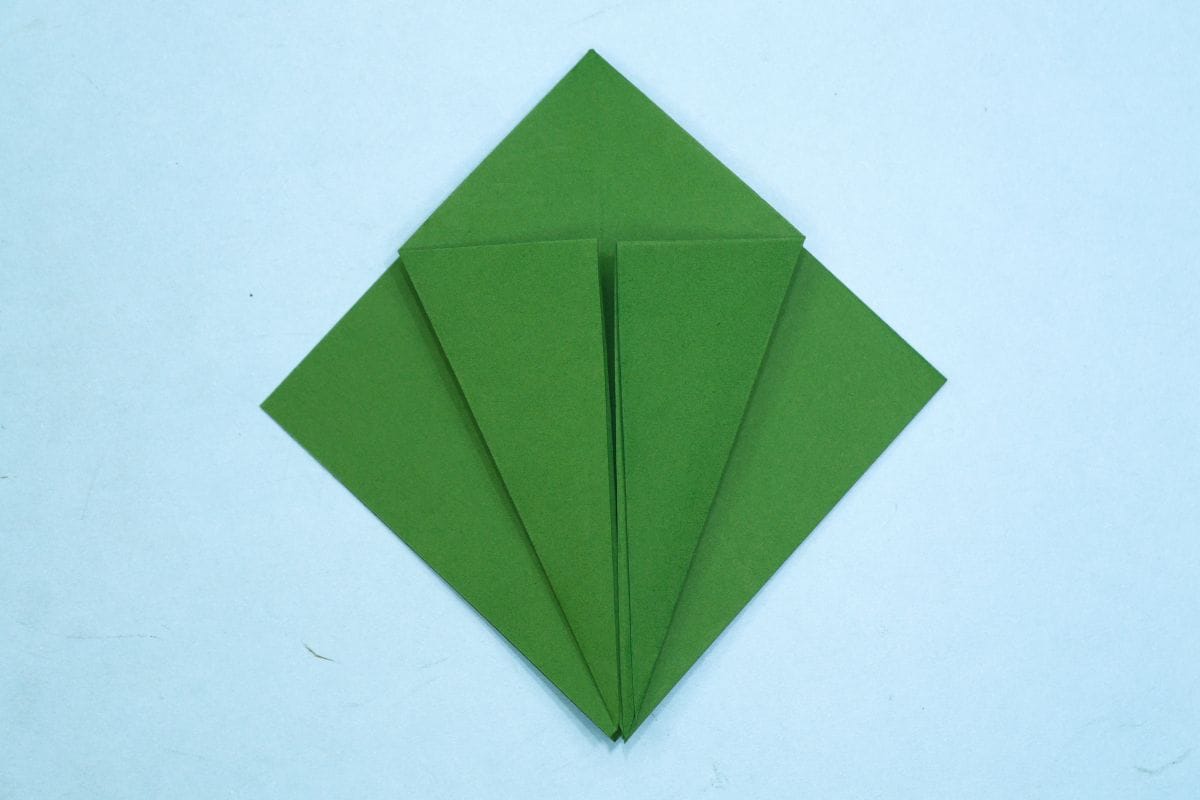
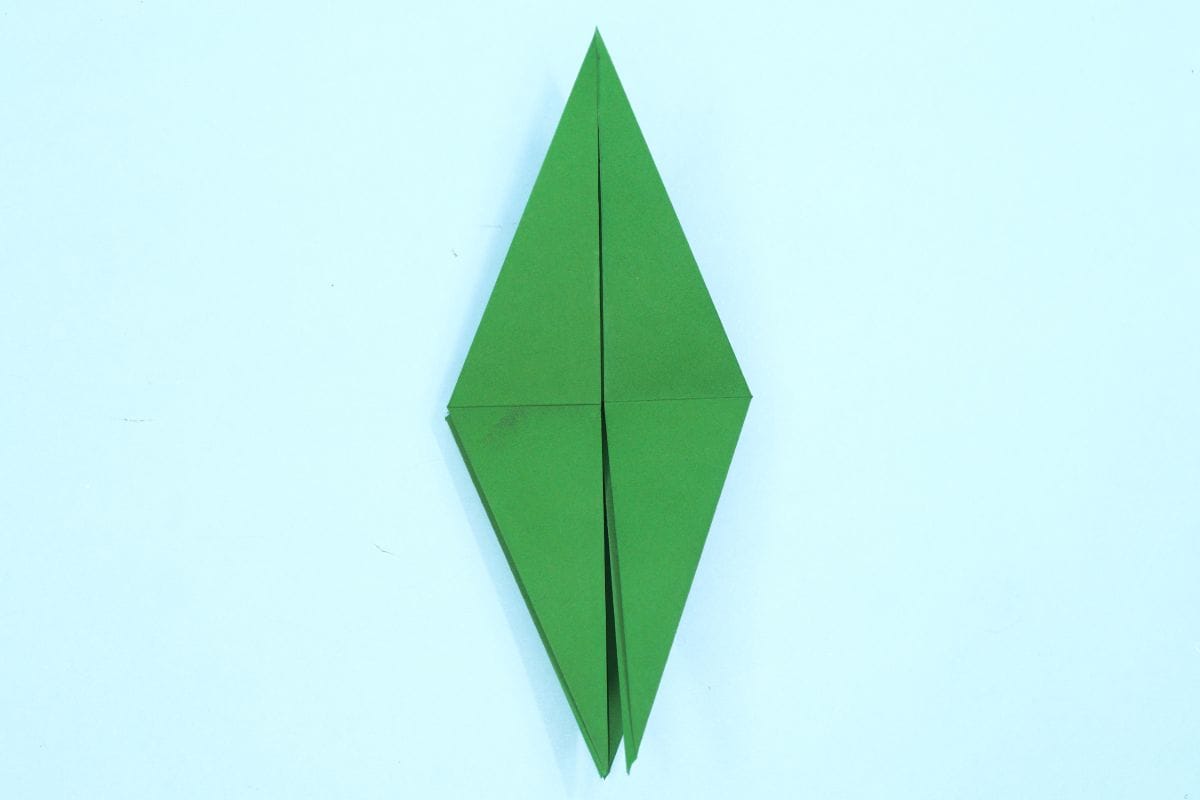
Step 10
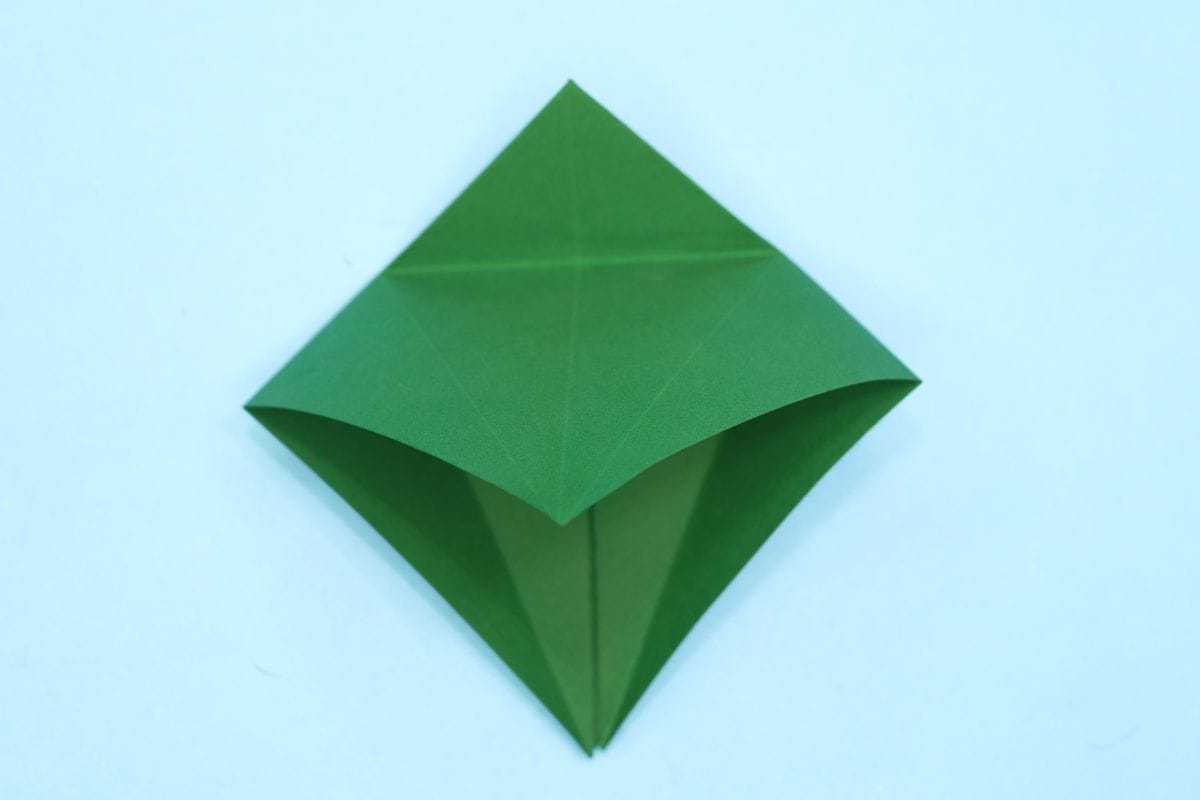
10
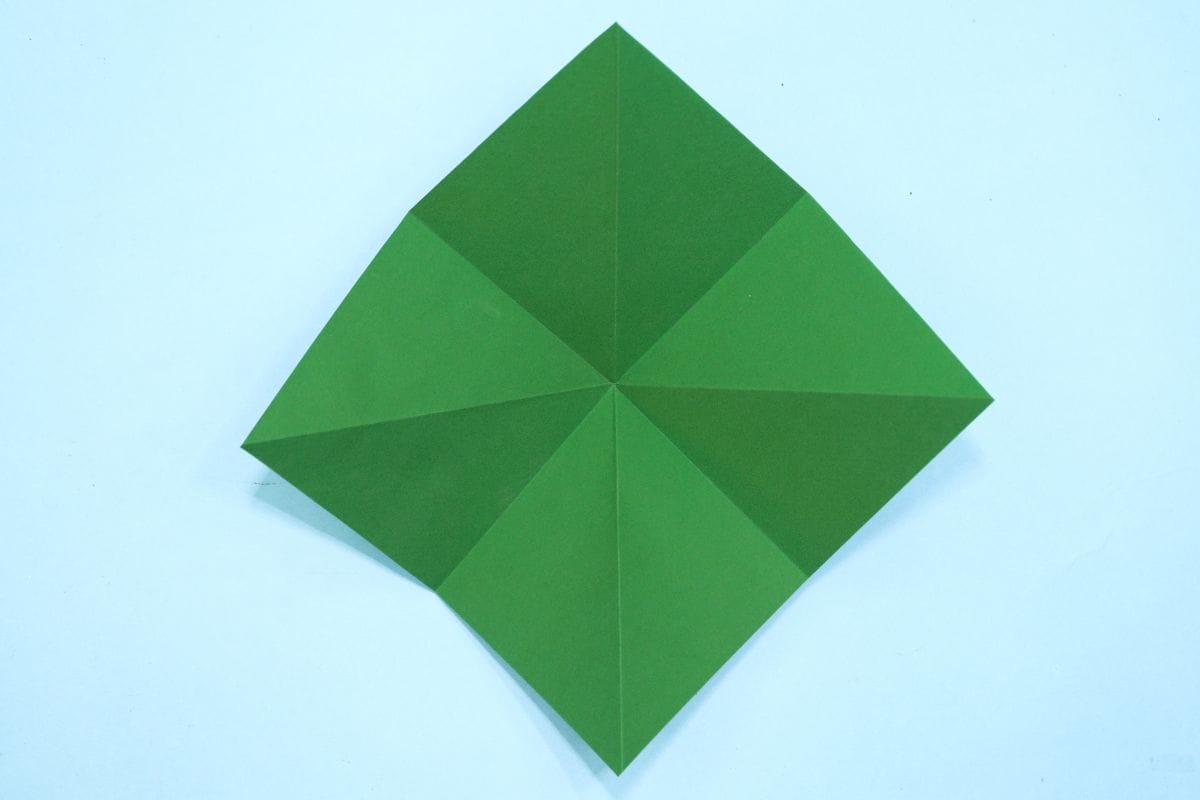
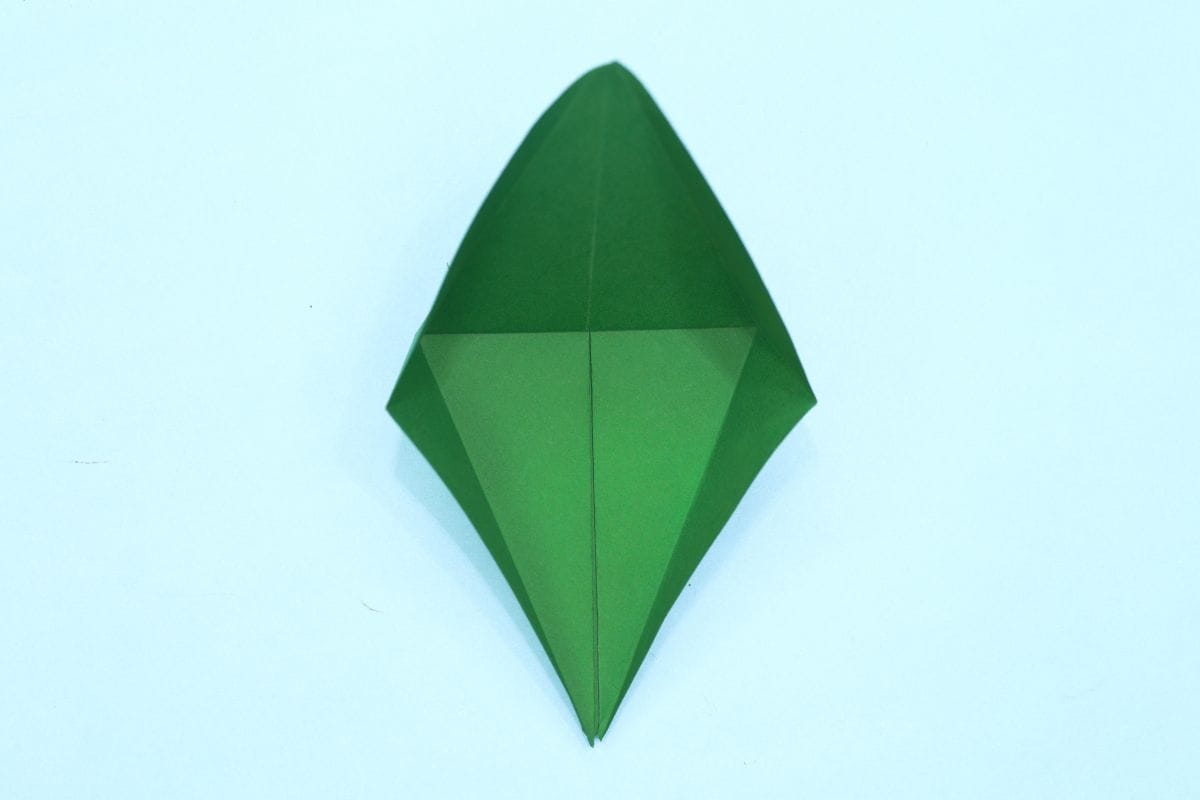
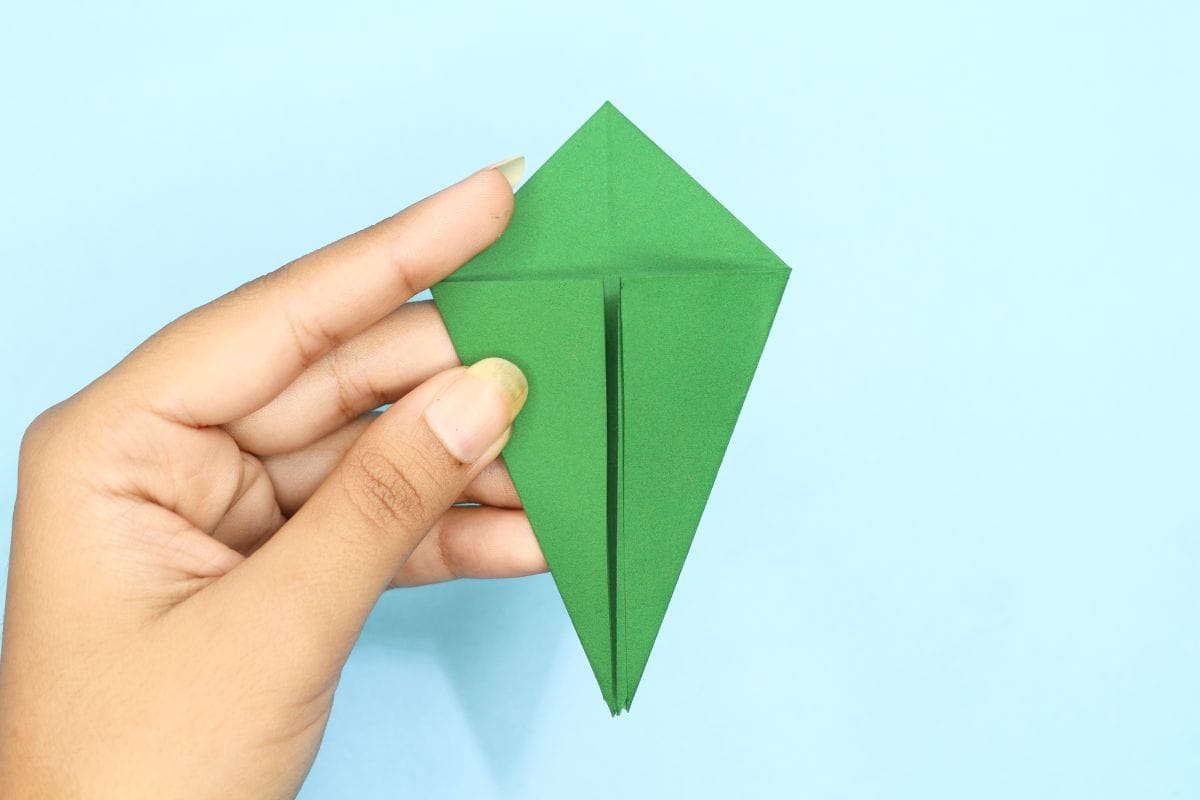
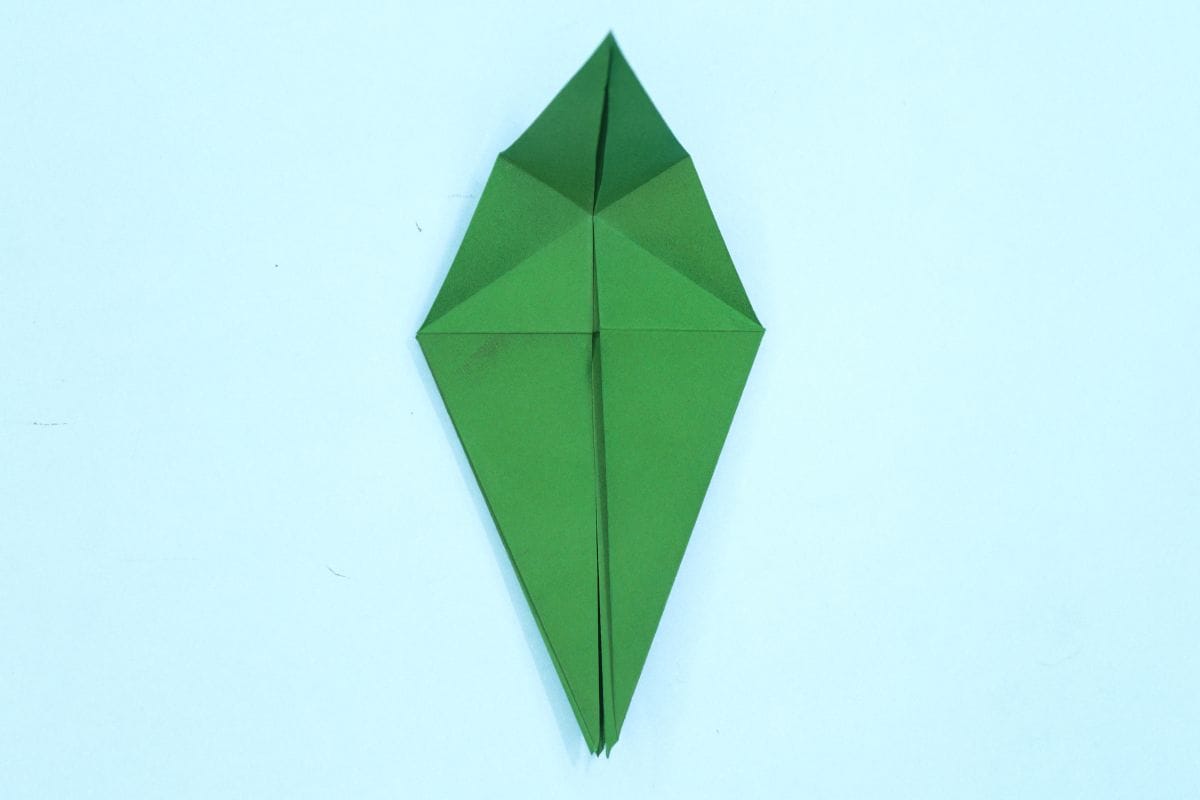
Pop in the center point of the big X with your finger.
Step 11
11
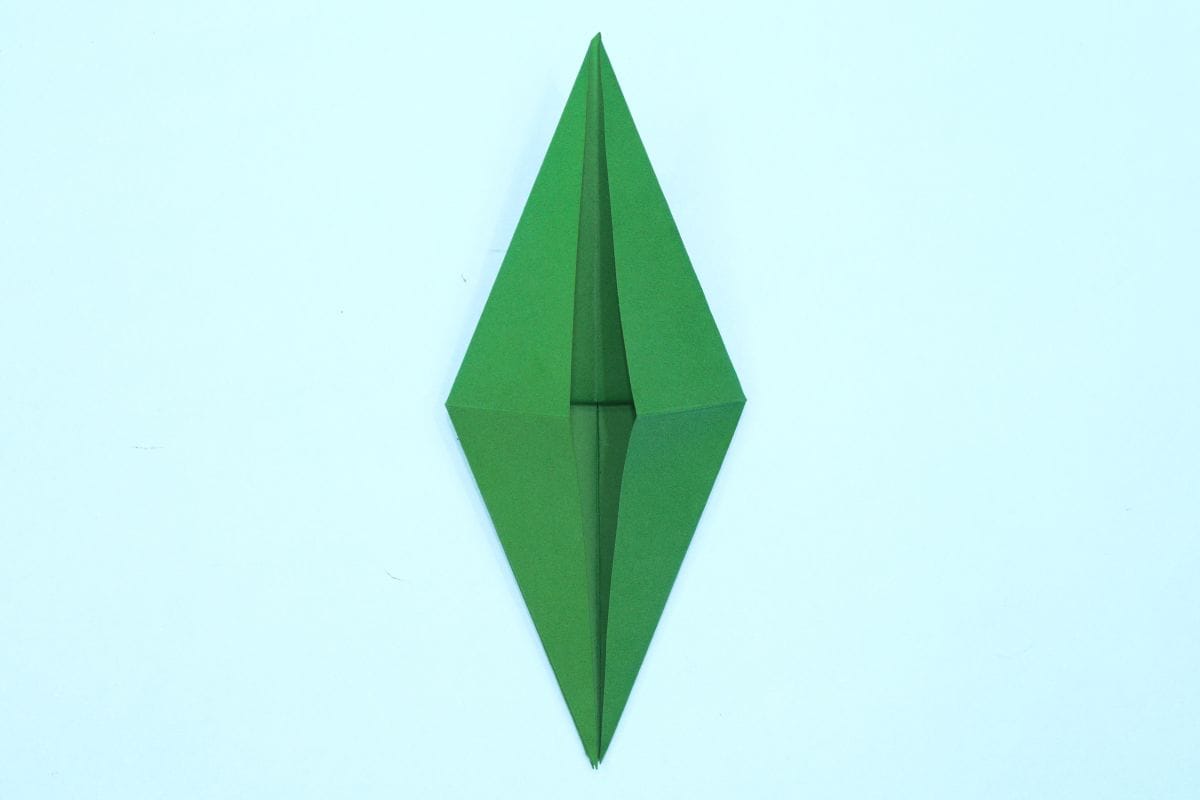
Rotate the paper as shown.
Step 12

12
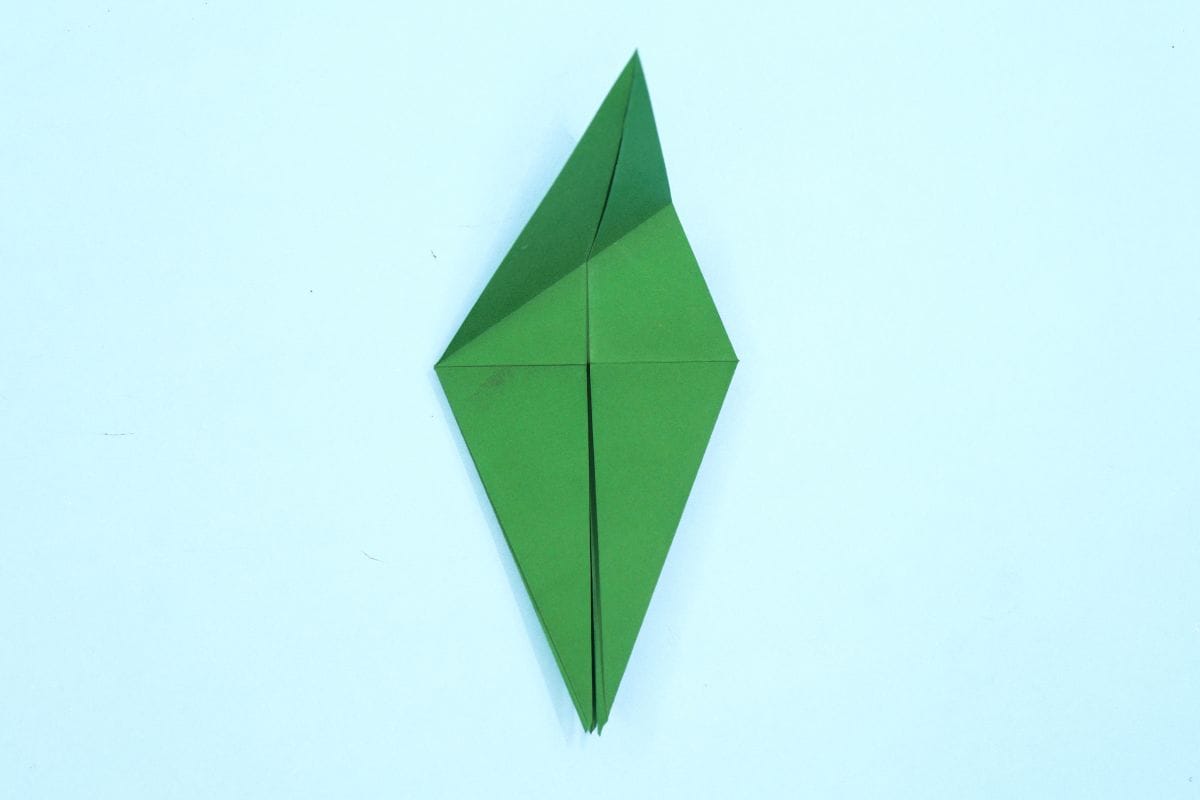
Fold the left and right center creases inward toward the center.
Step 13
13
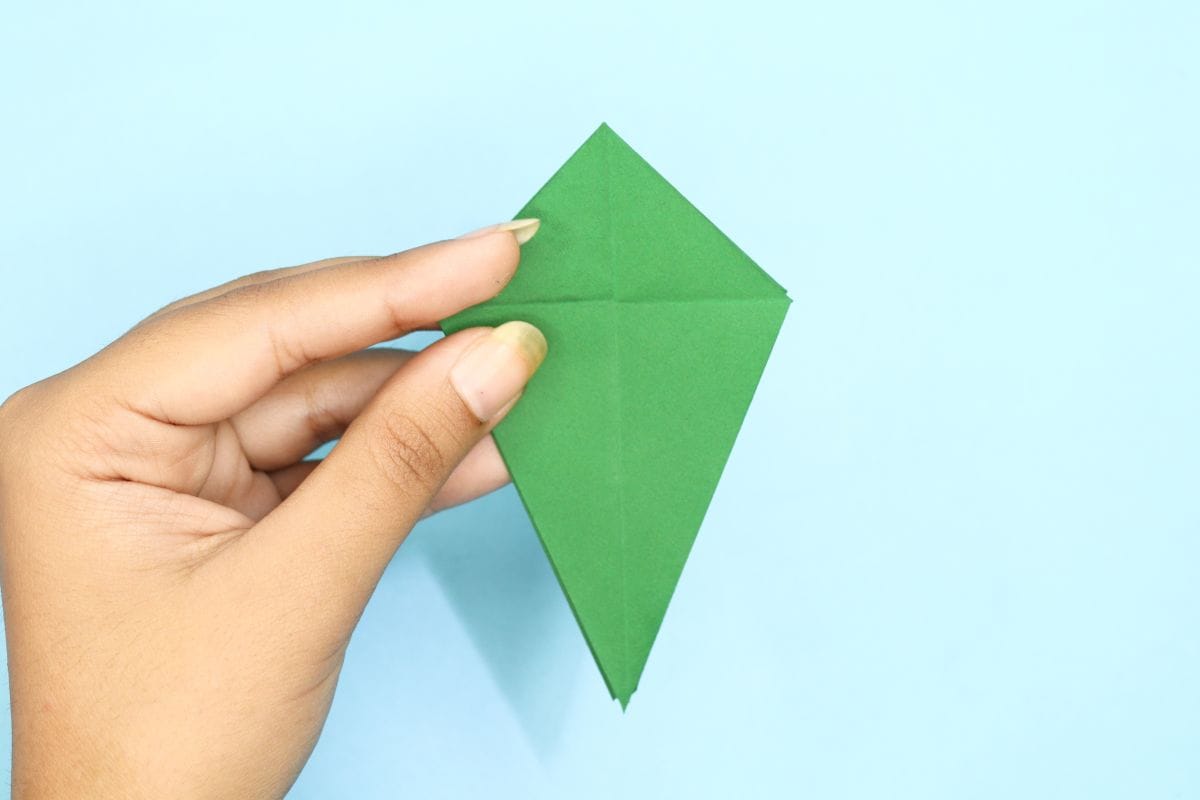
Fold them completely inward and press the folds flat.
Step 14

14
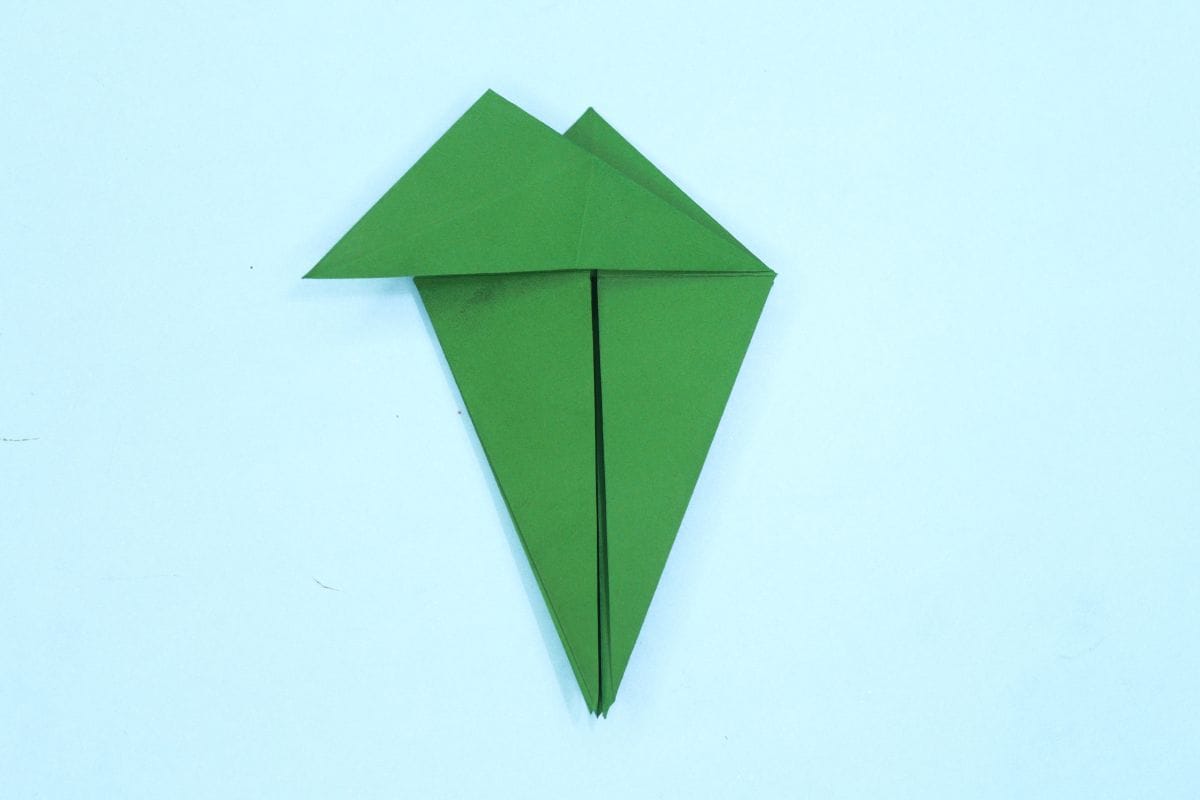
Fold the left edge inward to meet the center crease.
Step 15
15
Fold the right edge inward to meet the center crease.
Step 16
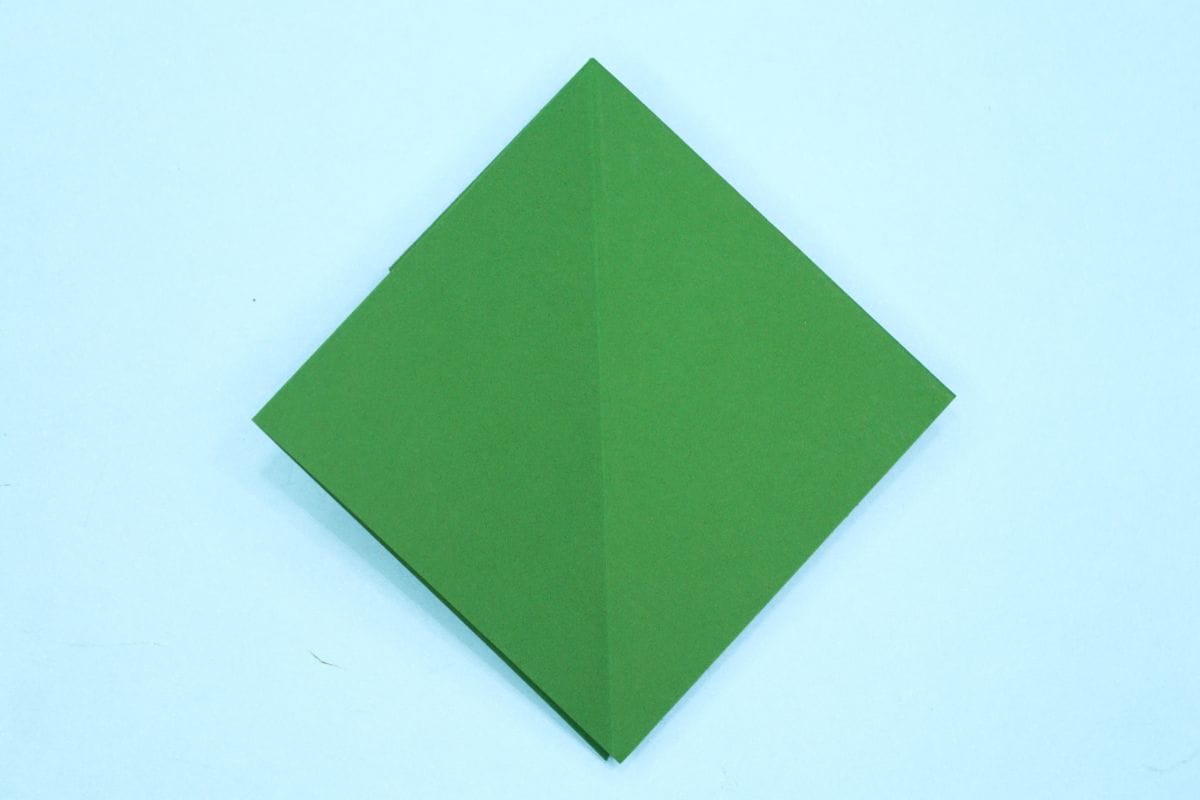
16
Turn the model over.
Step 17
17
Fold the left edge inward to meet the center crease.
Step 18

18
Fold the right edge inward to meet the center crease.
Step 19
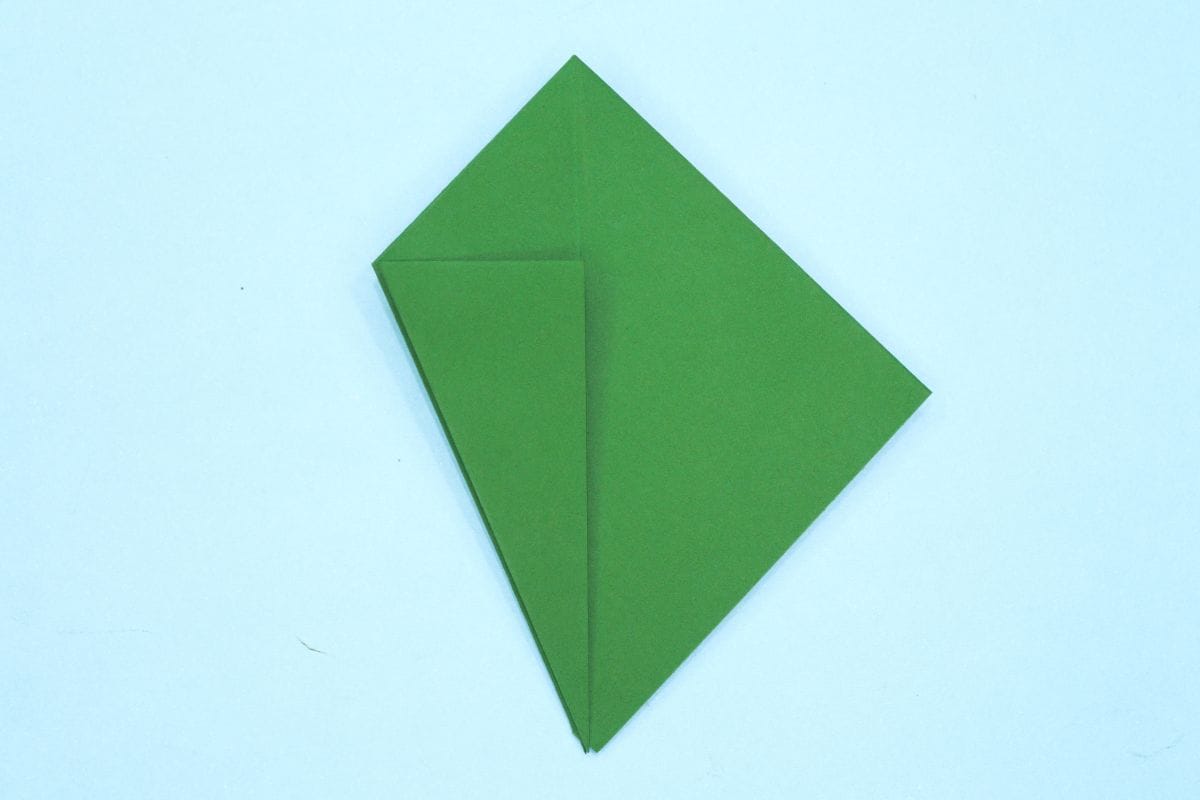
19
Fold down the top triangle.
Step 20
20
Unfold. We just needed a crease line.
Step 21
21
Unfold the sides too.
Step 22
22
Open up the top triangle as shown.
Step 23
23
Lift the top flap all the way to the top.
Step 24
24
Flatten the side edges well.
Step 25
25
Lower the top triangle as shown.
Step 26
26
Lower the top triangle fully to meet the bottom corner.
Step 27
27
Turn the model over.
Step 28
28
Repeat the steps 21 to 24 on this side too.
Step 29

29
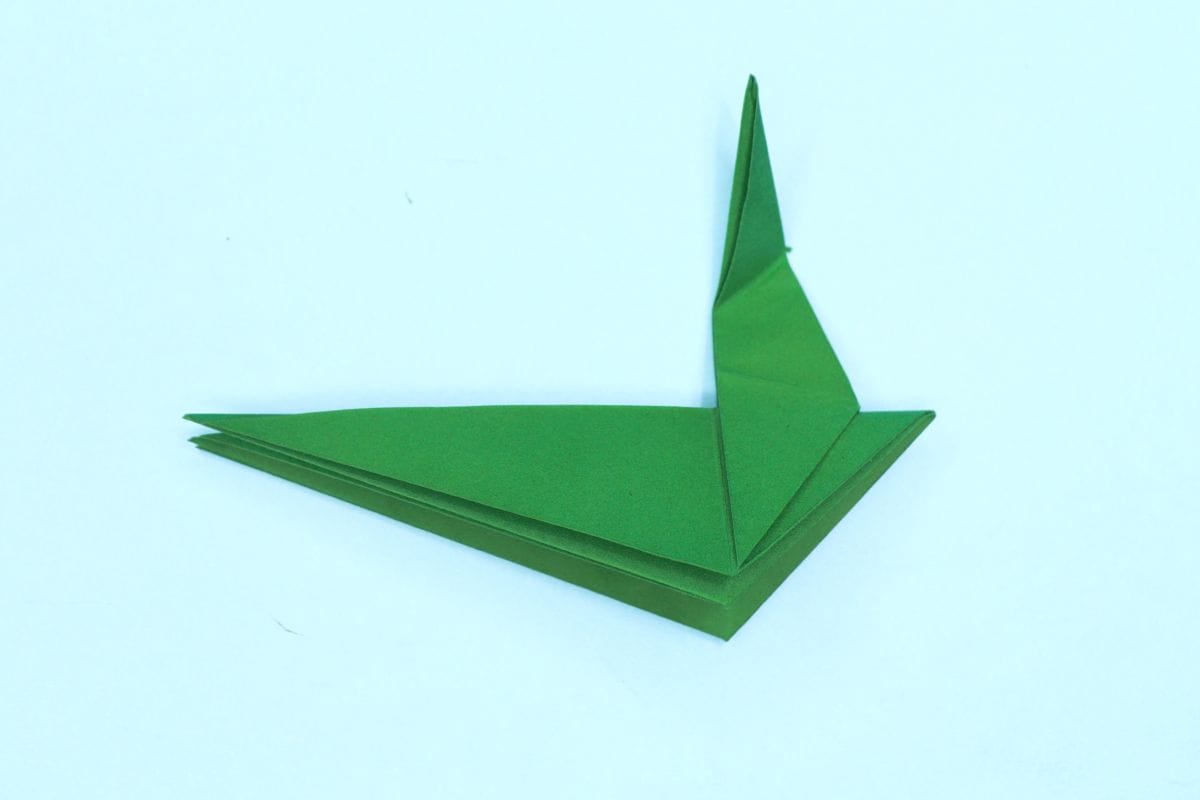
Fold the top triangle diagonally to the right until the top left edge aligns with the center crease.
Step 30
30
Unfold. We just needed a crease line.
Step 31
31
Make the same angled fold on the right side.
Step 32
32
Unfold. We just needed a crease line.
Step 33

33
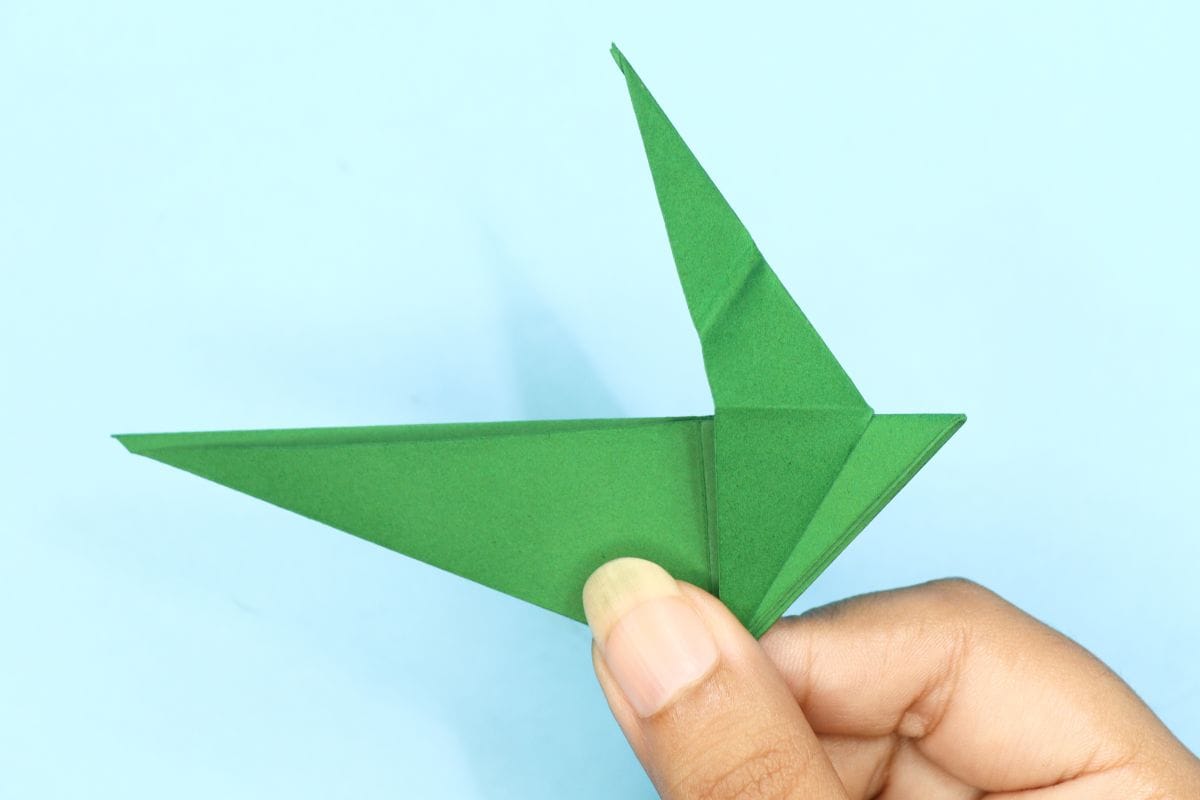
Pinch the left anf right edges together.
Step 34

34
Start folding the model in half as shown.
Step 35

35
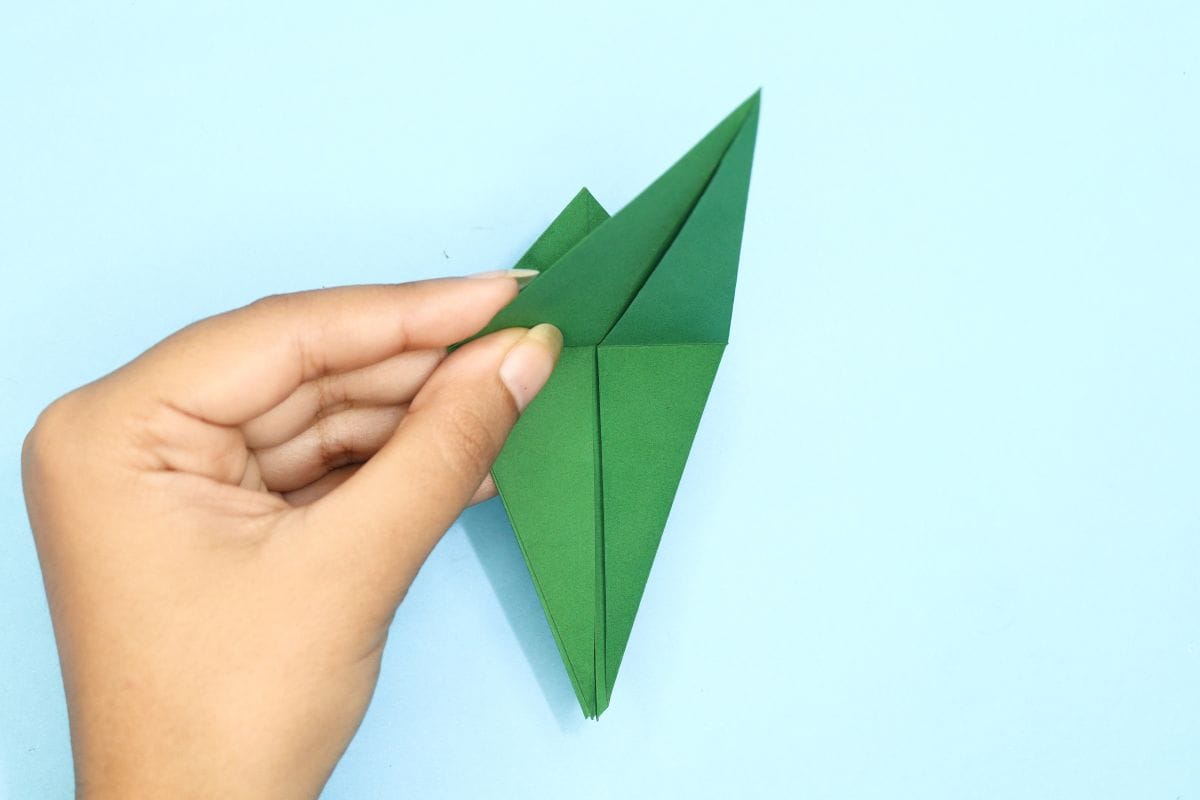
Once folded in half, the paper should match the image.
Step 36

36
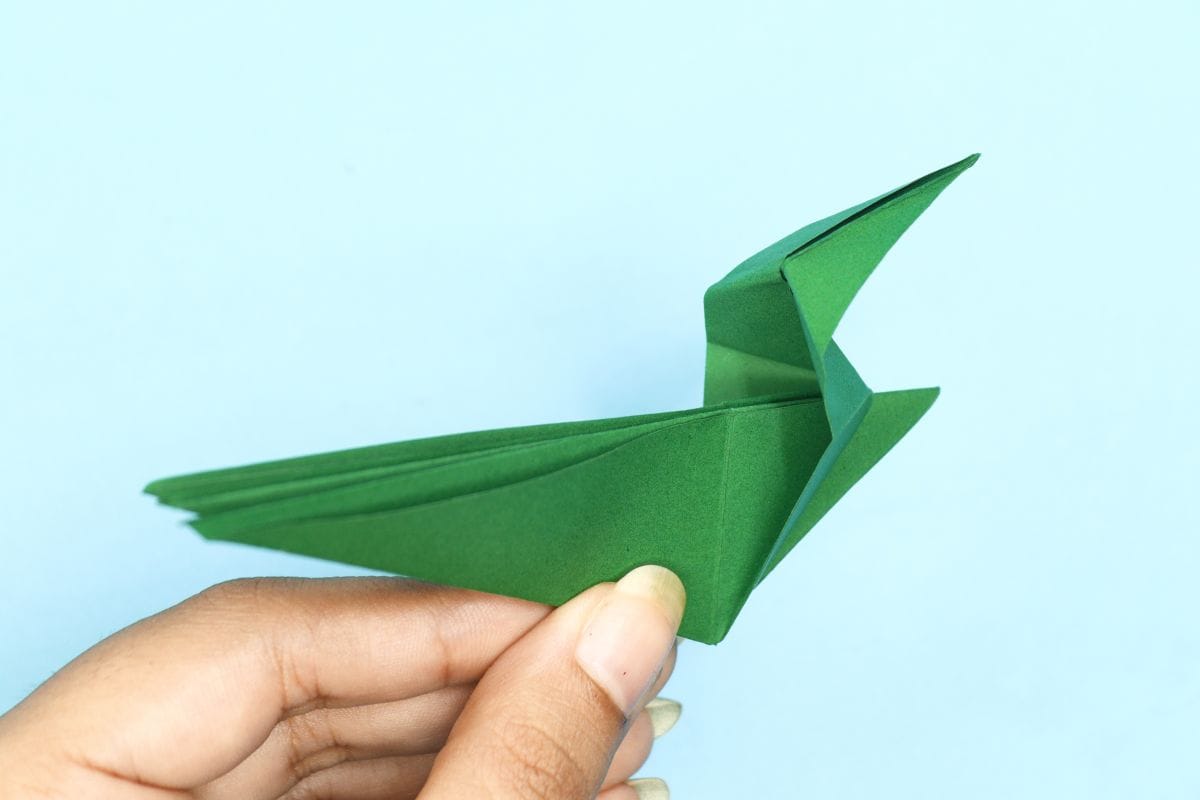
Fold the top corner to the right side at an angle.
Step 37
37
Unfold. We just needed a crease line.
Step 38

38
Fold it backwards.
Step 39
39
Unfold.
Step 40
40
Make an outside reverse fold along the crease you created earlier.
Step 41
41
Flatten the fold well.
Step 42
42
Fold the right corner to the left at an angle.
Step 43
43
Fold it backwards now.
Step 44

44
Unfold.
Step 45
45
Do an inside reverse fold with the crease we just made.
Step 46

46
Flatten the fold well.
Step 47
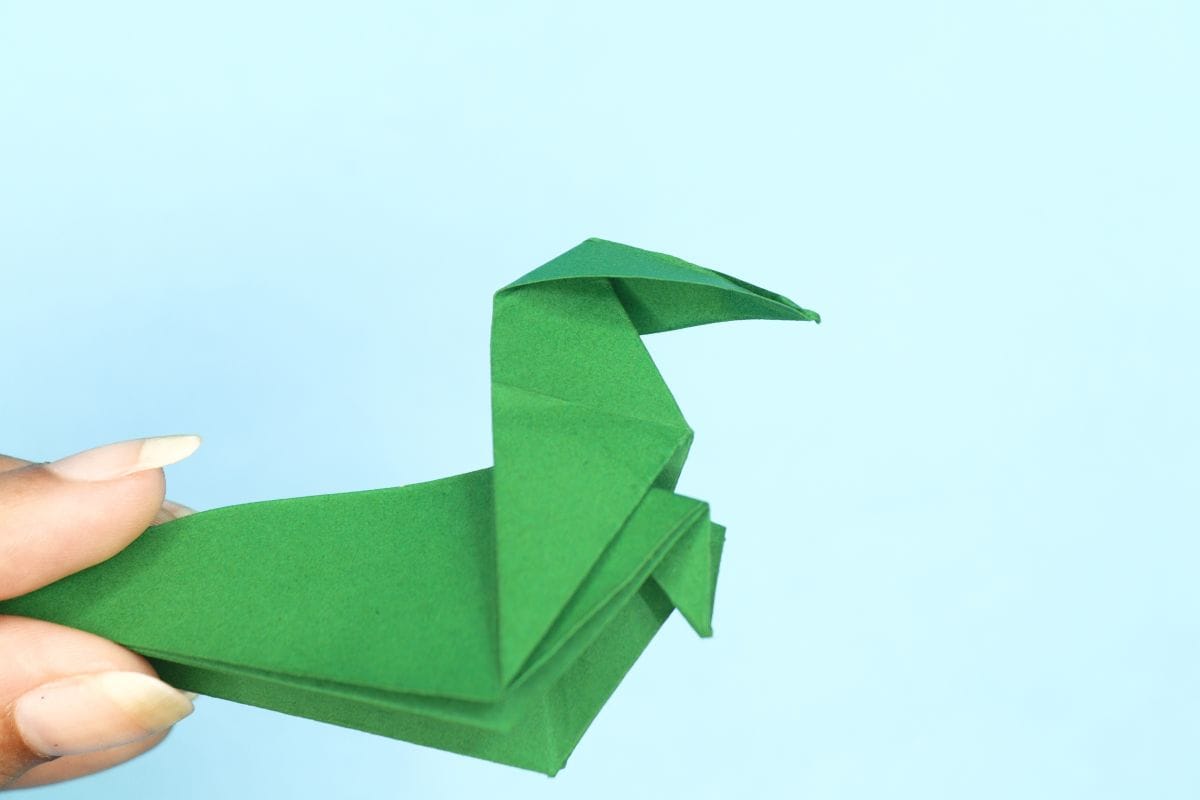
47
Open up the face.
Step 48
48
Fold in to right corner.
Step 49
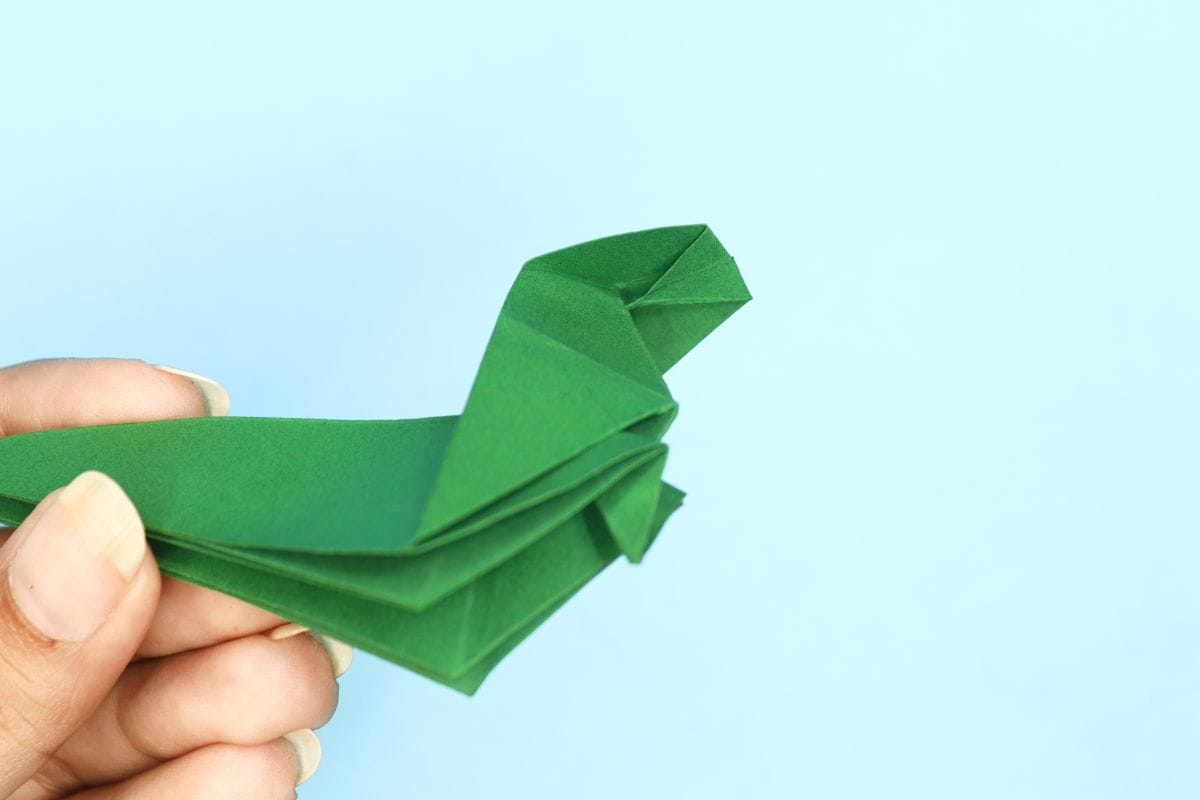
49
Flatten the fold well.
Step 50
50
Make an angled fold by bringing the left corner to the right.
Step 51
51
Angle-fold the tip of the hind leg backward.
Step 52
52
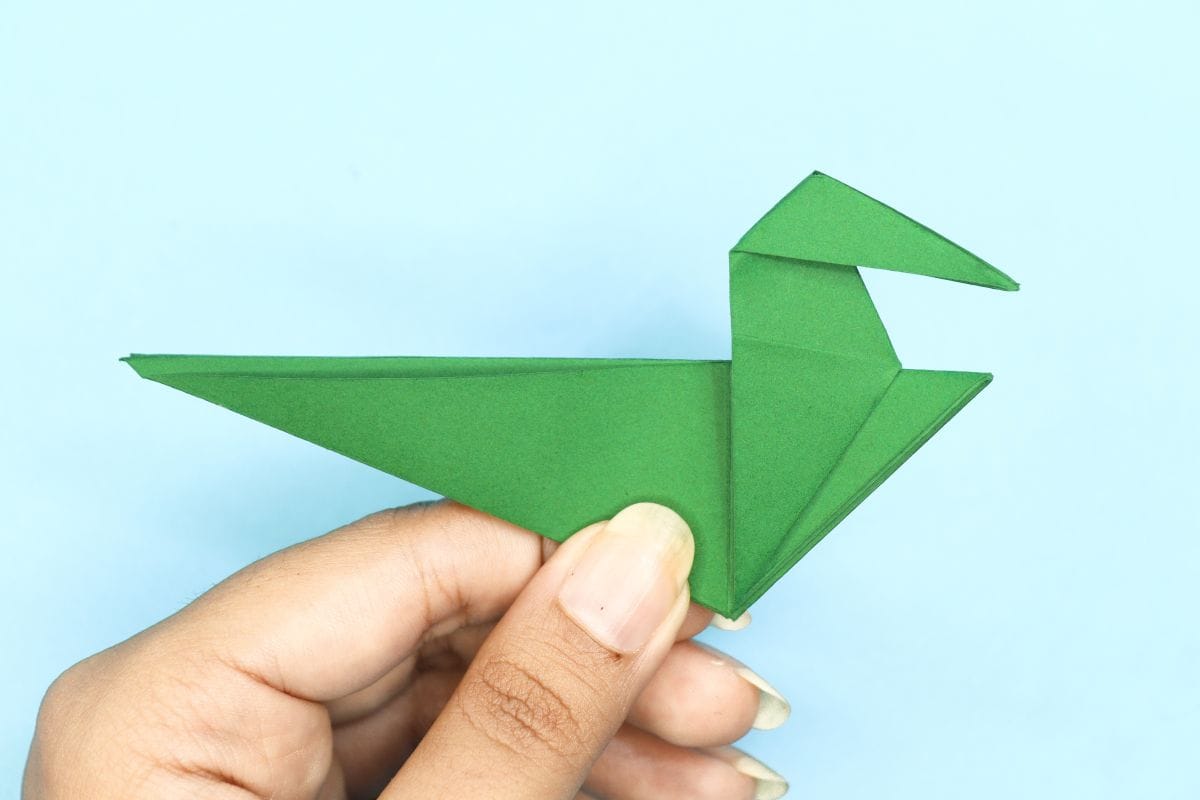
Fold the left corner over to the right once more to create the foot.
Step 53
53
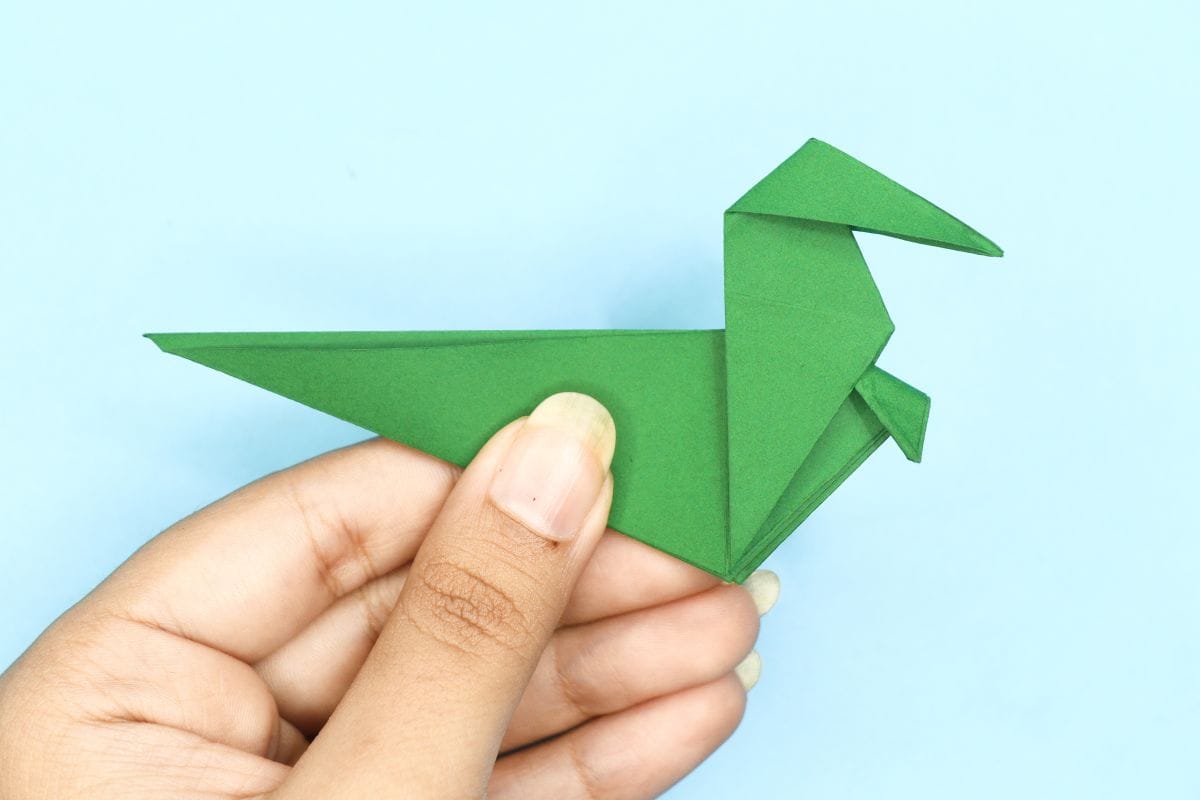
Turn the model over.
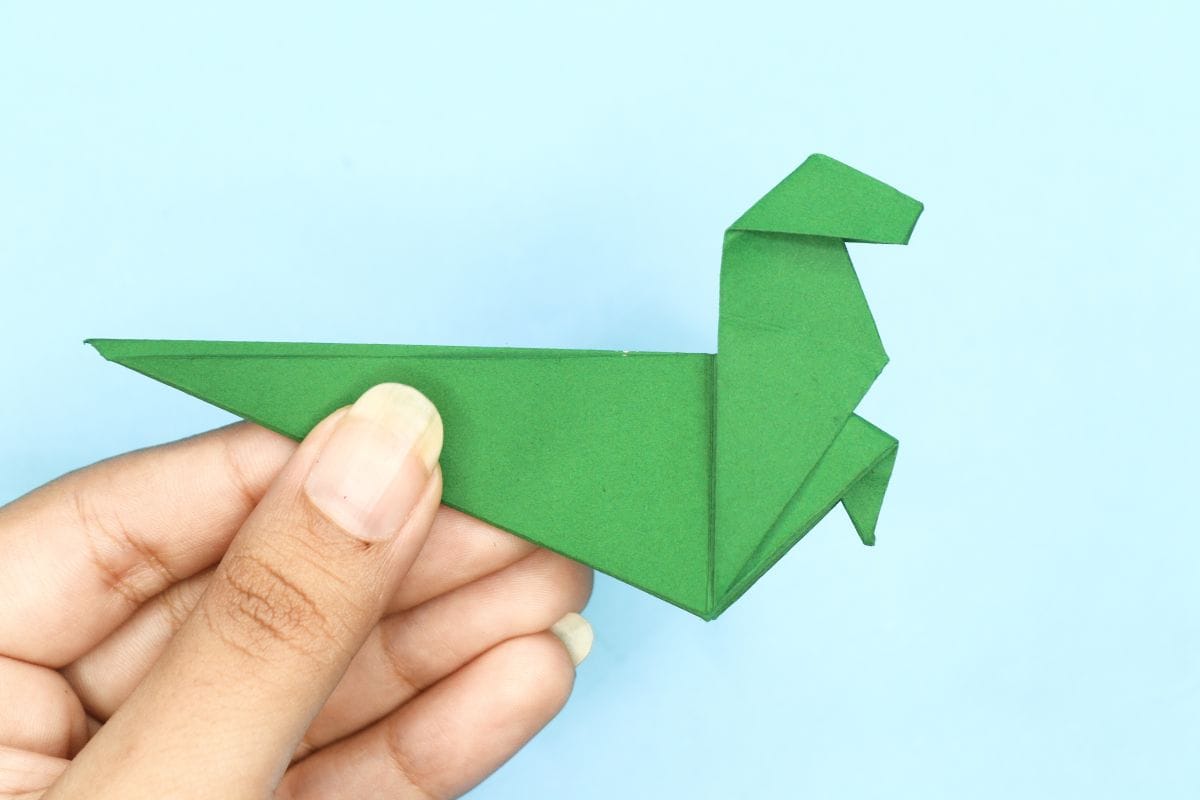
Step 54
54
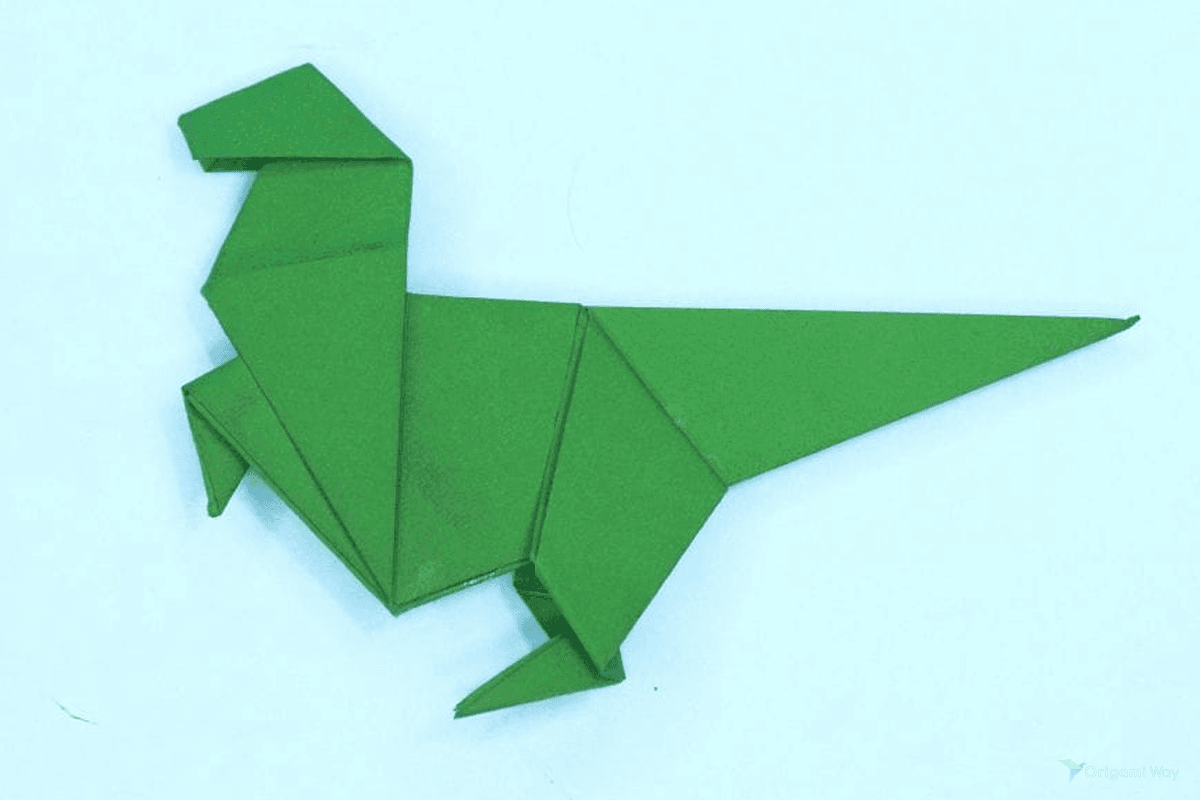
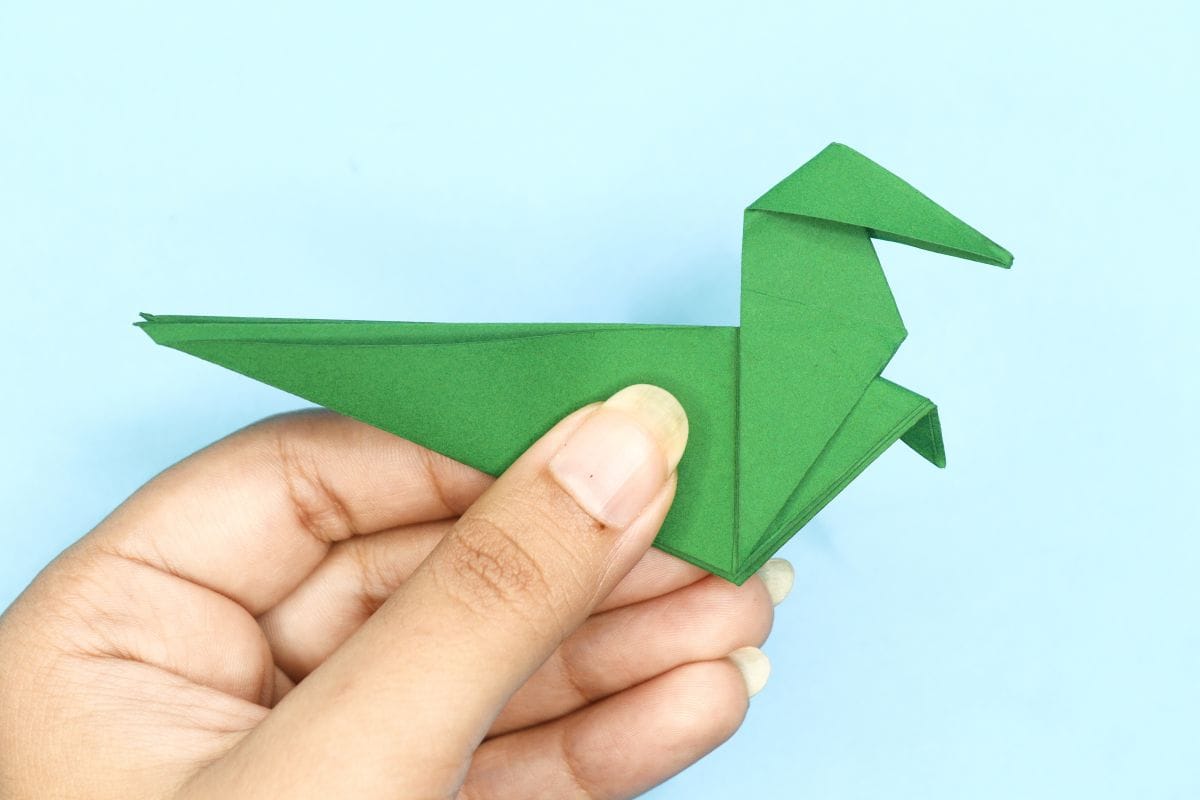
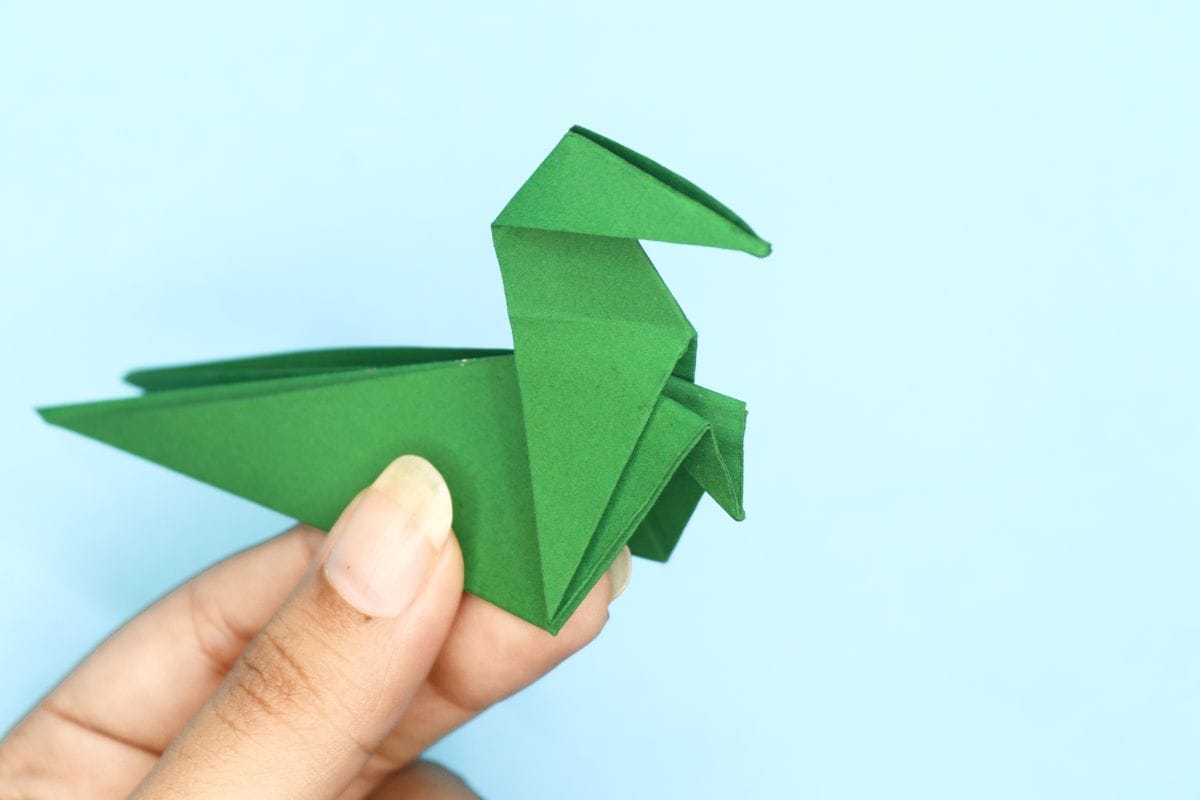
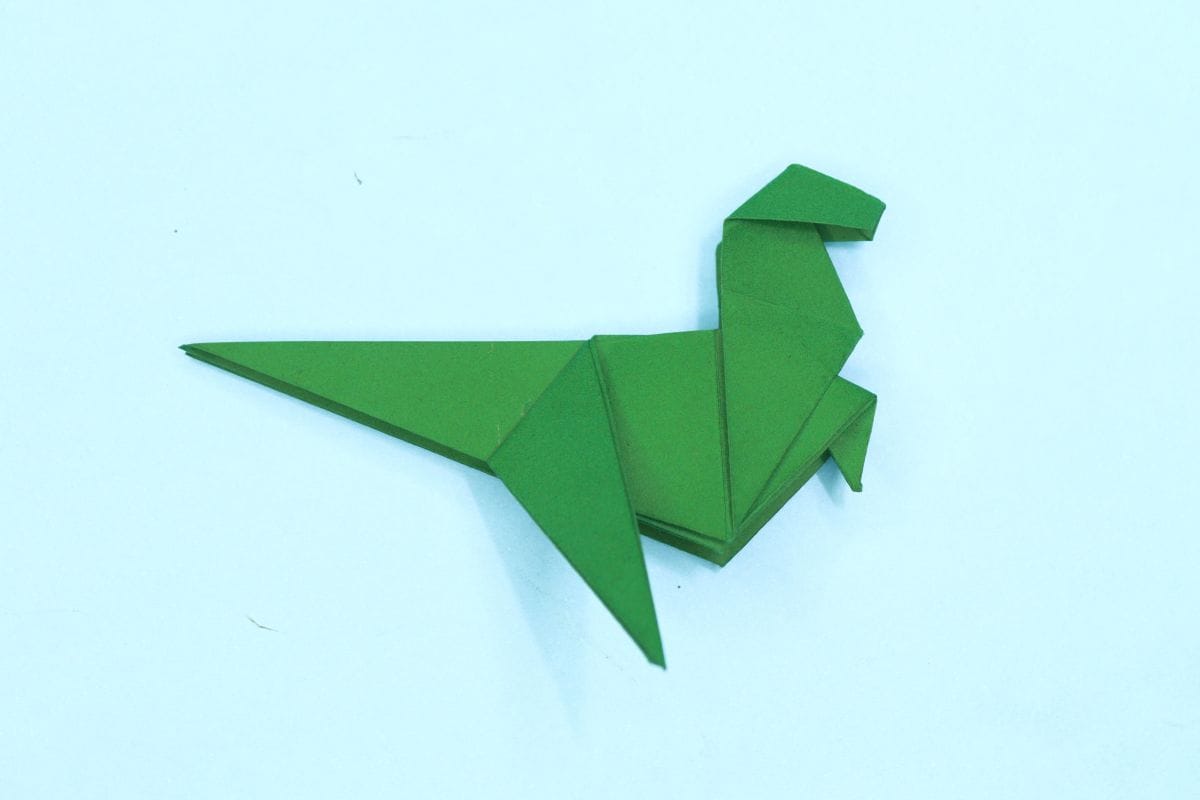
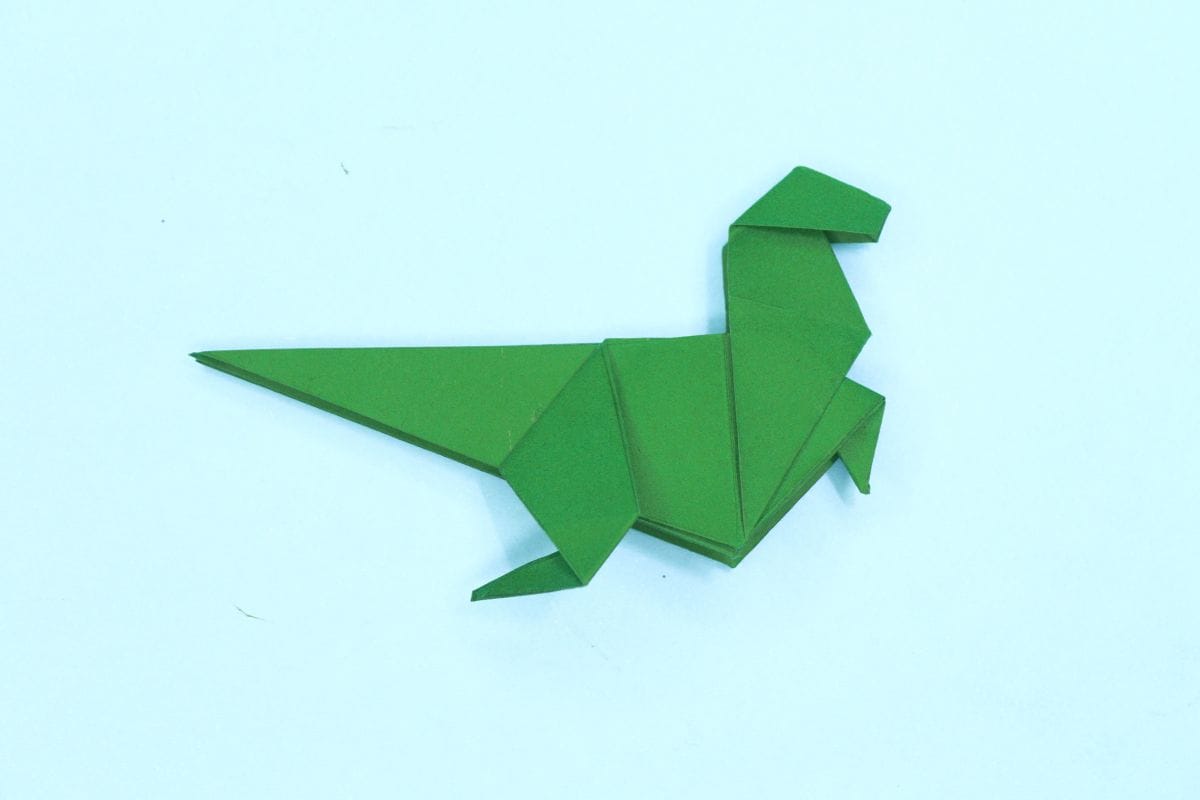
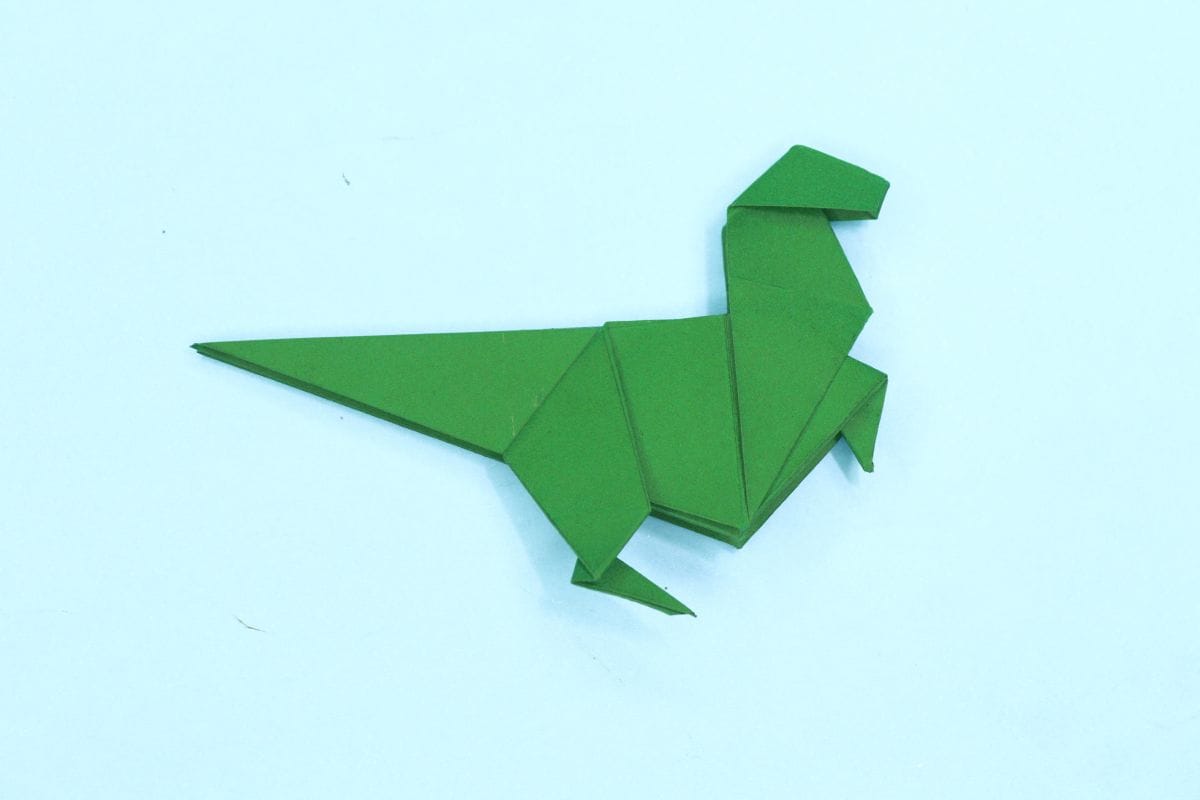
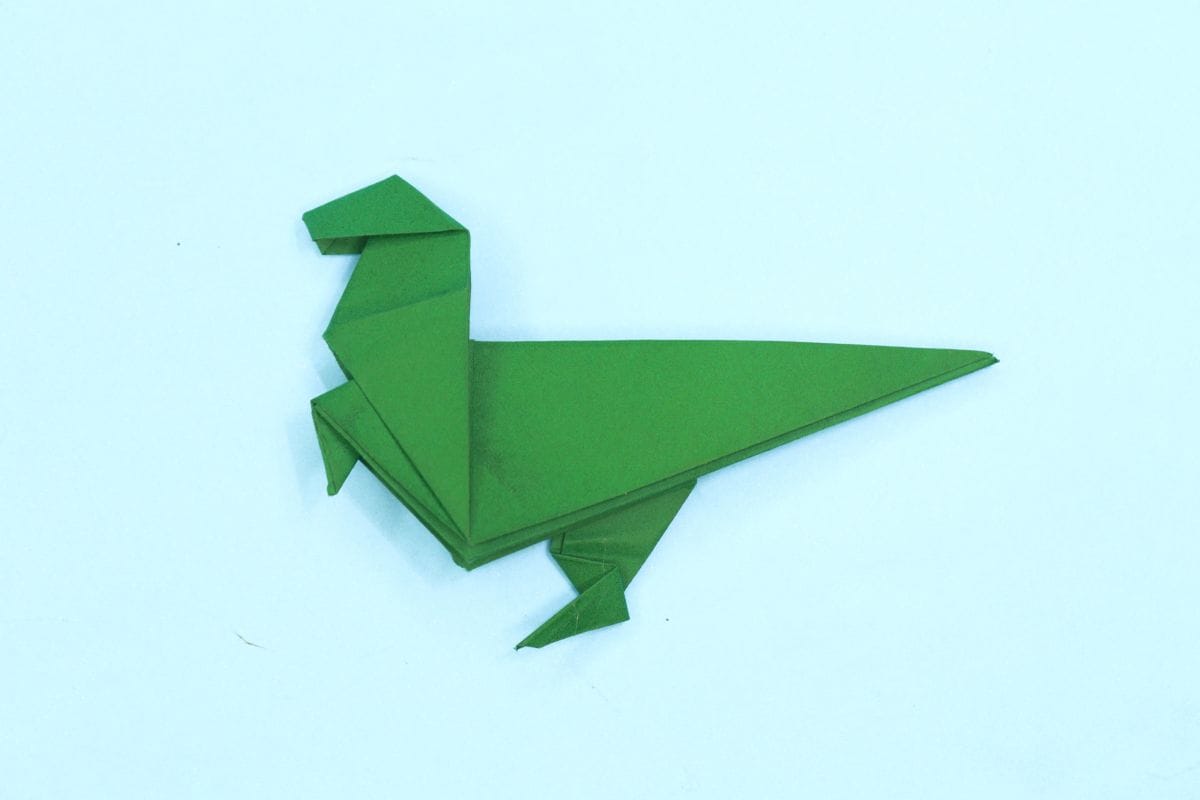
Repeat steps 50 through 52 on the opposite side to complete the other leg. Voilà! Your dinosaur is done.
Share and Comment
We would love to see your creations! Scroll down to the comments section and share a photo of your origami.
Leave a Reply