Turn a single sheet of paper into a beautifully styled goldfish! This elegant design transforms a flat sheet into a graceful fish with eye-catching fins. It’s a fun and creative project that’s perfect for origami lovers and decorative crafts.
How to Make a Stylish Origami Gold Fish
Category: Origami Animals

Difficulty: Intermediate
Learn how to fold a stylish origami goldfish with our clear step-by-step instructions that guide you through every fold.
Step 1
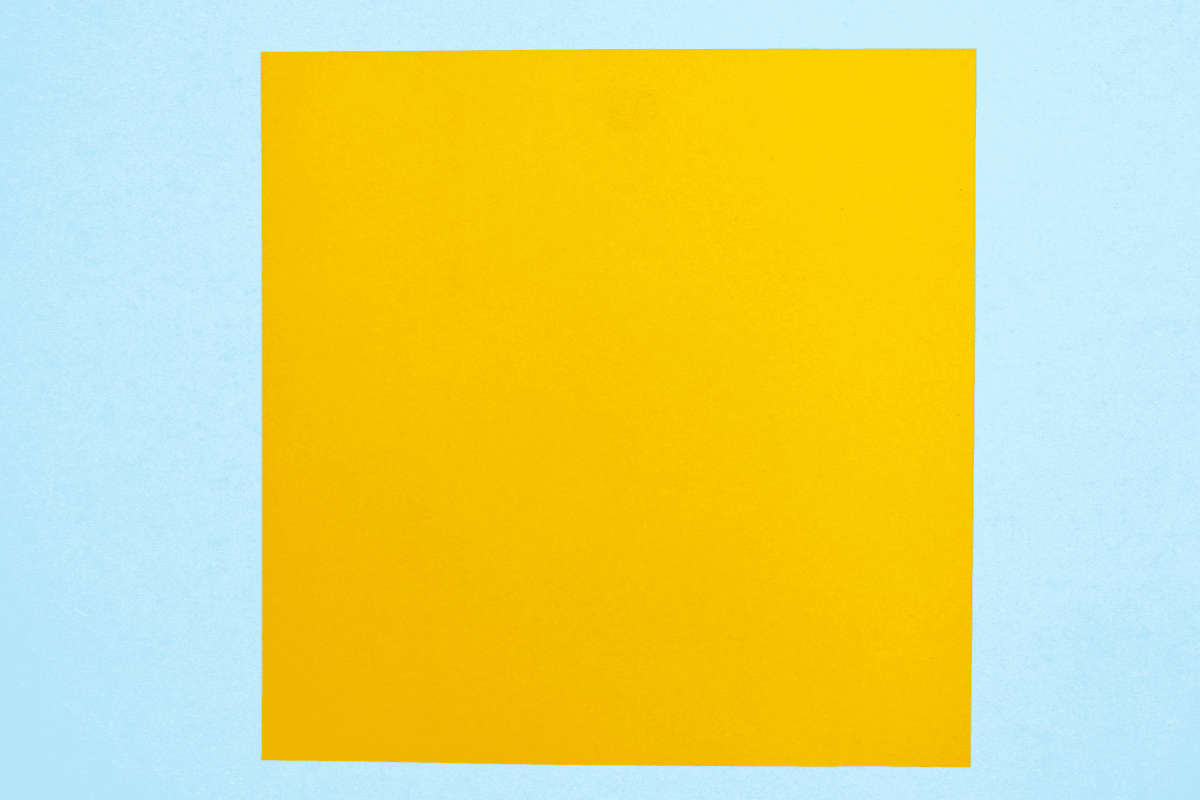
1
Start with a square sheet of origami paper. I am using an 7×7 inches origami paper.
If you only have regular paper, follow these instructions on how to make a square origami paper.
If you only have regular paper, follow these instructions on how to make a square origami paper.
Step 2
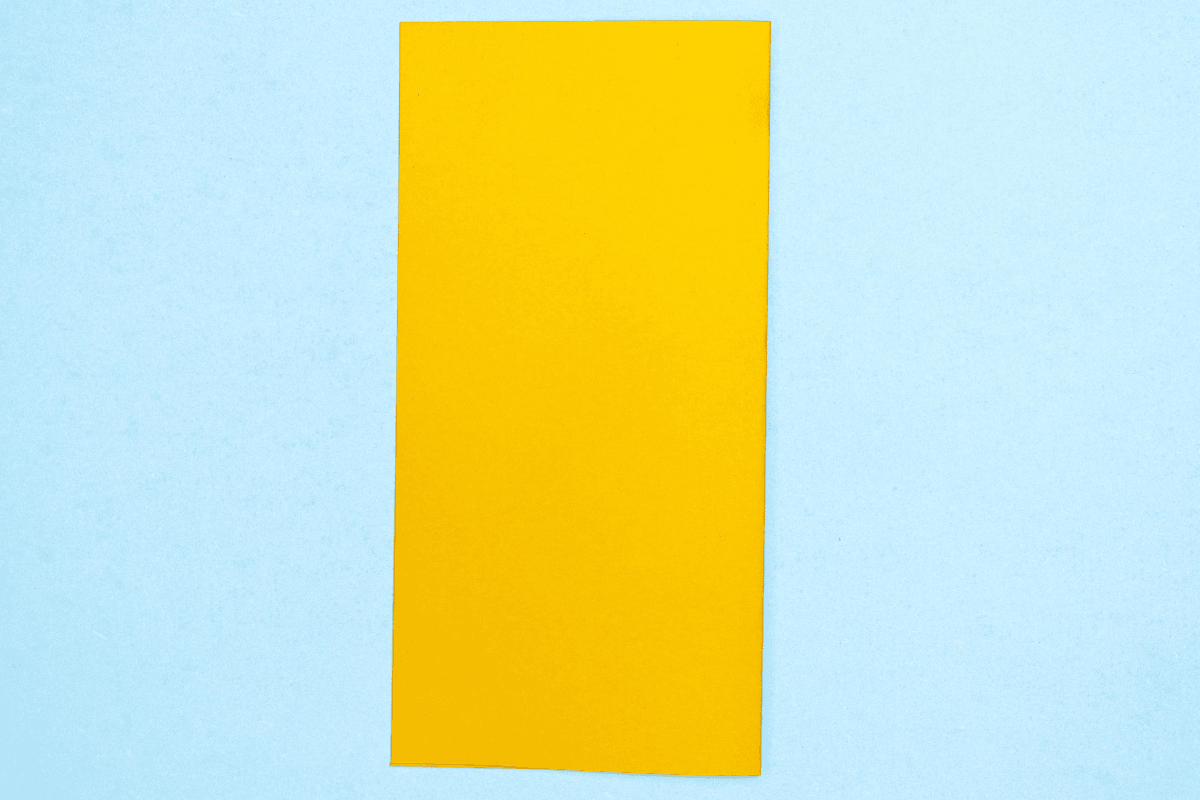
2
Fold the left half over to the right half.
Step 3
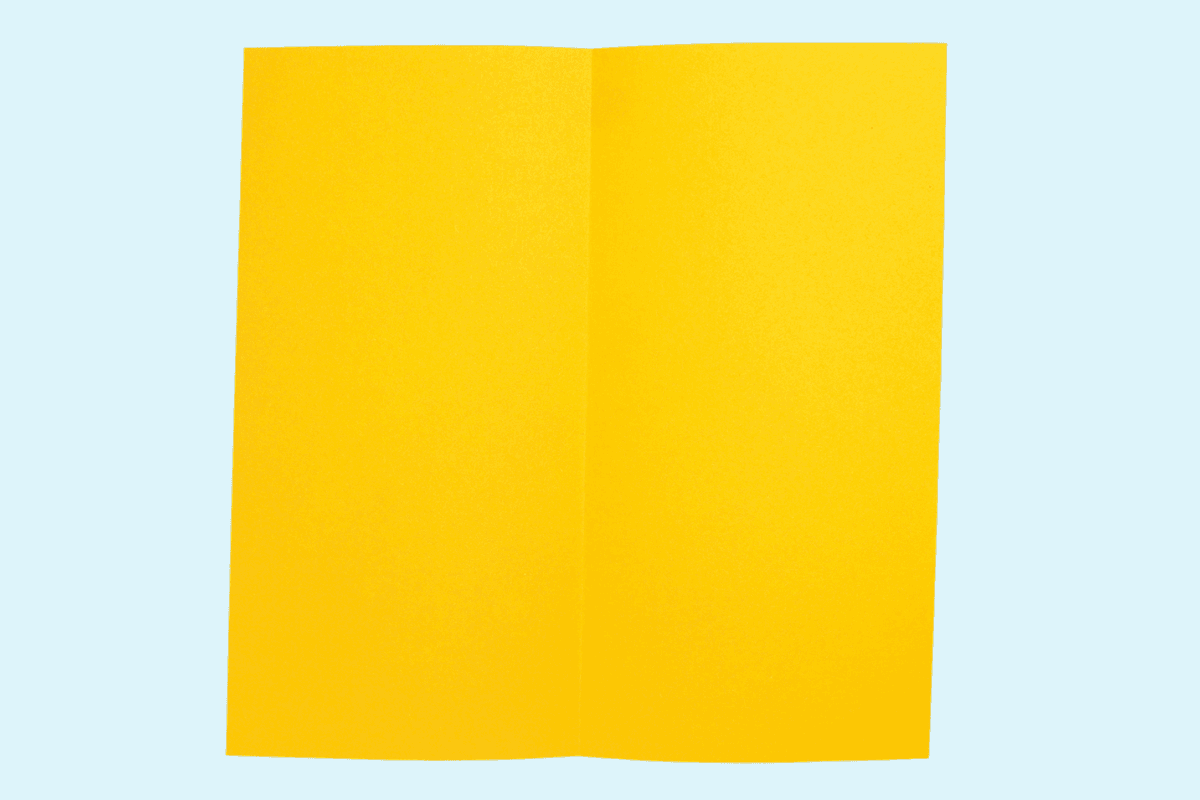
3
Unfold.
Step 4
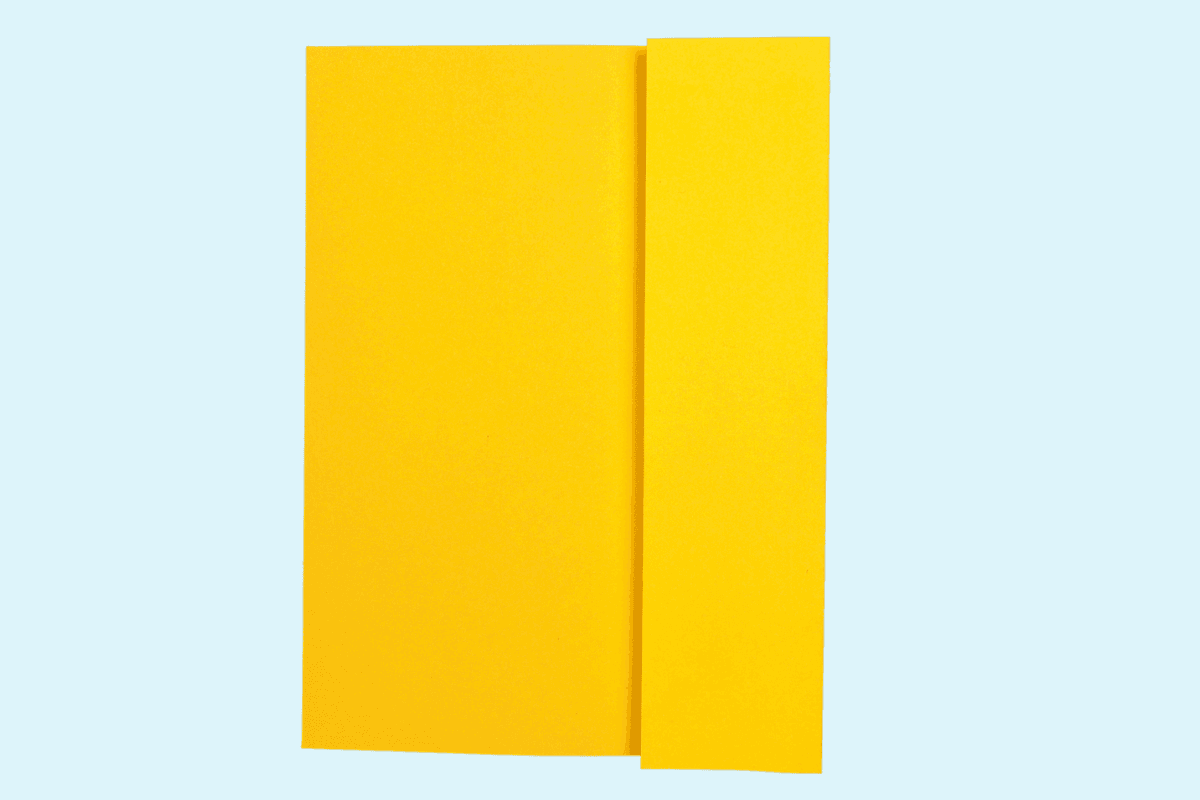
4
Fold the right edge over to the center.
Step 5
5
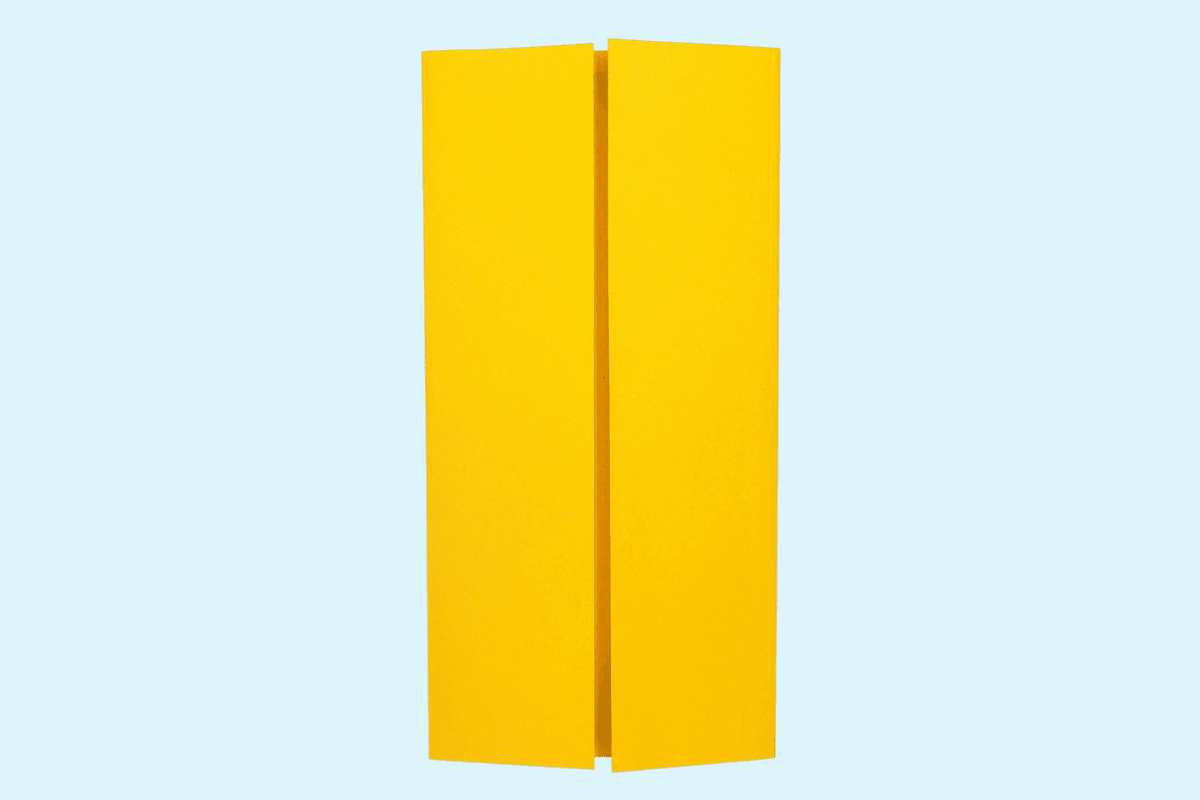
Fold the left edge over to the center.
Step 6
6
Unfold the both sides.
Step 7
7
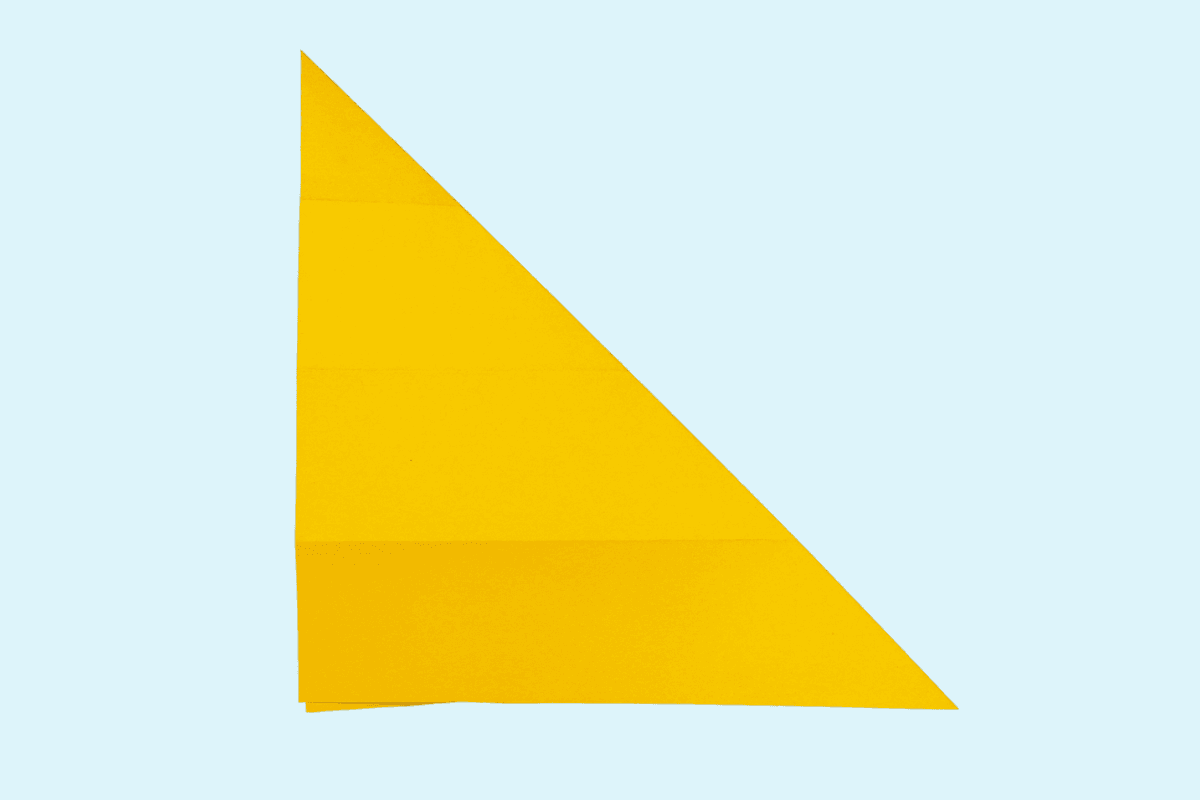
Fold the top right corner to the bottom left corner.
Step 8
8
Unfold.
Step 9

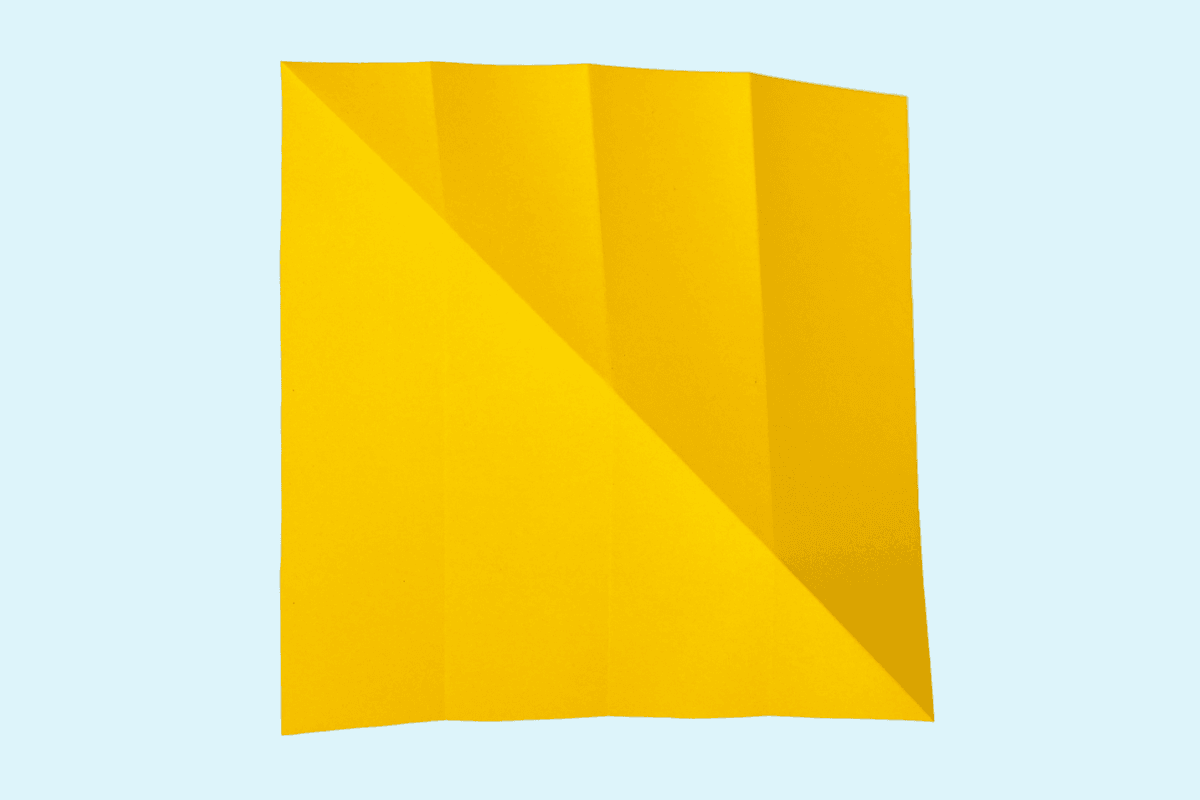
9
Fold the top left corner to the bottom right corner.
Step 10

10
Unfold and rotate the paper so that the vertical creases now appear horizontal.
Step 11
11
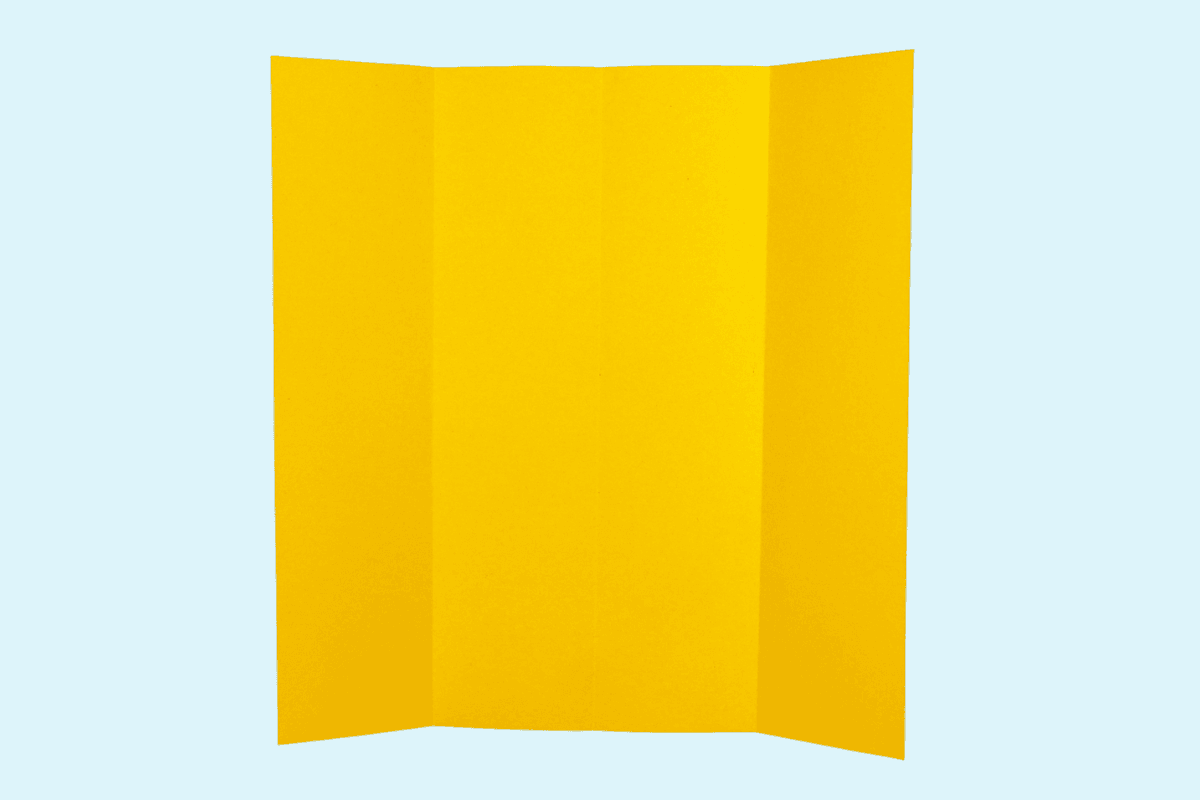
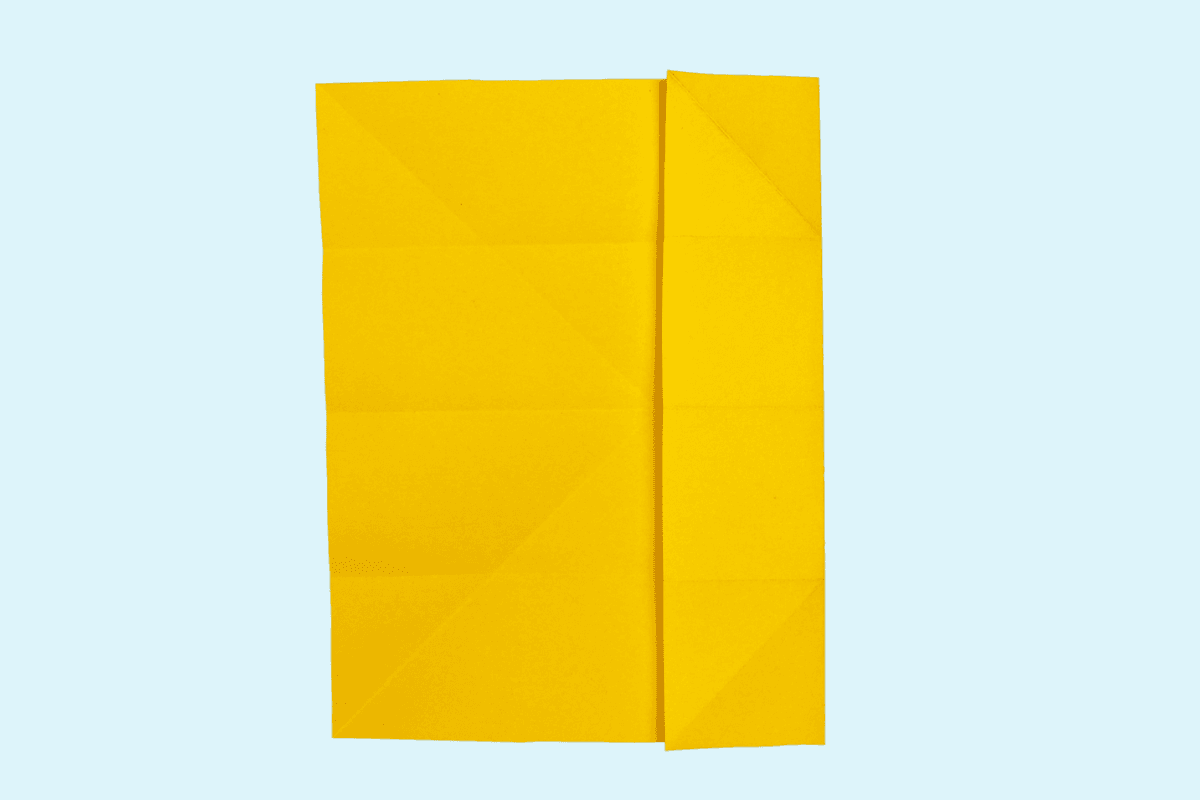
Fold the right edge over to the center.
Step 12

12
Fold the left edge over to the center.
Step 13
13
Unfold.
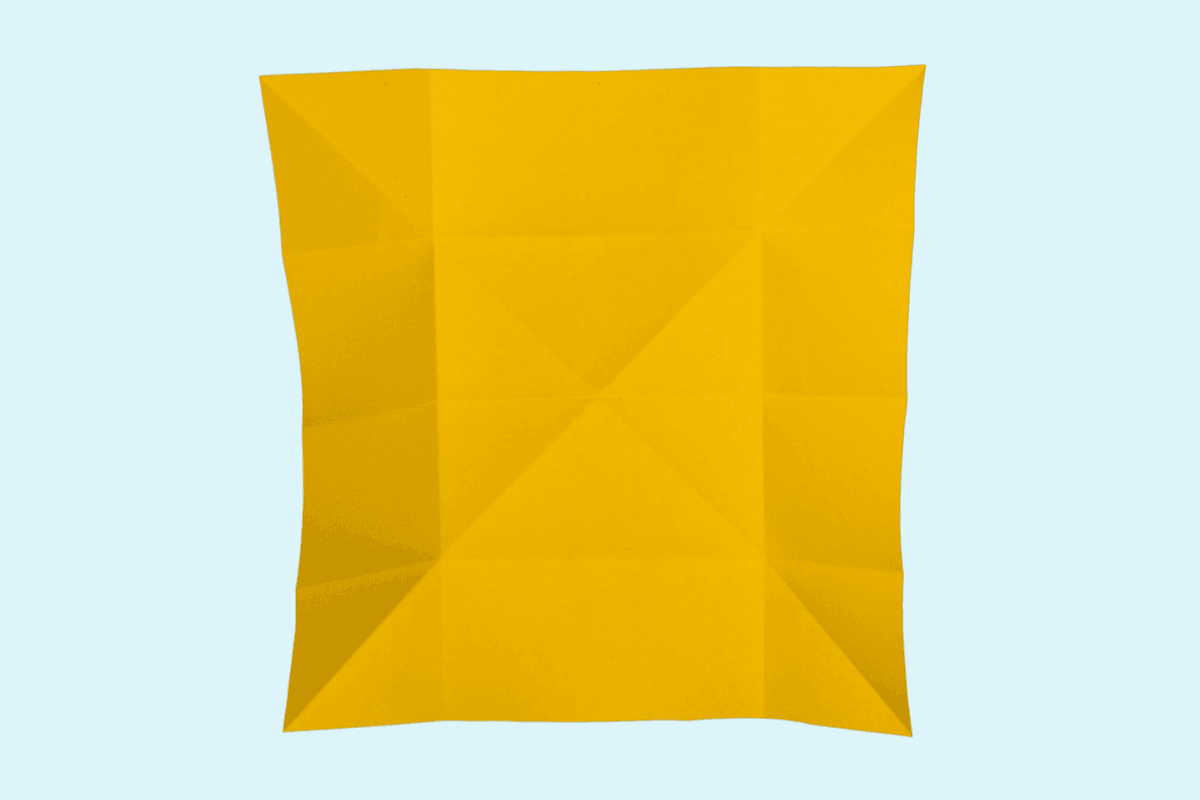
Step 14
14
Bring the top and right edges together.
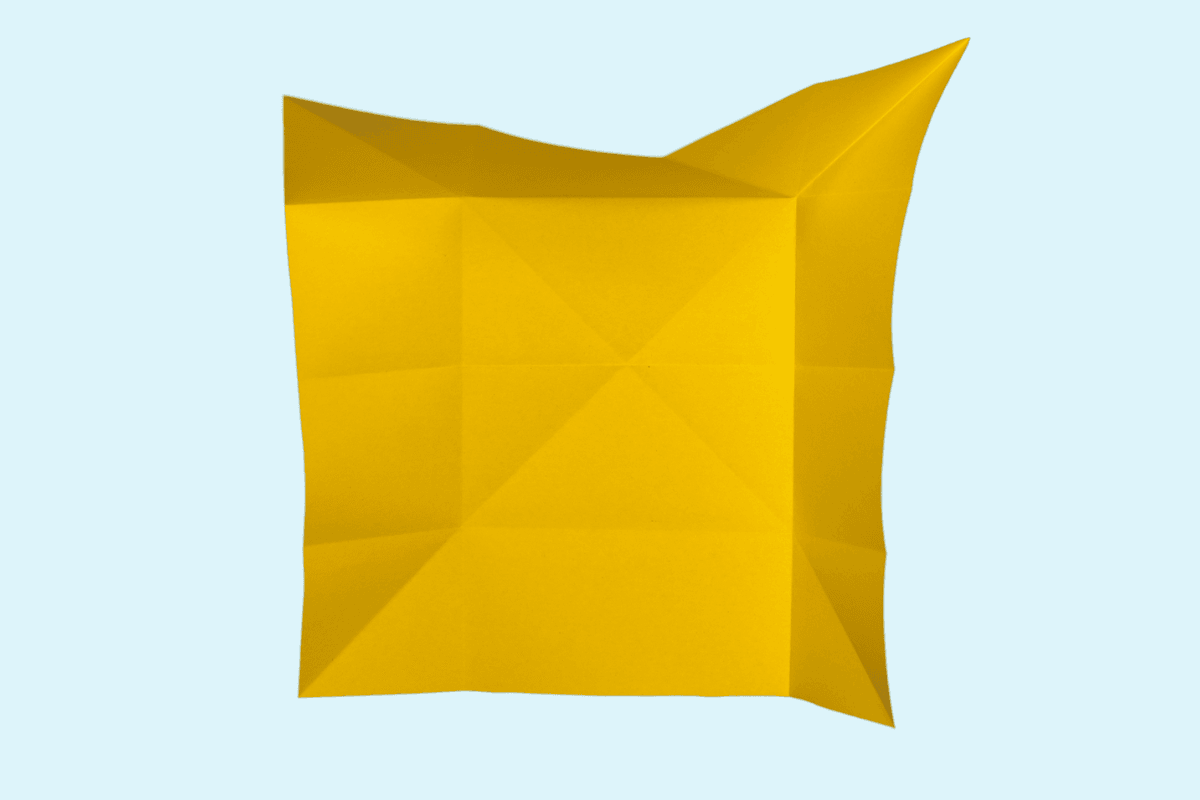
Step 15
15
Pinch the edges together to create a flap.
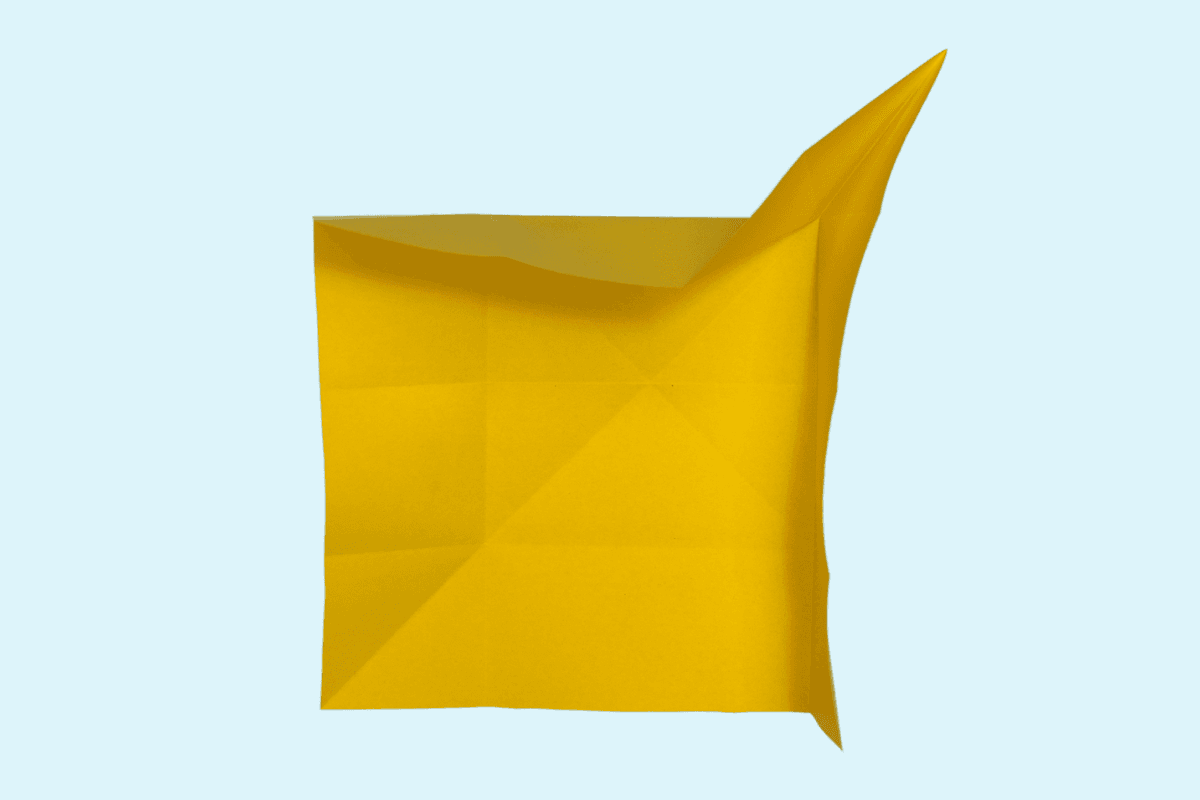
Step 16
16
Move the flap up.
Step 17

17
Flatten the fold.
Step 18
18
Repeat steps 14 through 17 on the left side as well.
Step 19
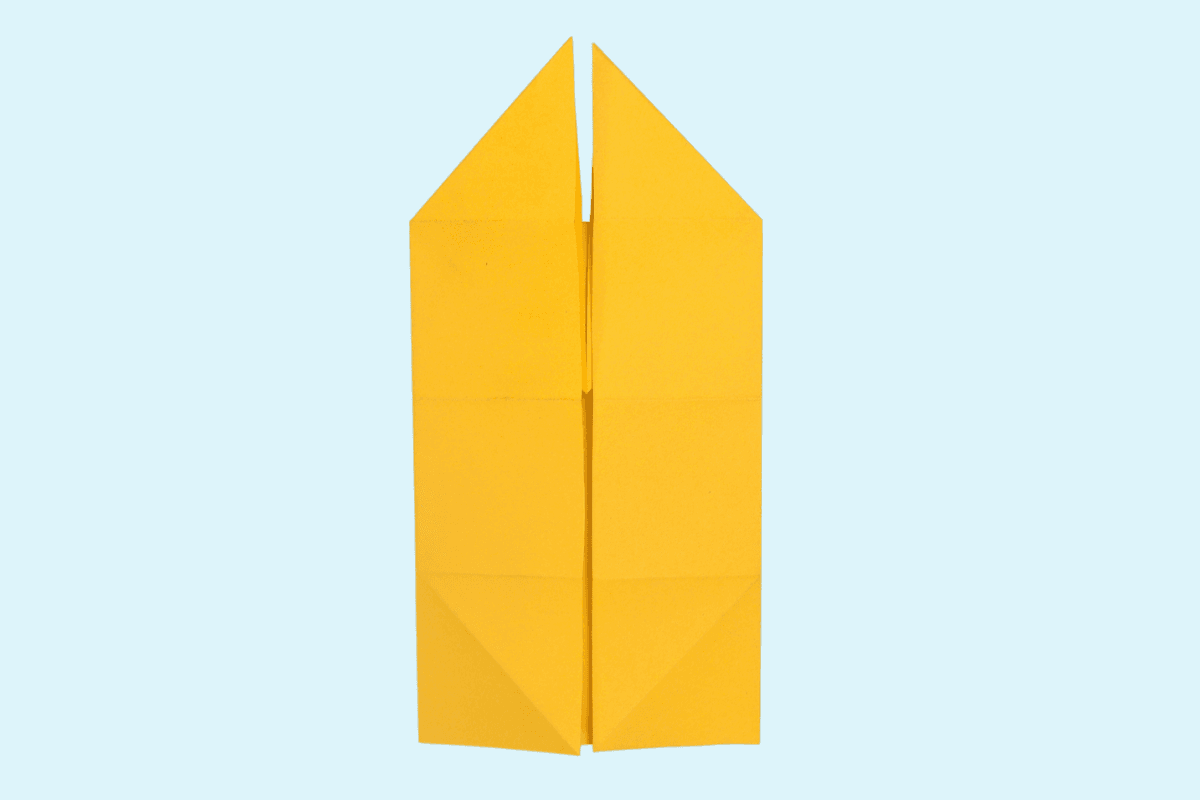
19
Open the bottom left fold.
Step 20
20
Open the bottom right fold.
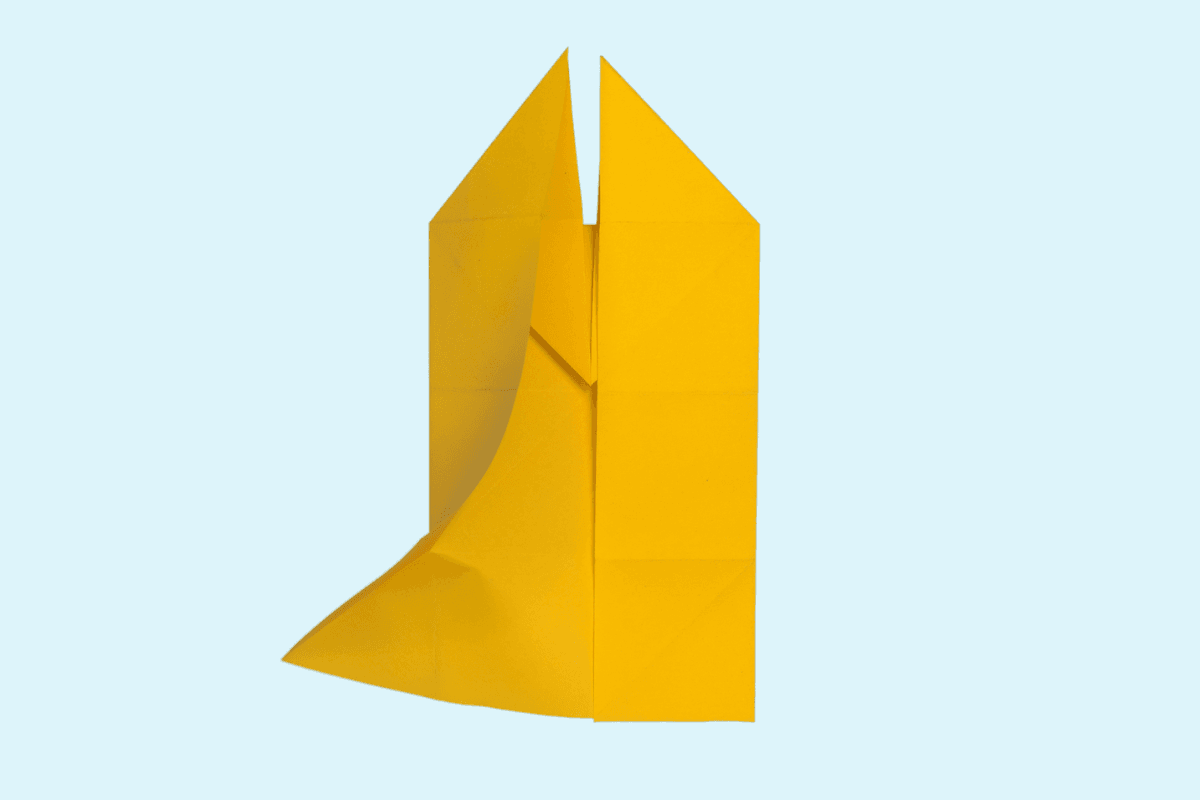
Step 21
21
Bring the bottom edge up.
Step 22
22
Flatten the fold.
Step 23

23
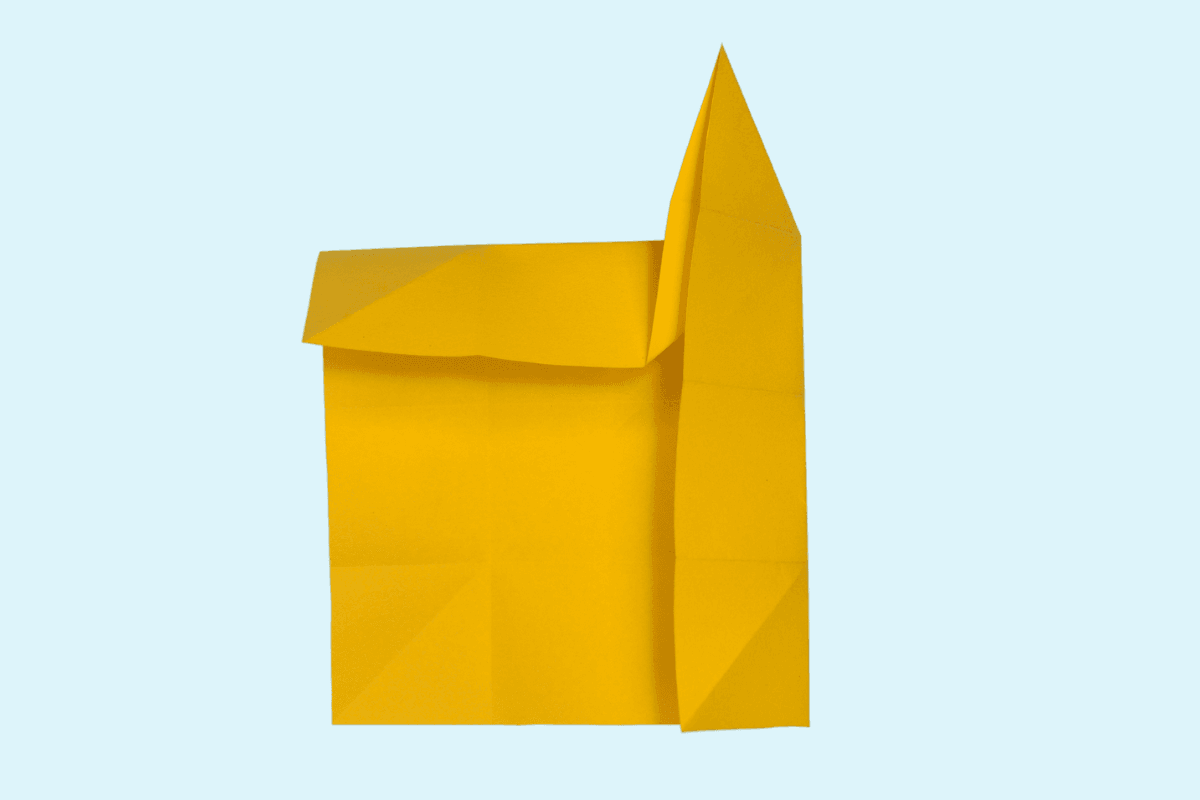
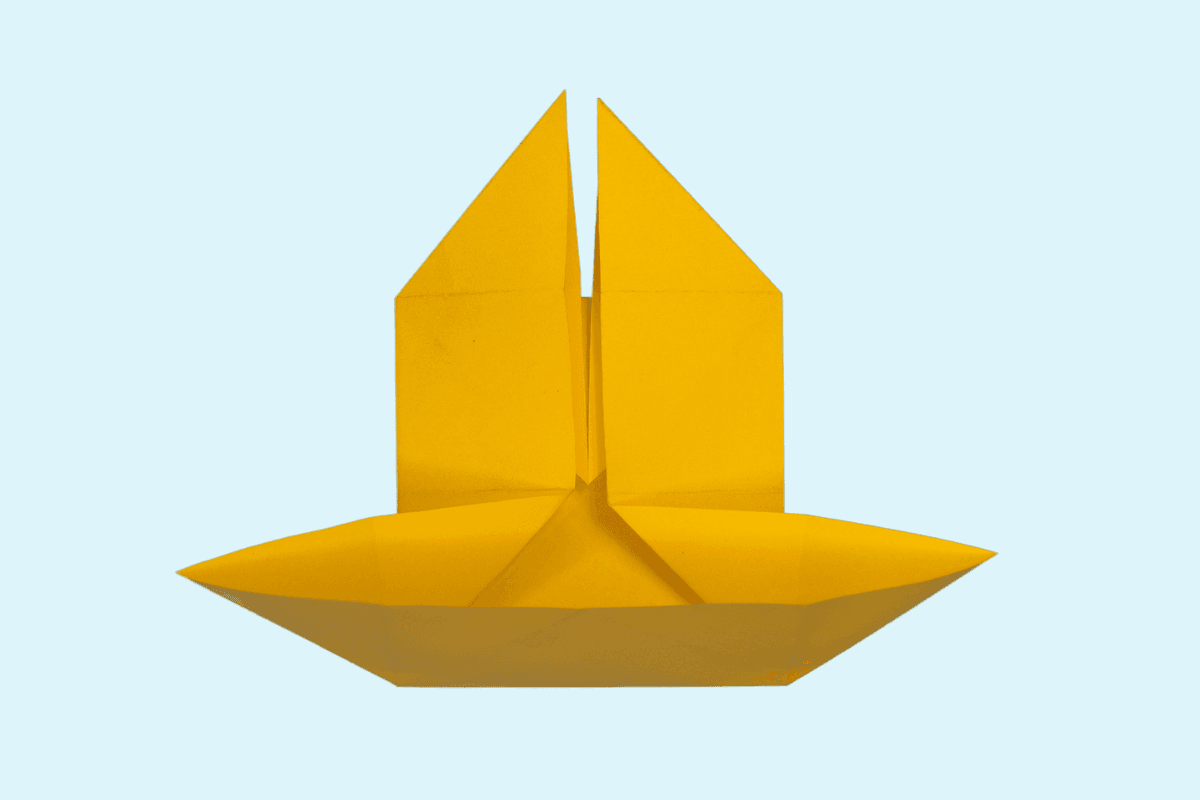
Rotate the paper as showm
Step 24

24
Fold the top edge down so that it meets the mid crease.
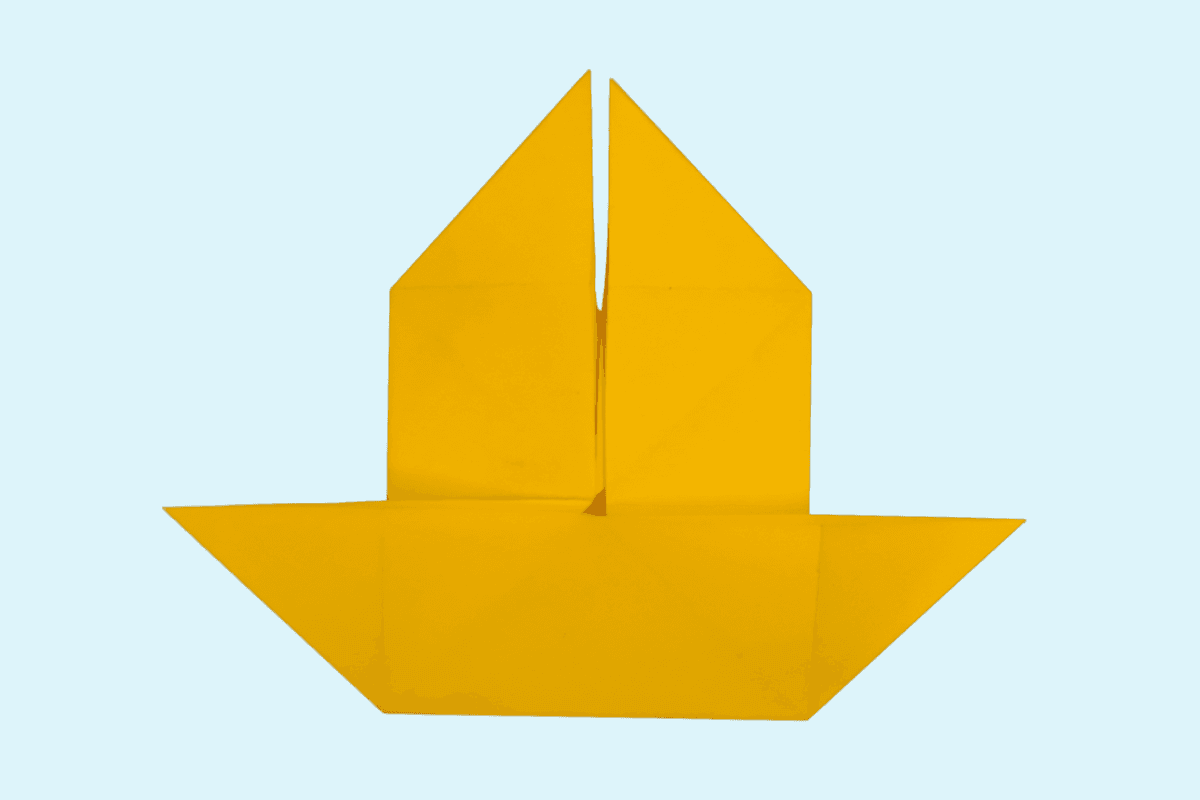
Step 25
25
Fold up the bottom triangle.
Step 26
26
Fold the bottom edge up so that it meets the mid crease.
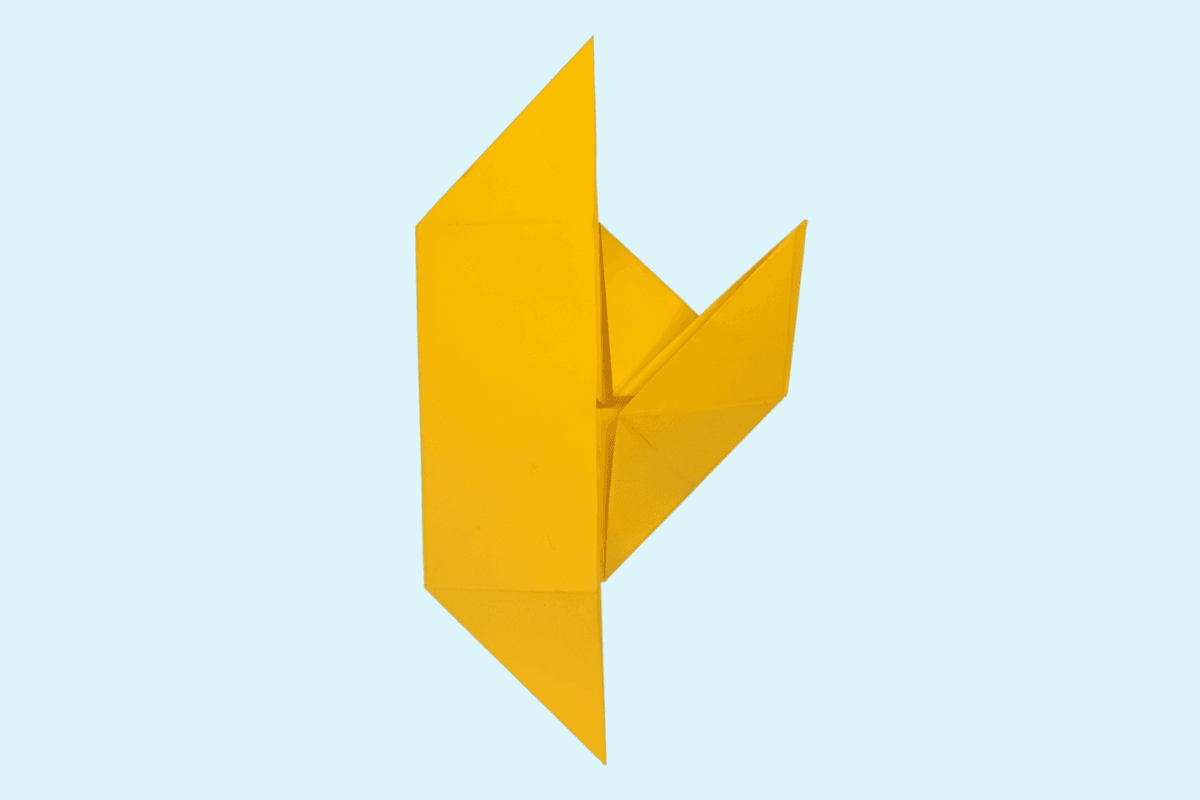
Step 27
27
Fold down the top triangle.
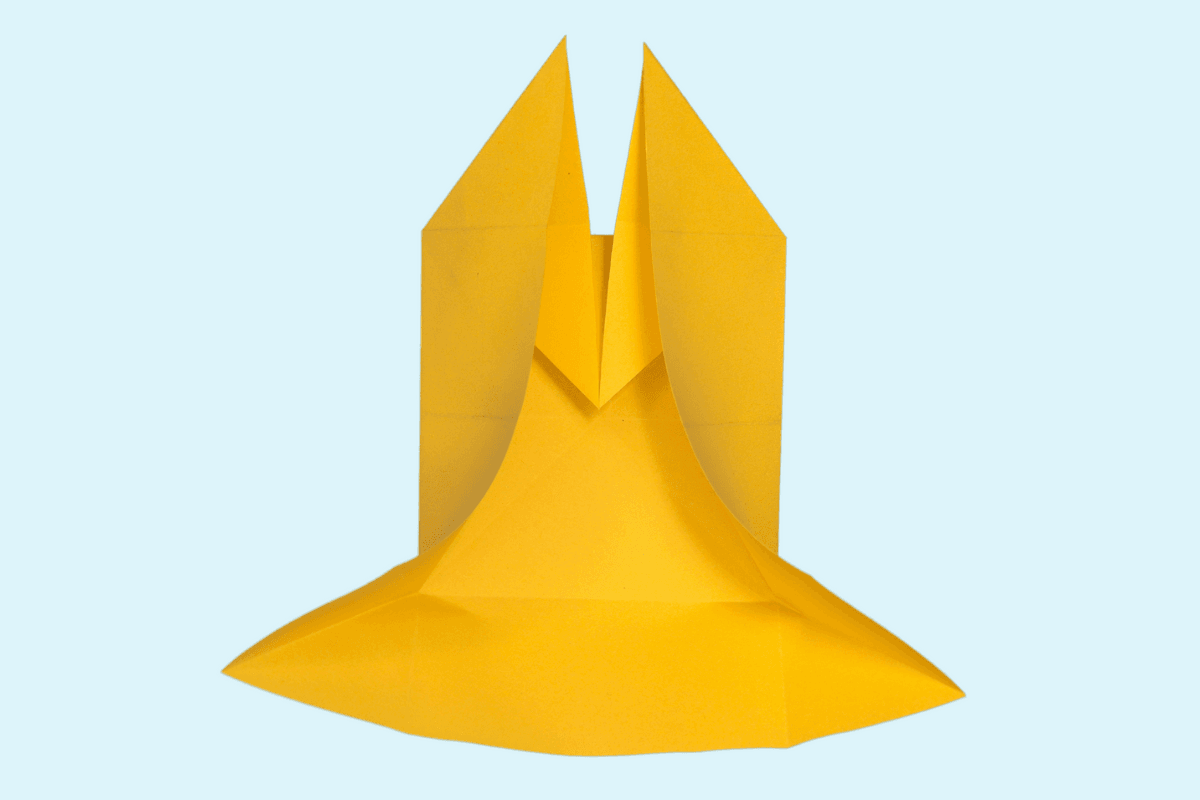
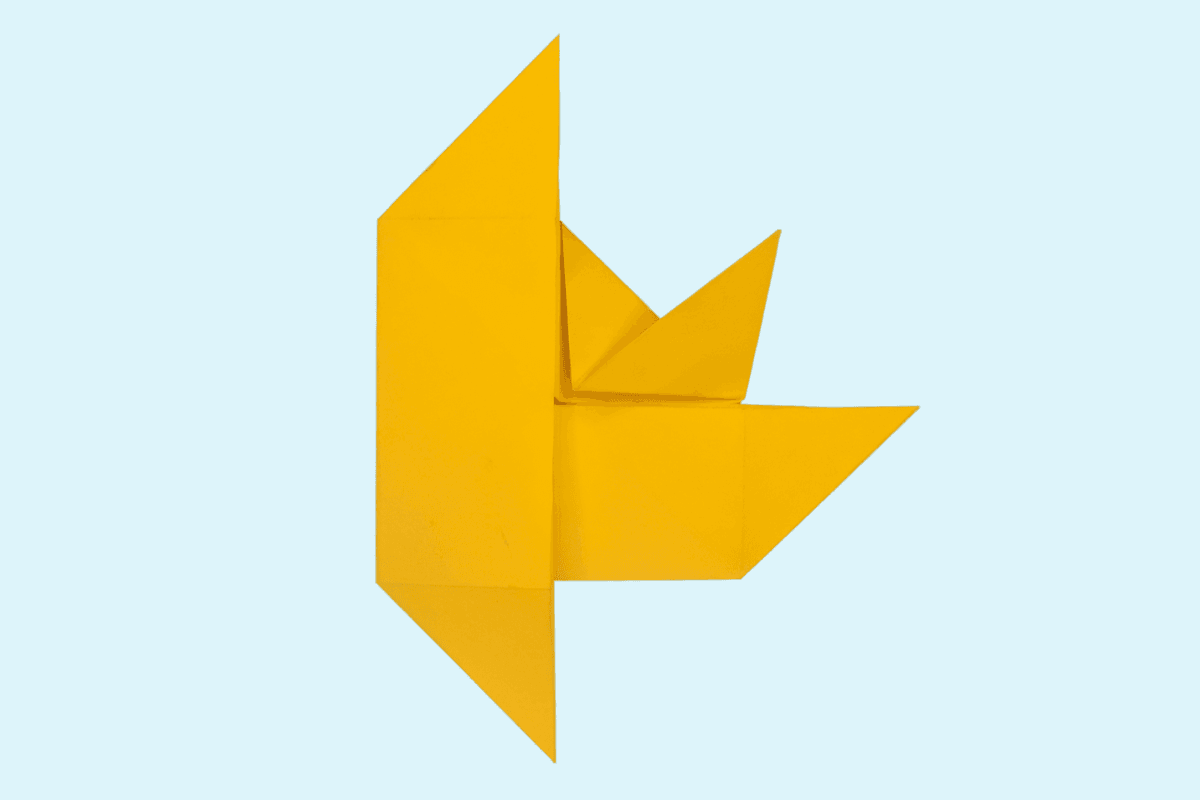
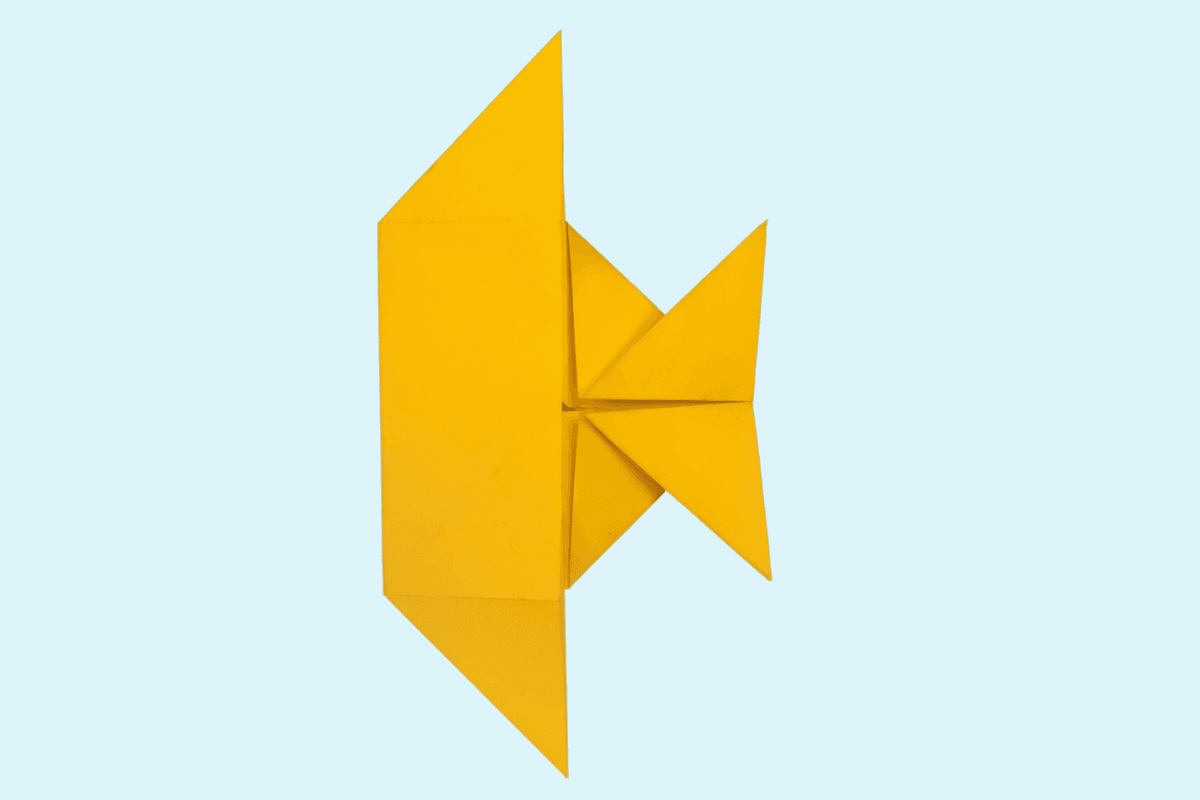
Step 28
28
To create the fish’s fins, fold up the lower left edge toward the center.
Step 29
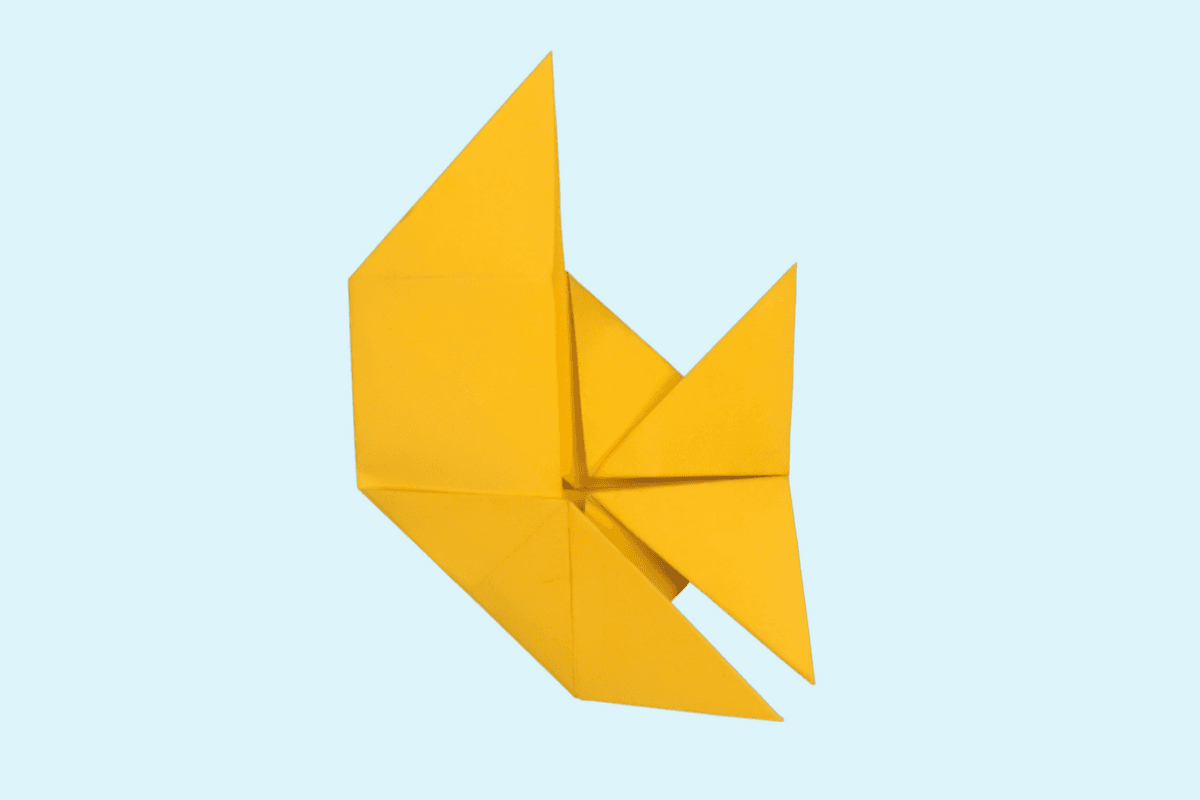
29
To create the fish’s fins, fold down the upper left edge toward the center.
Step 30

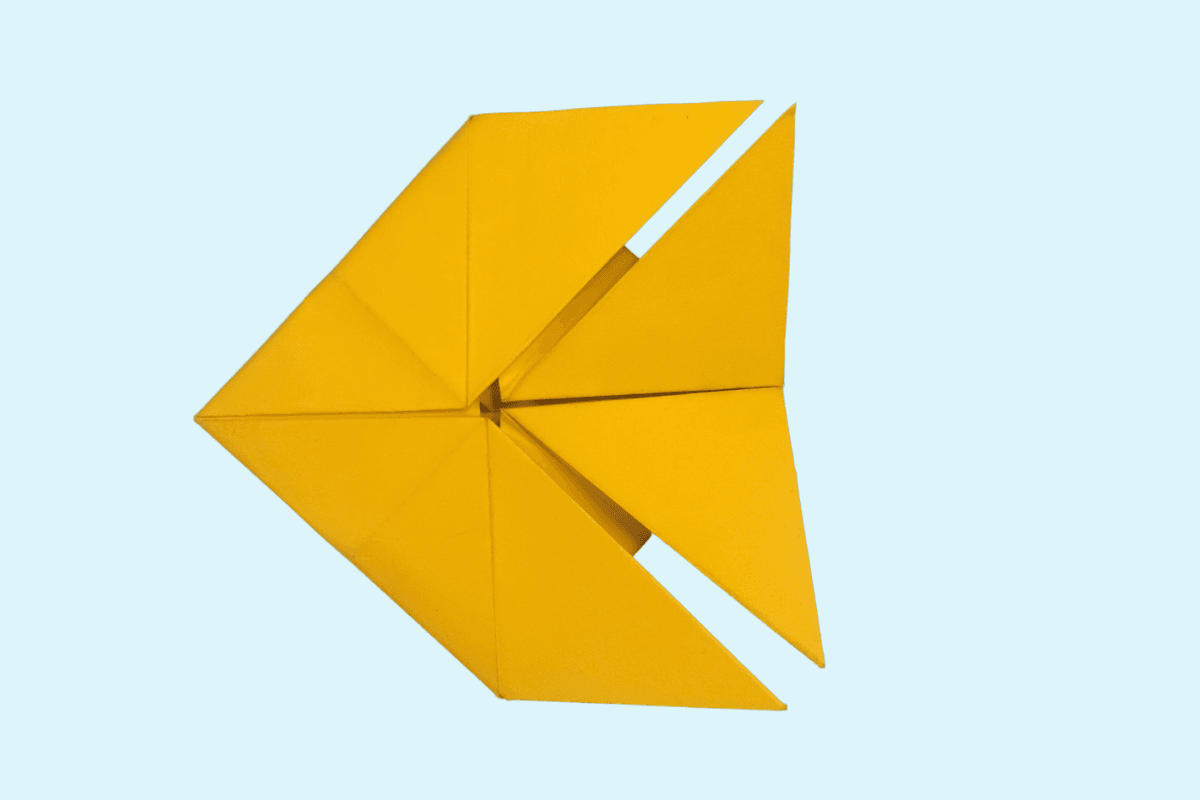
30
Turn the model over horizontally.
Step 31
31
Draw the eyes and your beautiful gold fish is ready for its first swim. 🙂
Share and Comment
We would love to see your creations! Scroll down to the comments section and share a photo of your origami.
Leave a Reply