How to Make an Origami Leaf

Origami leaf final step
Difficulty: Intermediate
Celebrate the seasons with an Origami leaf! Follow our easy steps to fold this charming paper design. Great for crafts and displays!

Did you know that leaves help produce the oxygen we breathe? So the next time you’re walking down the street or passing by plants and flowers, remind yourself not to pick them. Every leaf you take away reduces the amount of oxygen it can create.

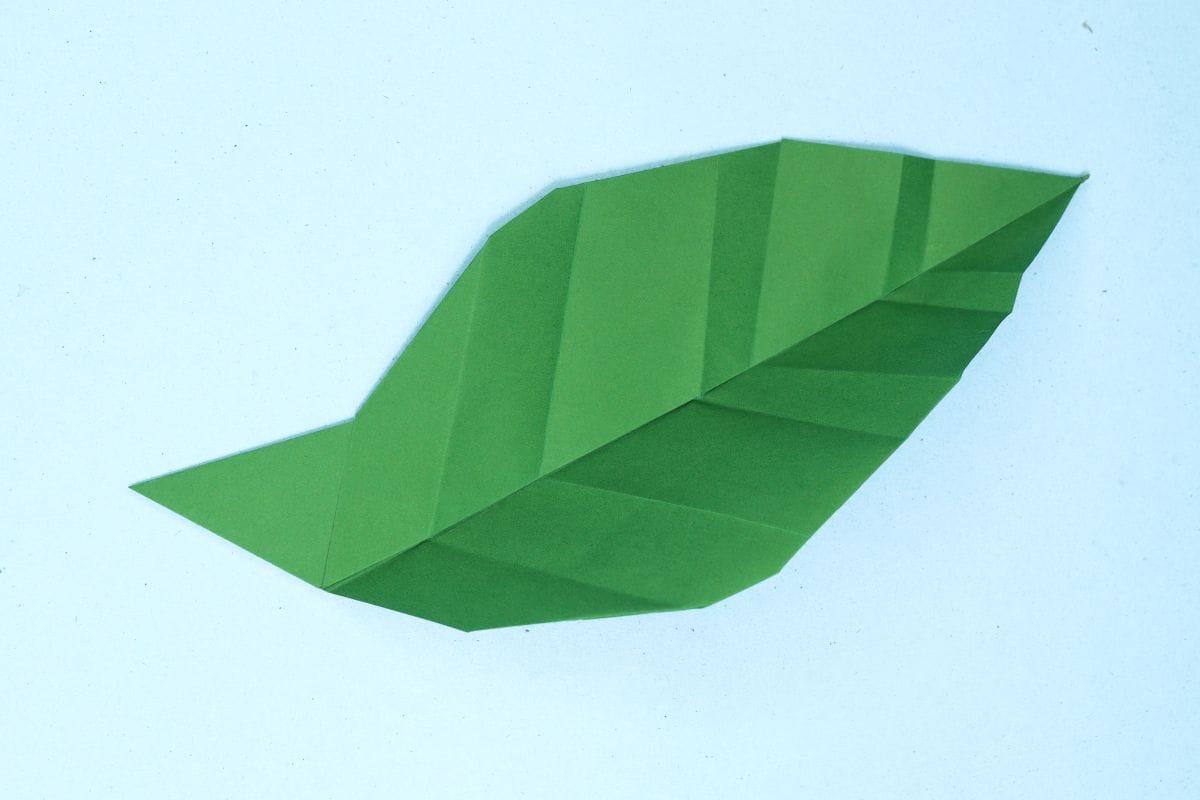
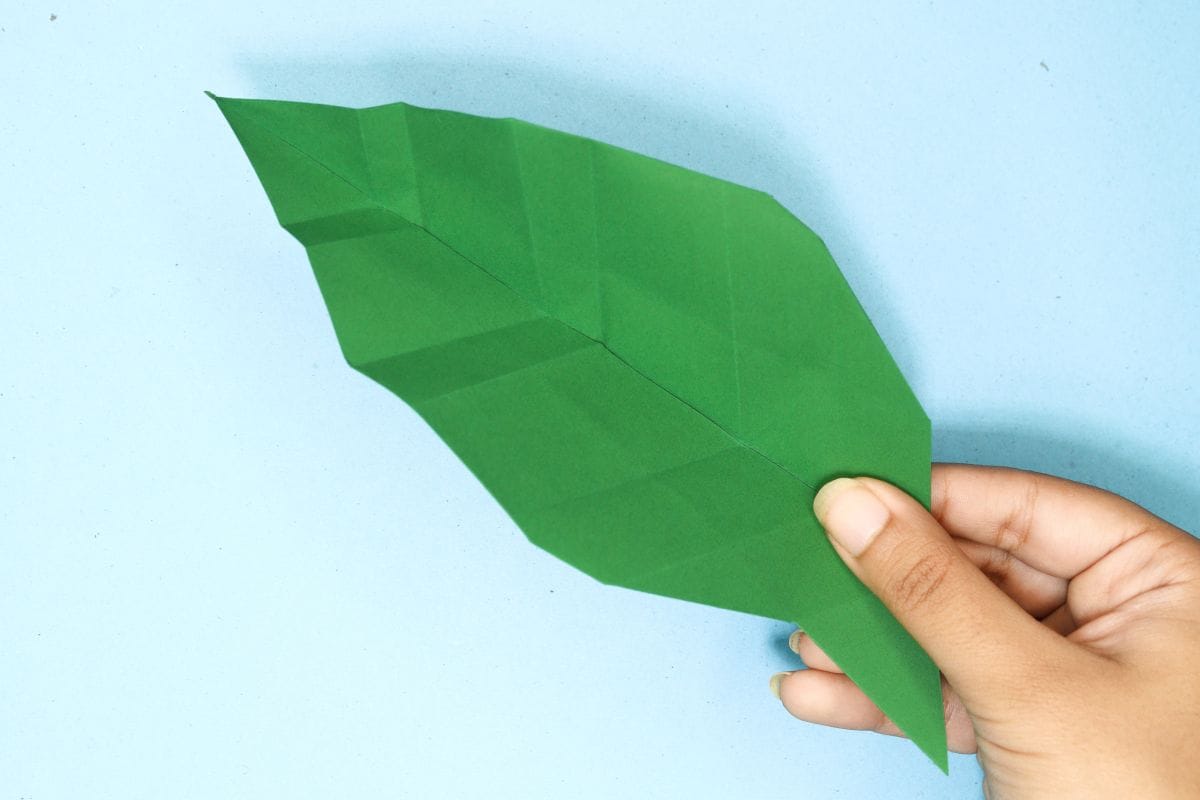
Instead of picking real leaves, you can make your very own origami leaf and decorate any space you like. Place them in your bedroom, classroom, office, or even in your children’s rooms.

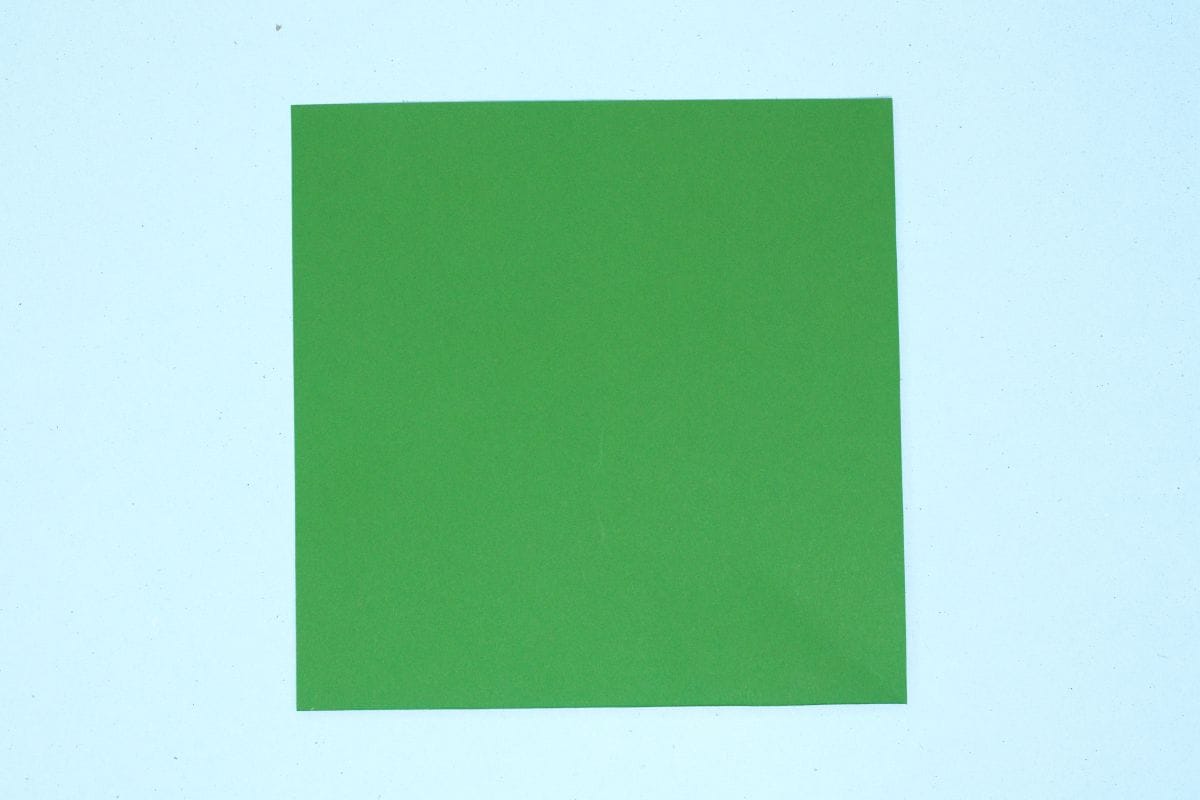
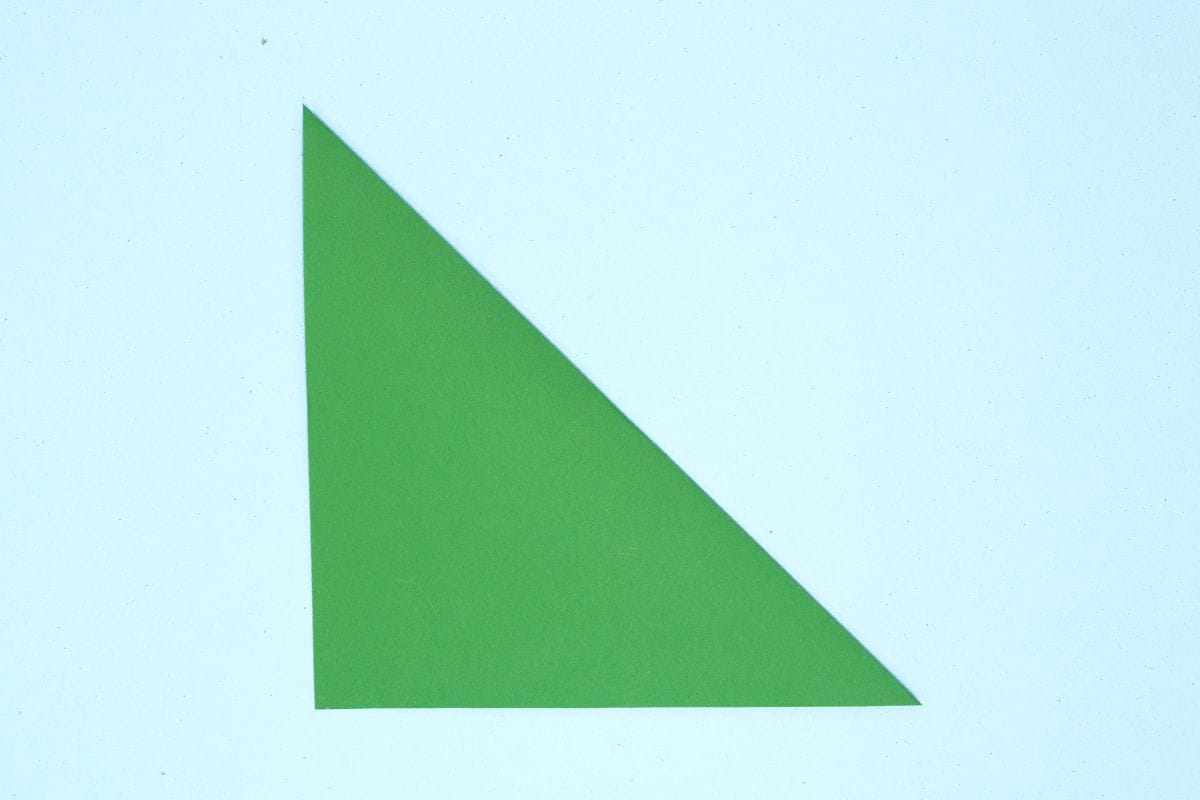
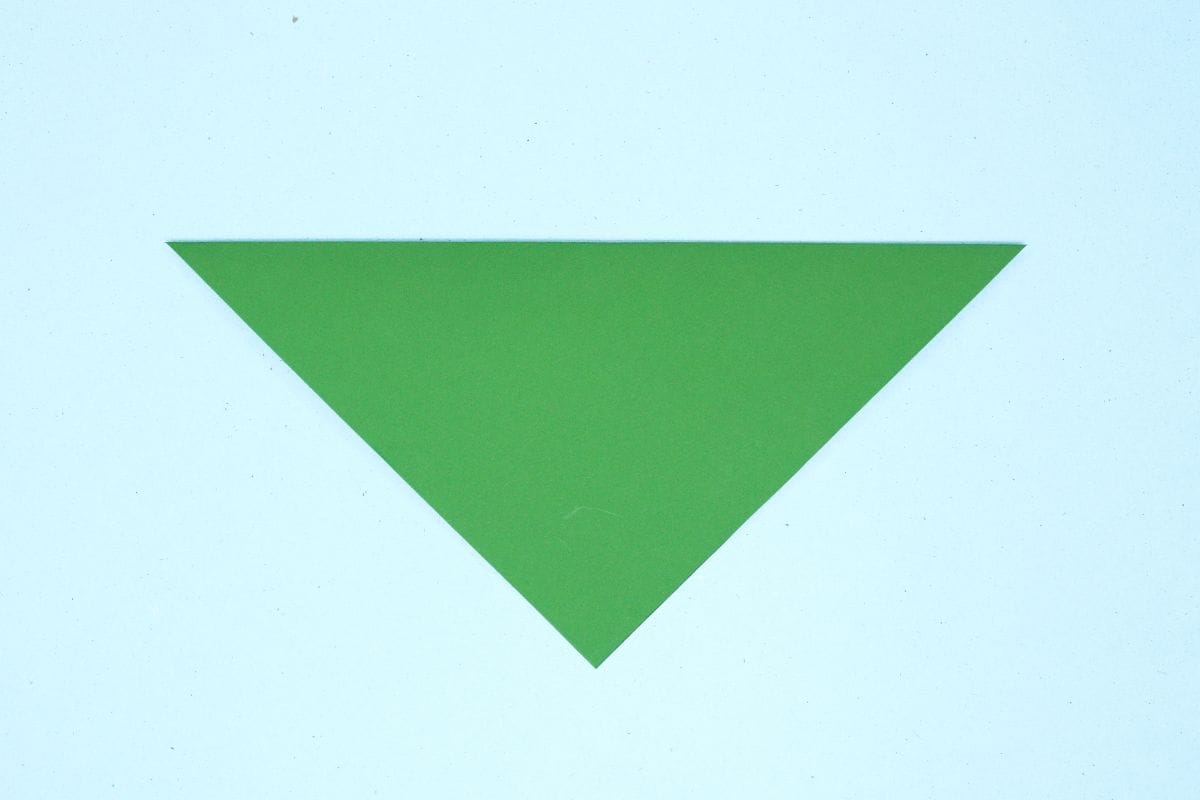
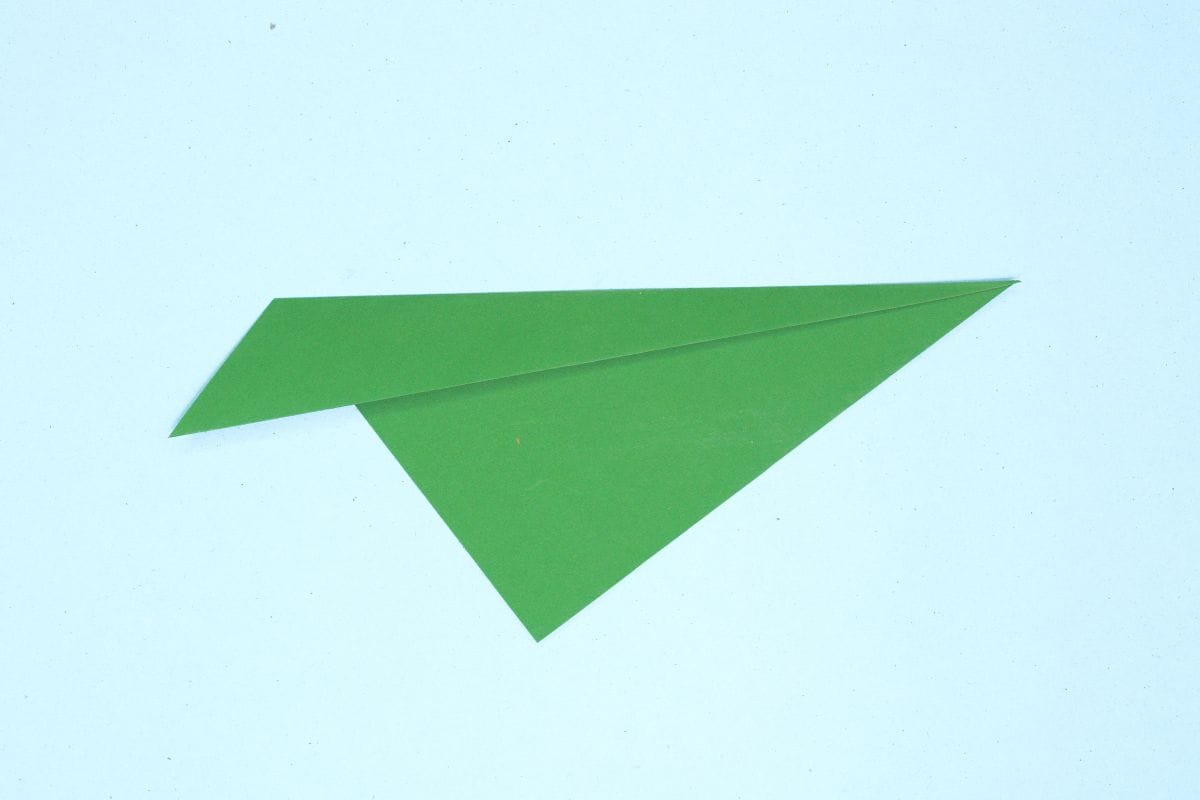
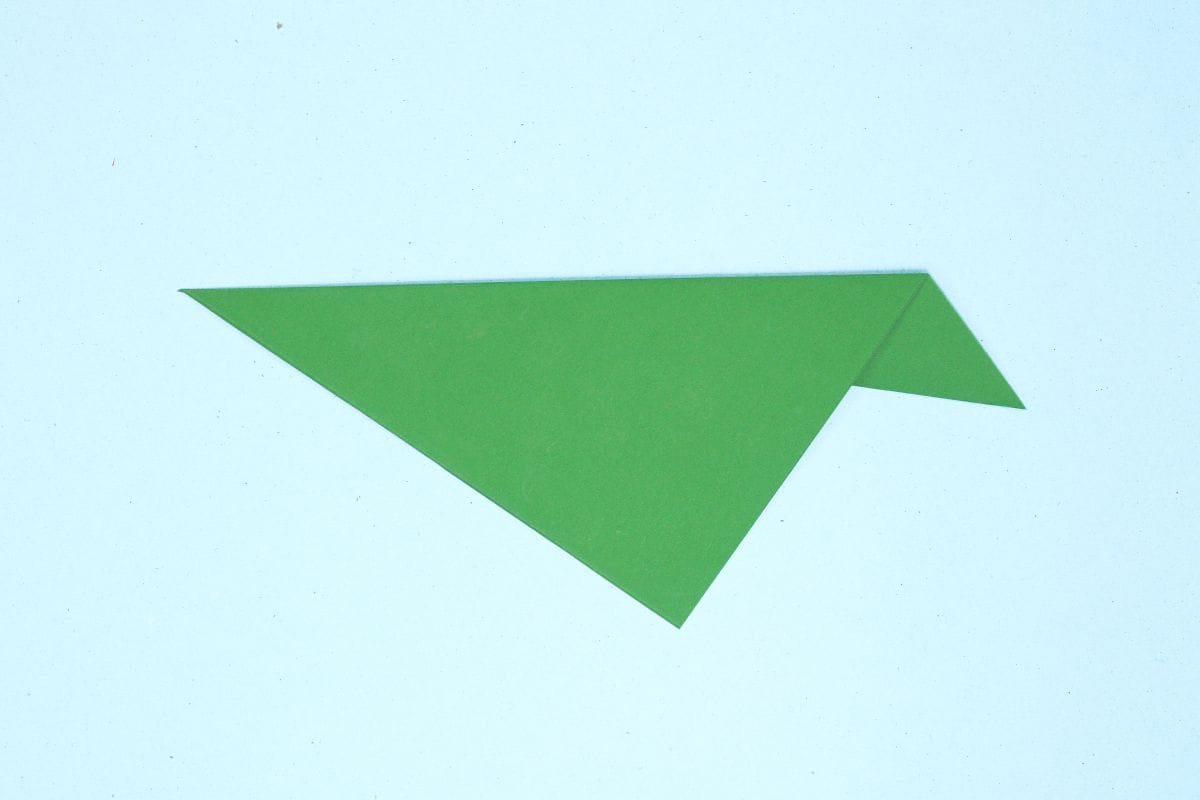
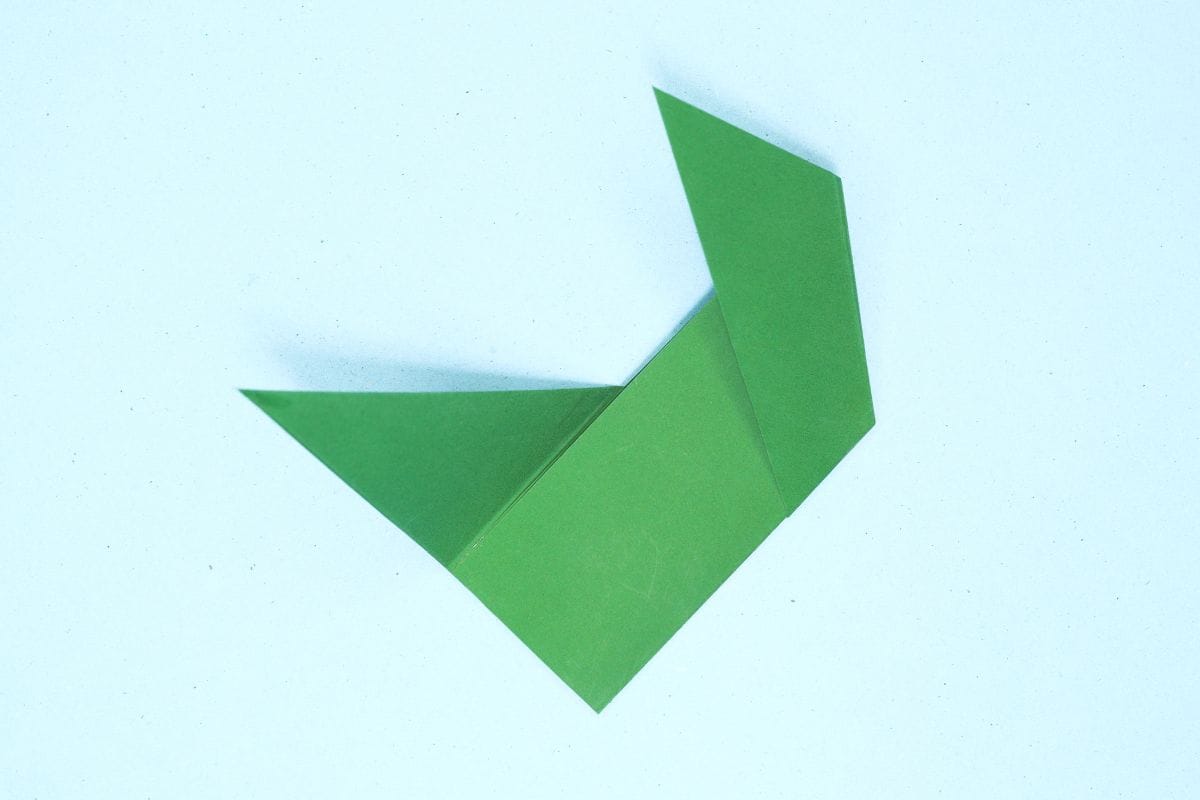
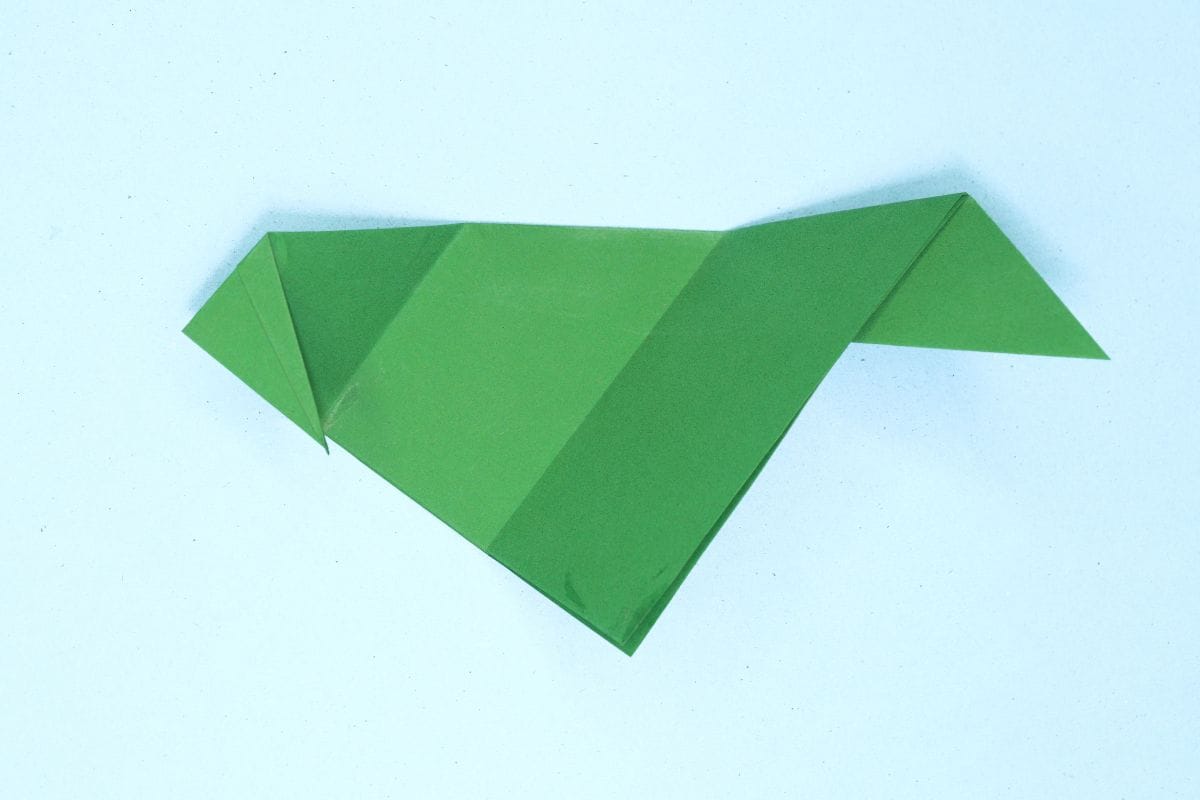
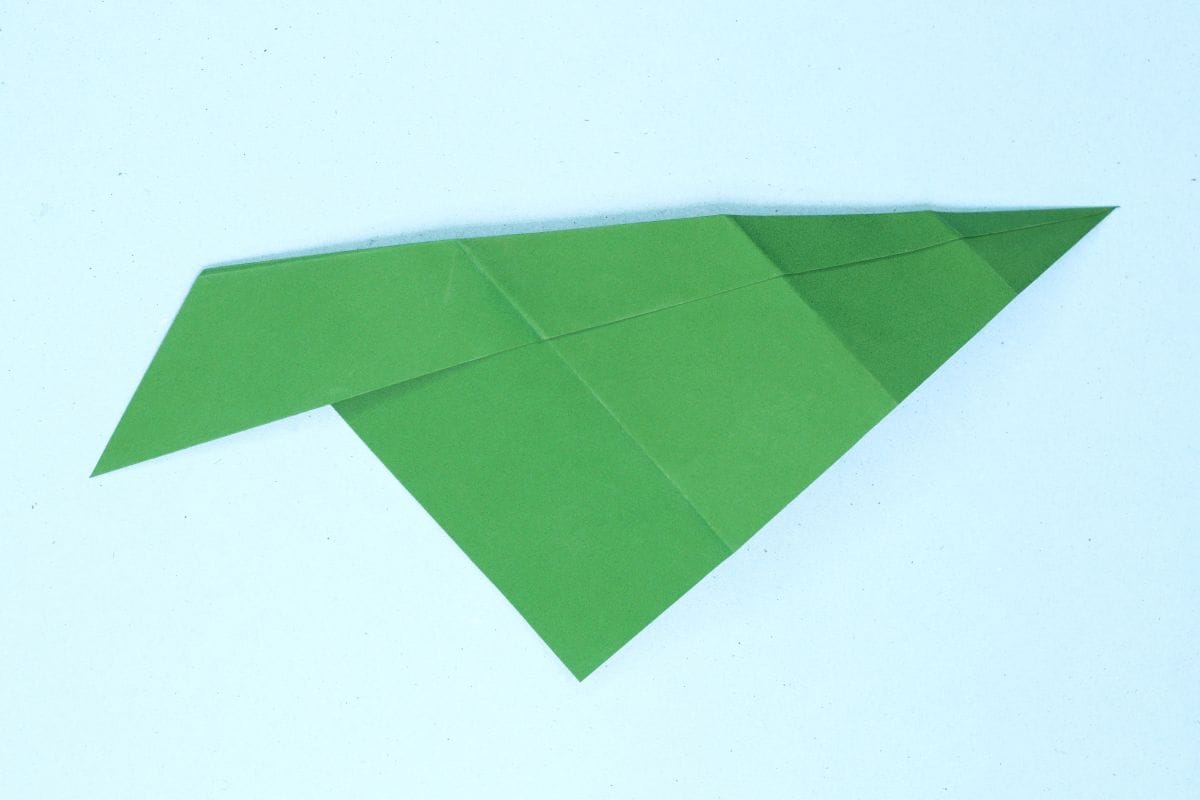
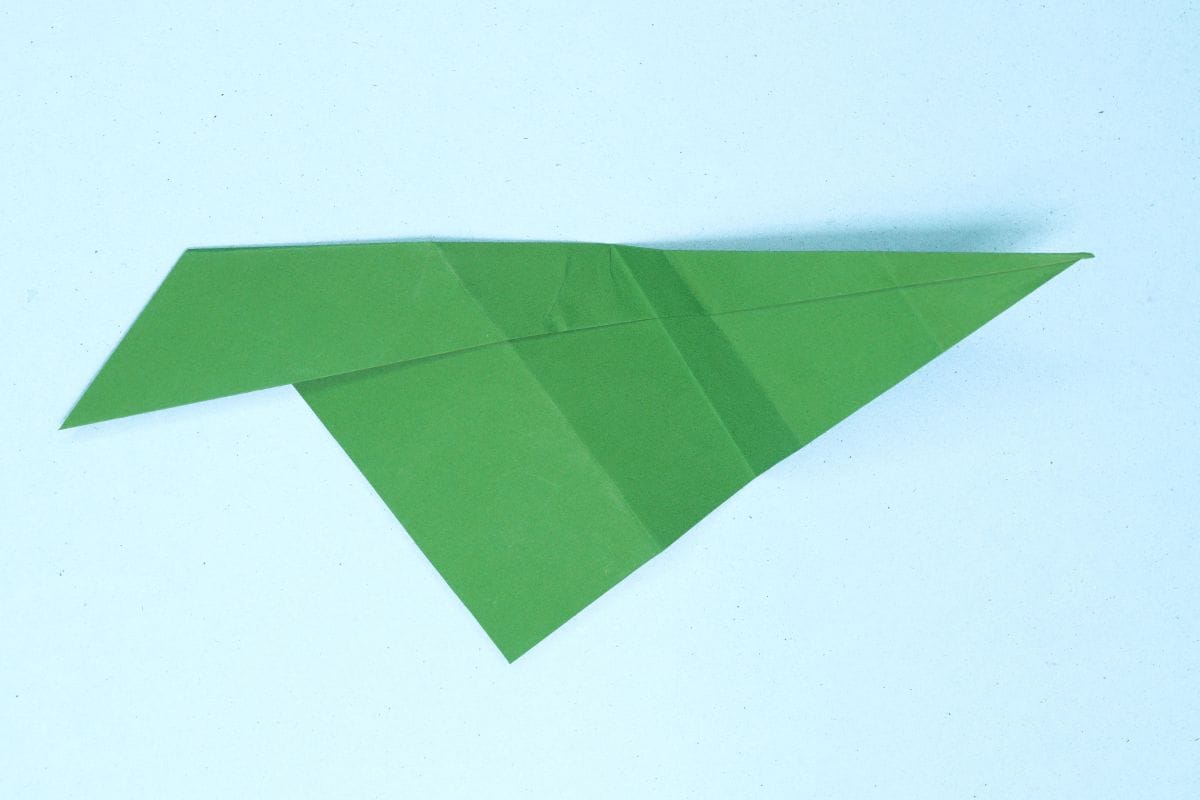
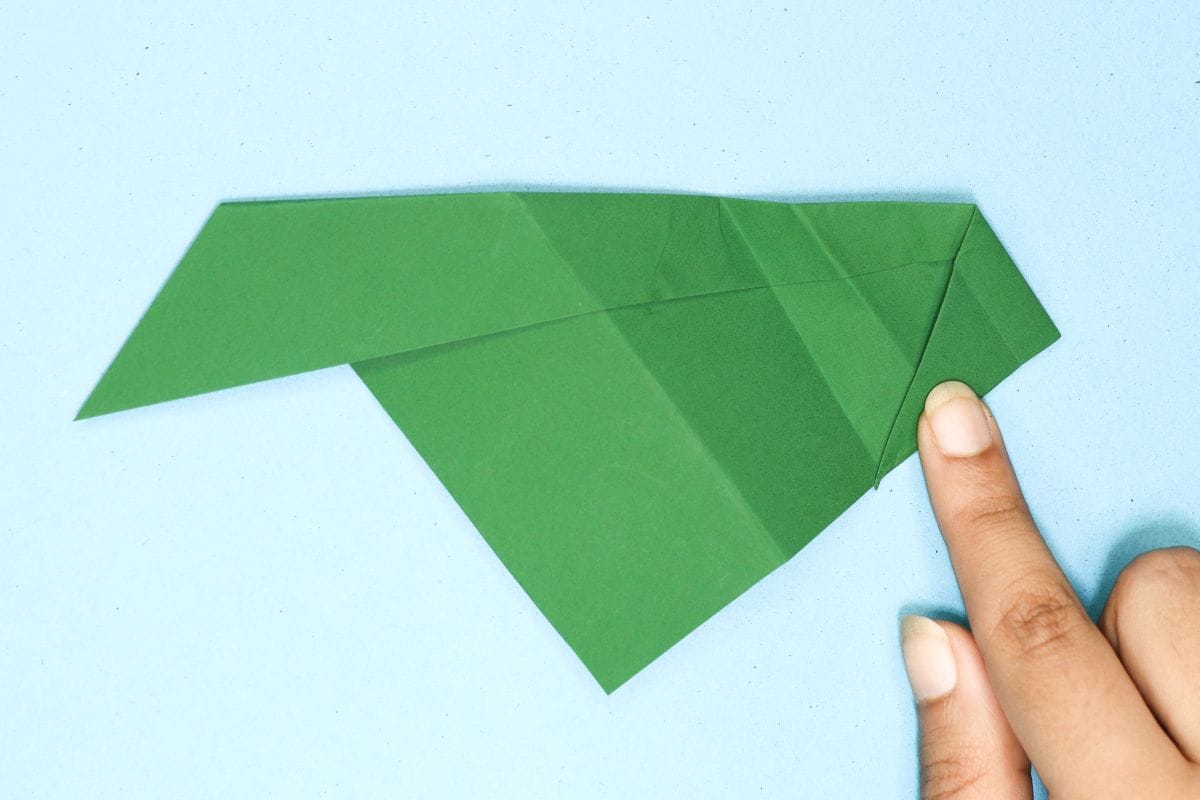
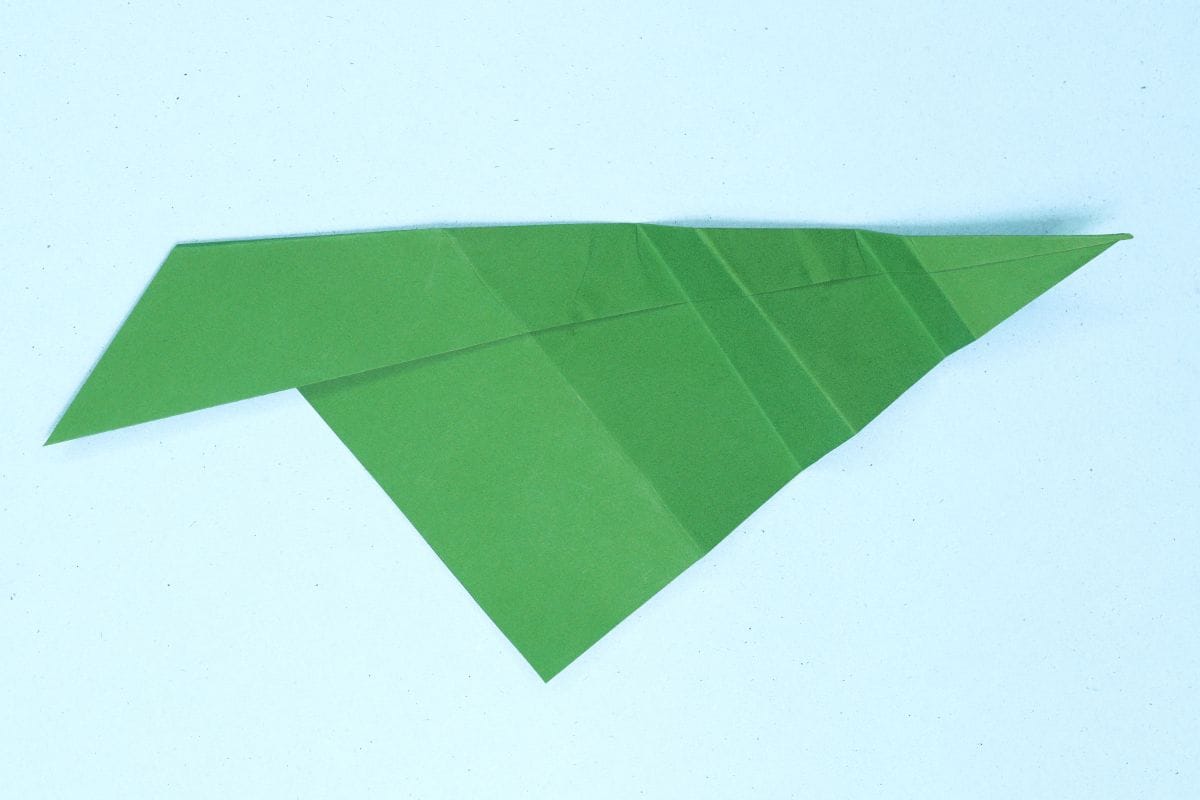
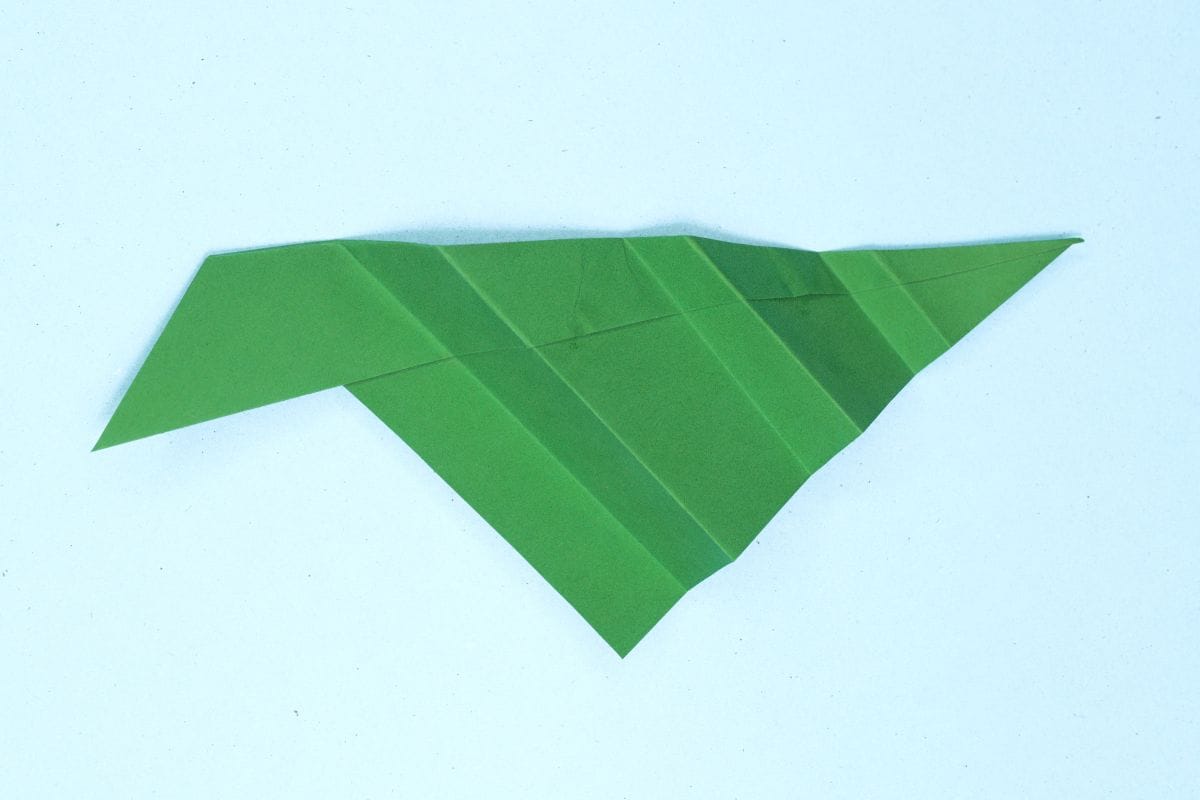
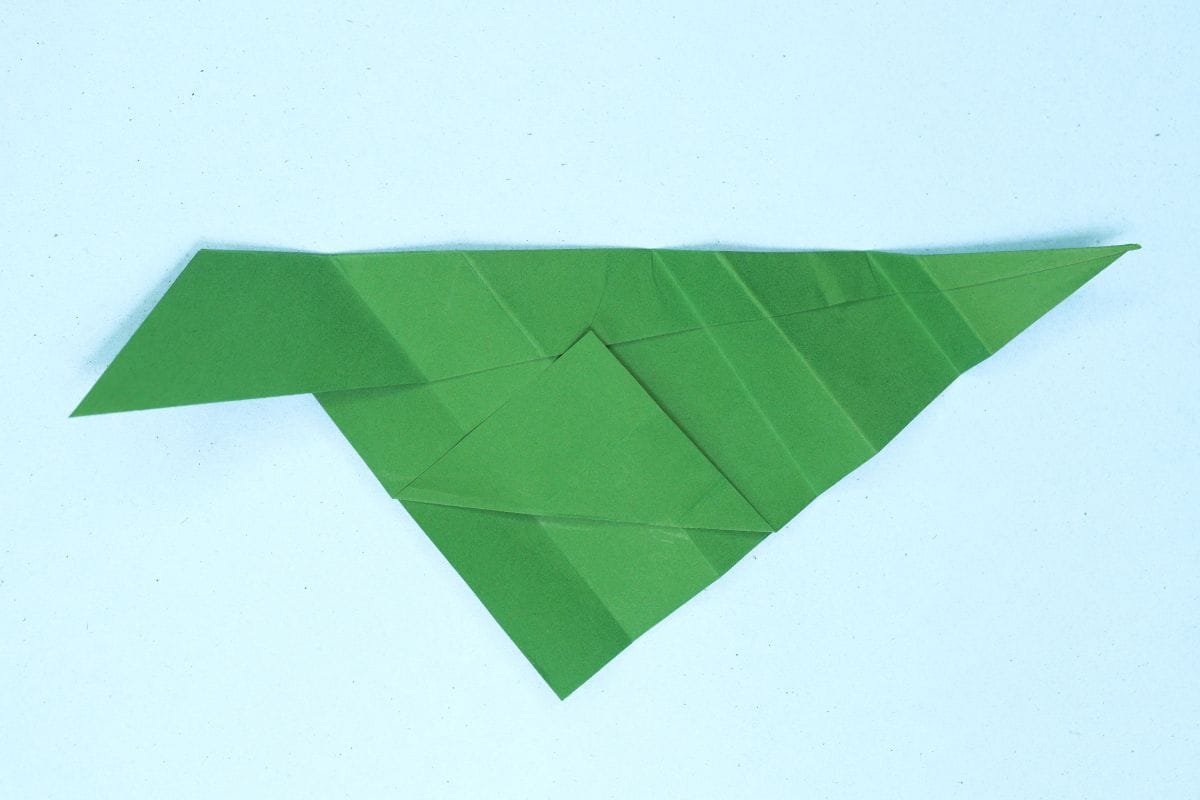
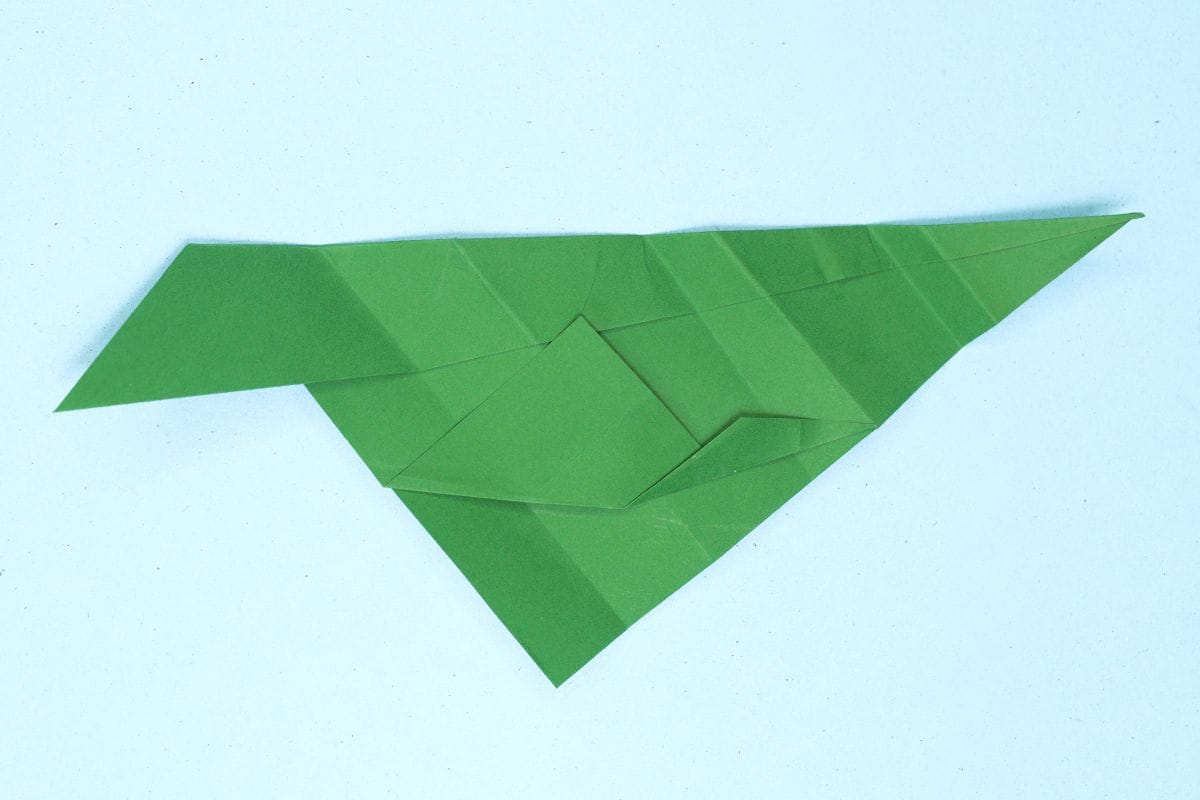
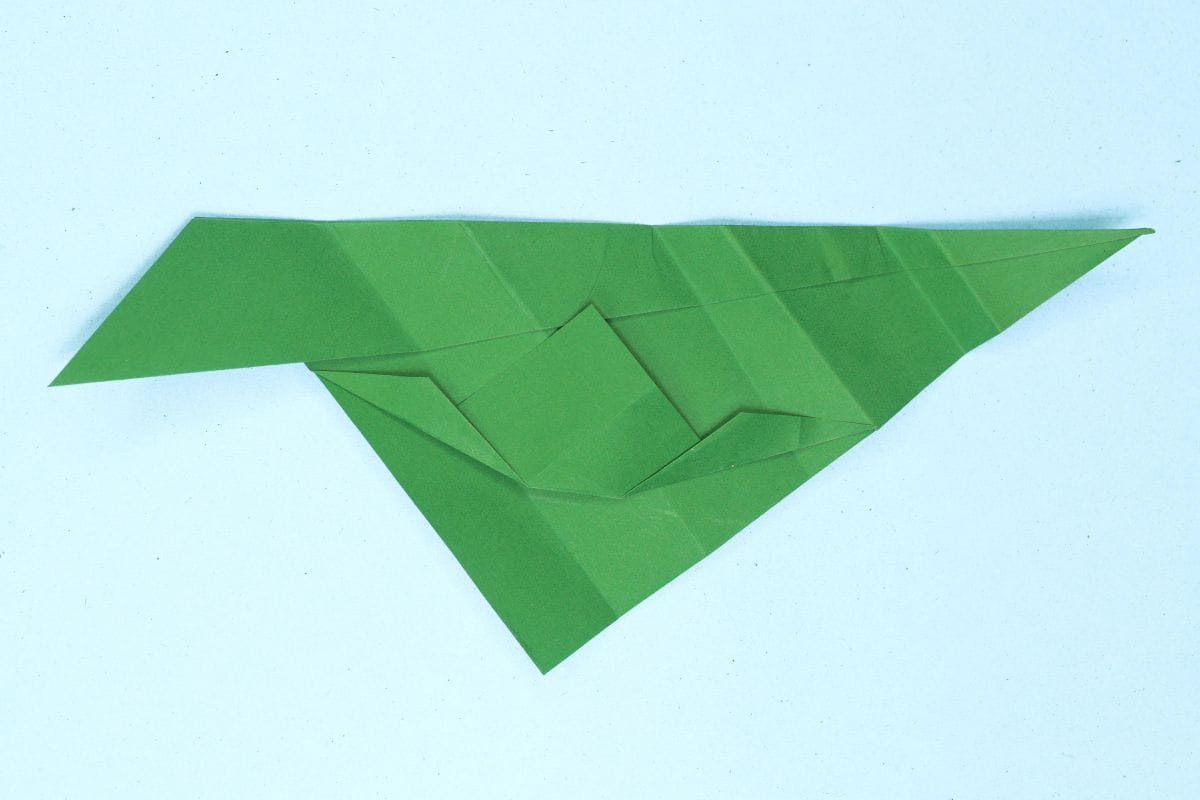
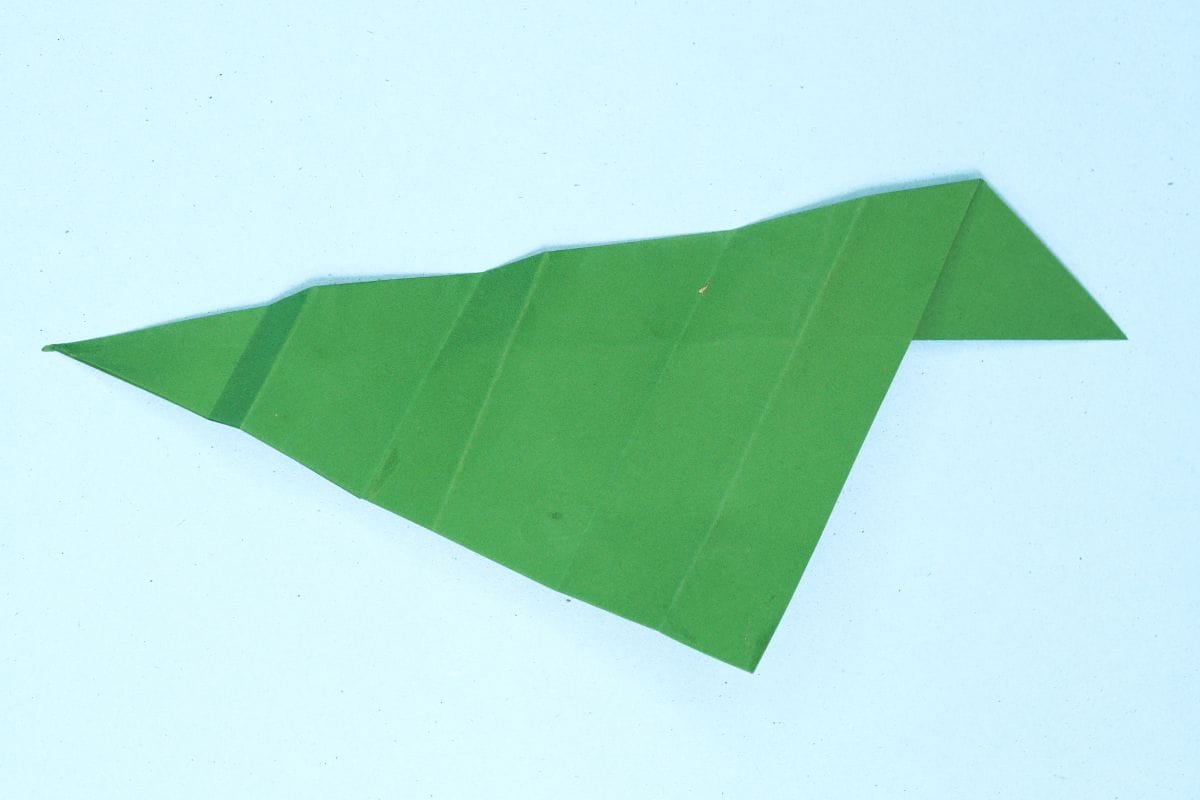
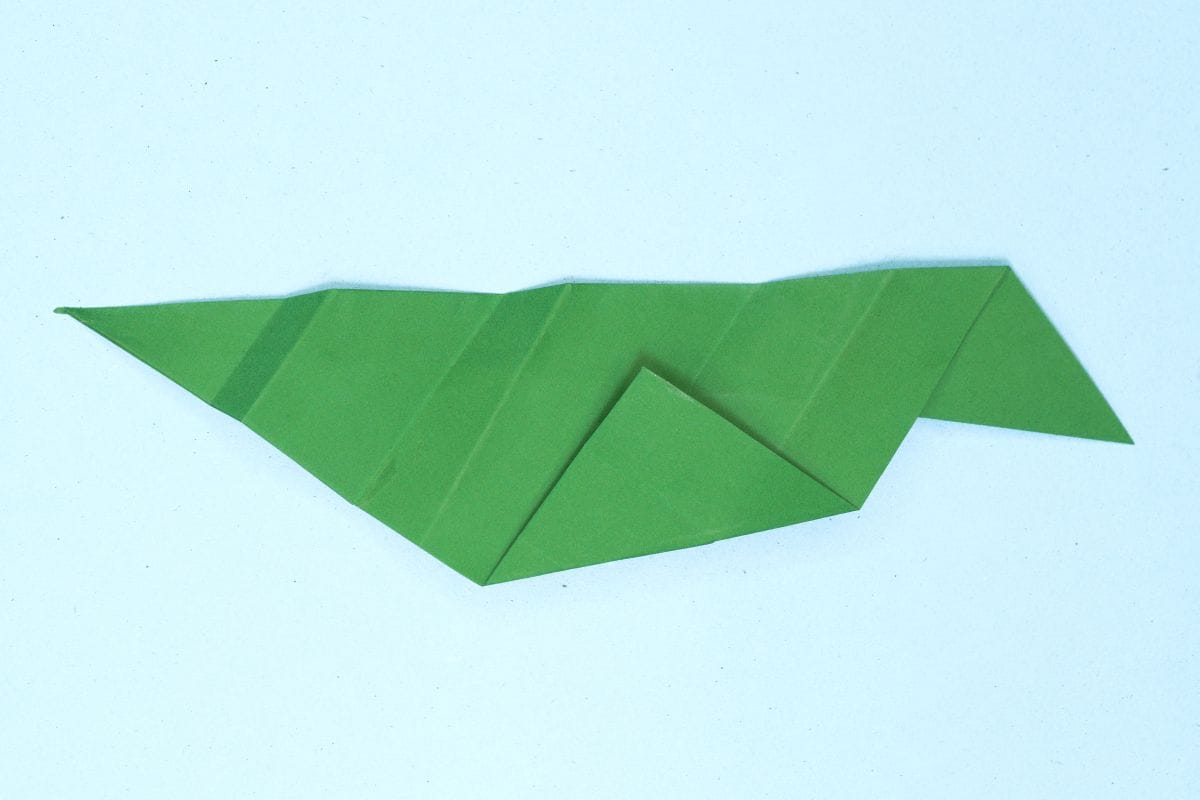
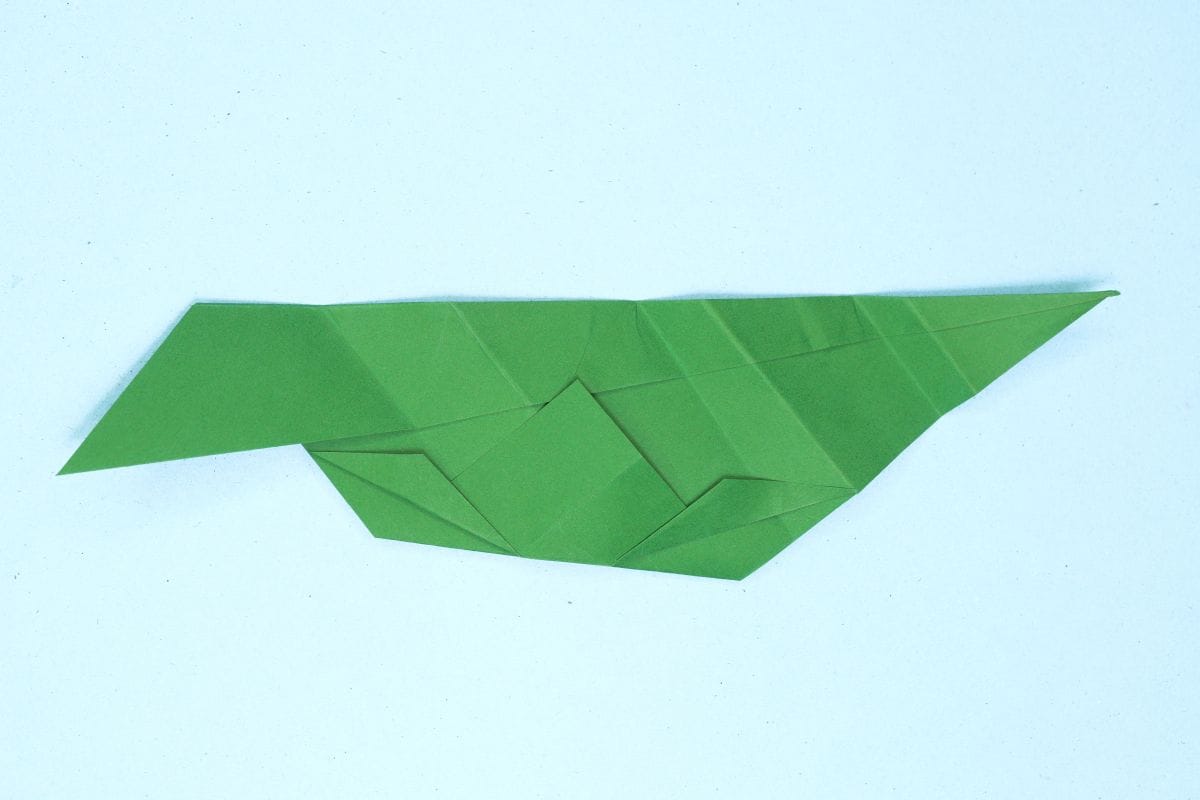
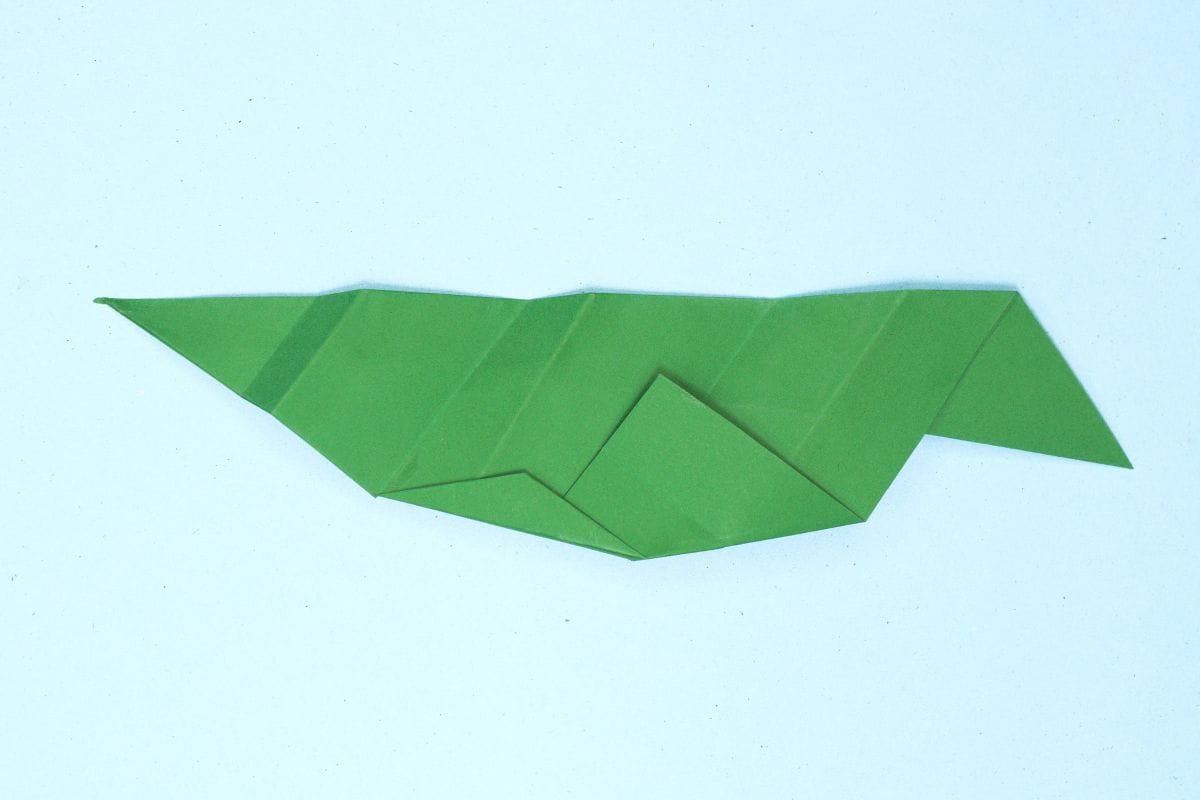
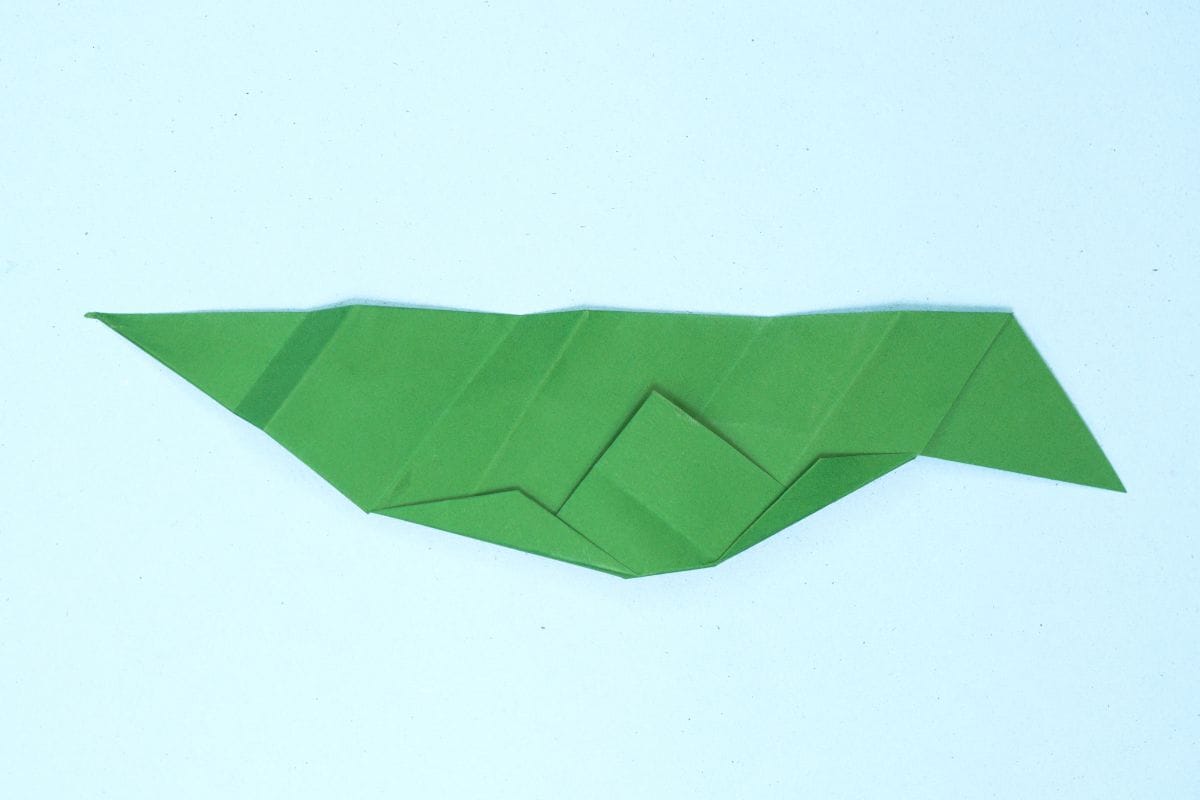
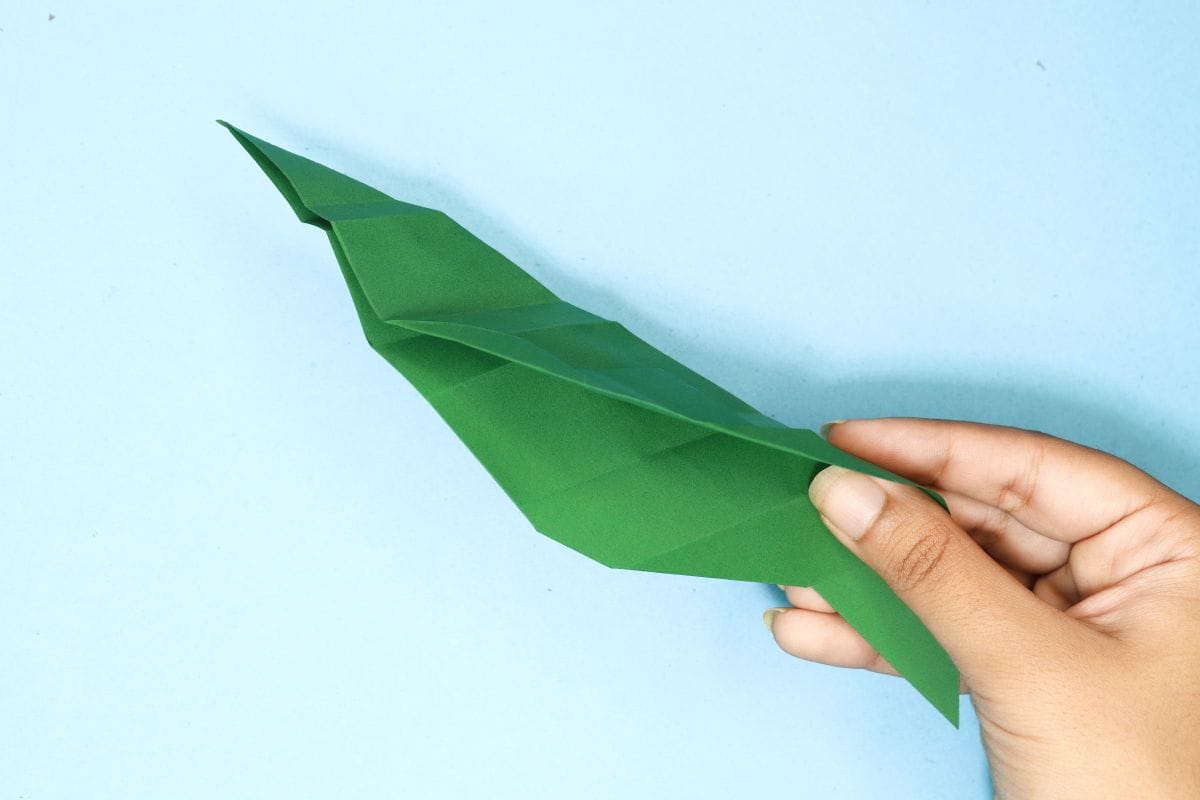
Follow these simple steps to learn how to make your own origami leaf!

Step 1
Origami leaf step 01
1
Start with an square sheet of origami paper. I am using an 7×7 inches origami paper.

If you only have regular paper, follow these instructions on how to make a square origami paper.

Step 2
Origami leaf step 02
2
Fold from top right corner to the bottom left corner.

Step 3
Origami leaf step 03
3
Position the triangle so that it is vertical and pointing downward.

Step 4
Origami leaf step 04
4
Make a diagonal fold starting from the top edge.

Step 5
Origami leaf step 05
5
Turn the model over.

Step 6
Origami leaf step 06
6
Fold the left corner diagonally so that it touches the left edge, slightly above the bottom corner.

Step 7
Origami leaf step 07
7
Unfold the corner.

Step 8
Origami leaf step 08
8
Fold the right edge to the left crease you just created.

Step 9
Origami leaf step 09
9
Unfold the right edge.

Step 10
Origami leaf step 10
10
Fold the left corner to the first crease.

Step 11
Origami leaf step 11
11
Unfold. We just needed a crease line.

Step 12
Origami leaf step 12
12
Turn the paper over.

Step 13
Origami leaf step 13
13
Fold the right corner diagonally so that it extends just past the left edge.

Step 14
Origami leaf step 14
14
Unfold.

Step 15
Origami leaf step 15
15
Fold down the right corner to the fourth crease from the right.

Step 16
Origami leaf step 16
16
Unfold. We just needed a crease line.

Step 17
Origami leaf step 17
17
Fold the left edge to the first crease from the left.

Step 181
Origami leaf step 18
181
Unfold. We just needed a crease line.

Step 19
Origami leaf step 19
19
Fold the top layer of the bottom corner upward to form a triangle.

Step 20
Origami leaf step 20
20
Fold up the lower right corner of the small triangle.

Step 21
Origami leaf step 21
21
Fold up the lower left corner of the small triangle.

Step 22
Origami leaf step 22
22
Turn the paper over.

Step 23
Origami leaf step 23
23
Fold the bottom corner upward to form a triangle.

Step 24
Origami leaf step 24
24
From the other side, it should look like this. Make sure the bottom edges of the front and back triangles align perfectly.

Step 25
Origami leaf step 25
25
Now, back to the side we were working on, fold up the lower left corner of the small triangle.

Step 26
Origami leaf step 26
26
Fold up the lower right corner of the small triangle.

Step 27
Origami leaf step 27
27
Open the sides.

Step 28
Origami leaf step 28
28
After opening, it should look like the image.

Step 29
Origami leaf step 29
29
Flatten the fold well on a striaght surface.

Step 30
Origami leaf final step
30
Voila! Your origami leaf is ready.

Share and Comment
We would love to see your creations! Scroll down to the comments section and share a photo of your origami.

Comments

Leave a Reply

Your email address will not be published. Required fields are marked *

Drop file here