Add a touch of charm to your crafts with this beautiful origami paper ribbon! In this tutorial, you’ll learn how to transform a simple square of paper into a delicate ribbon shape that looks perfect for decorating cards, gifts, or creative projects. With a few satisfying folds, your paper becomes a stylish little accent that’s both simple to make and fun to display.
How to Make a Beautiful Origami Paper Ribbon
Category: Misc Origami

Difficulty: Intermediate
Learn how to make a beautiful origami paper ribbon with clear step-by-step instructions that guide you through every fold.
Step 1
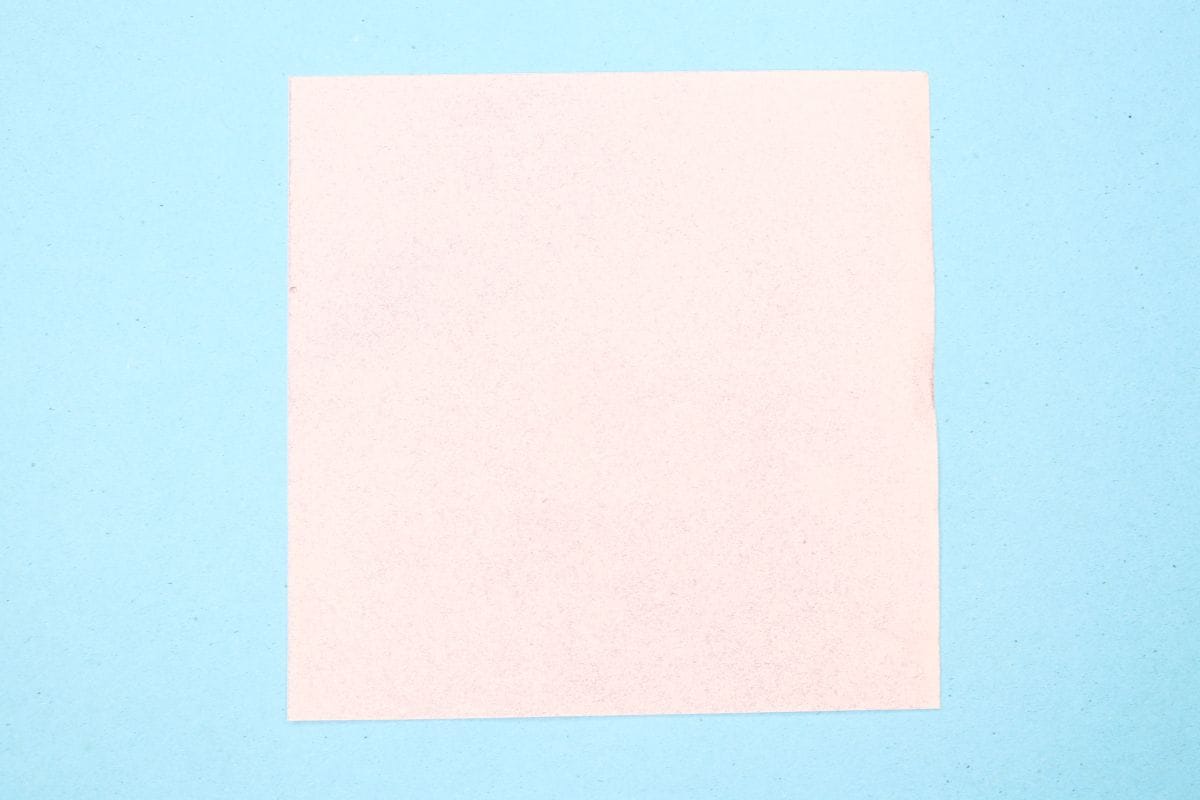
1
Start with a square sheet of origami paper. I am using an 7×7 inches origami sheet.
If you only have regular paper, follow these instructions on how to make a square origami paper.
If you only have regular paper, follow these instructions on how to make a square origami paper.
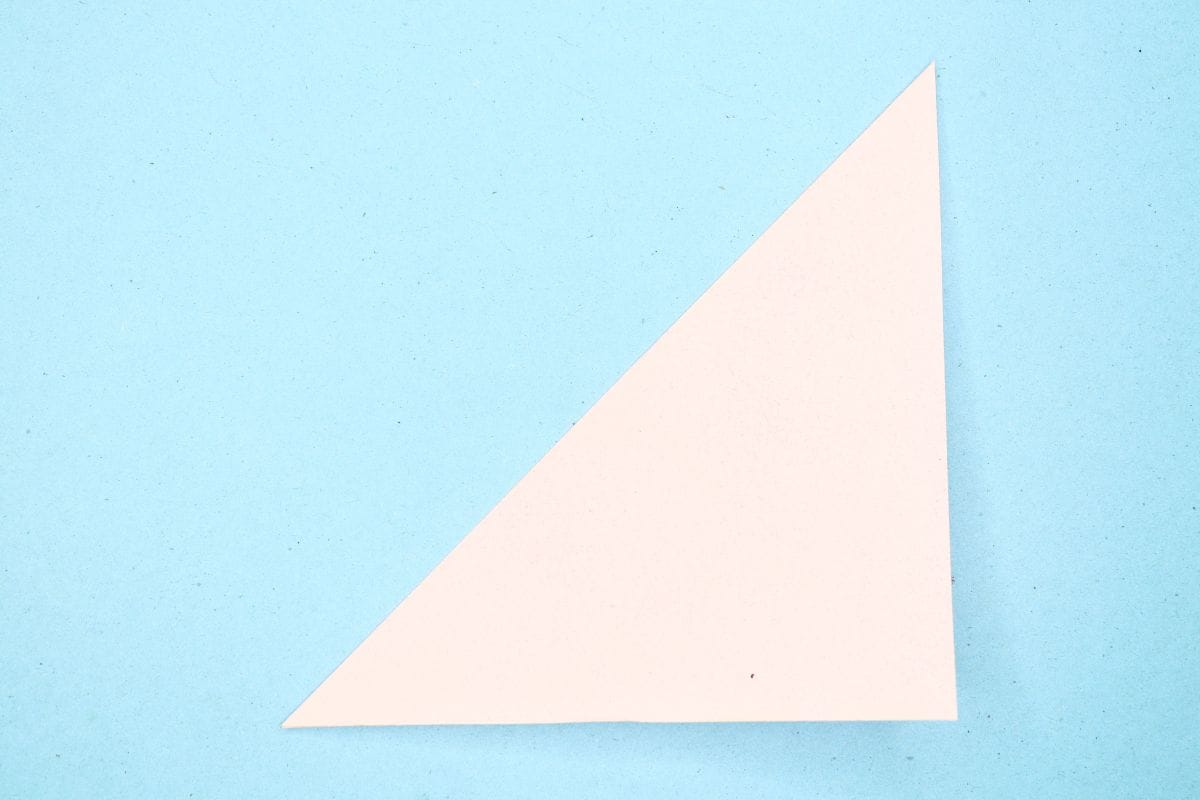
Step 2
2
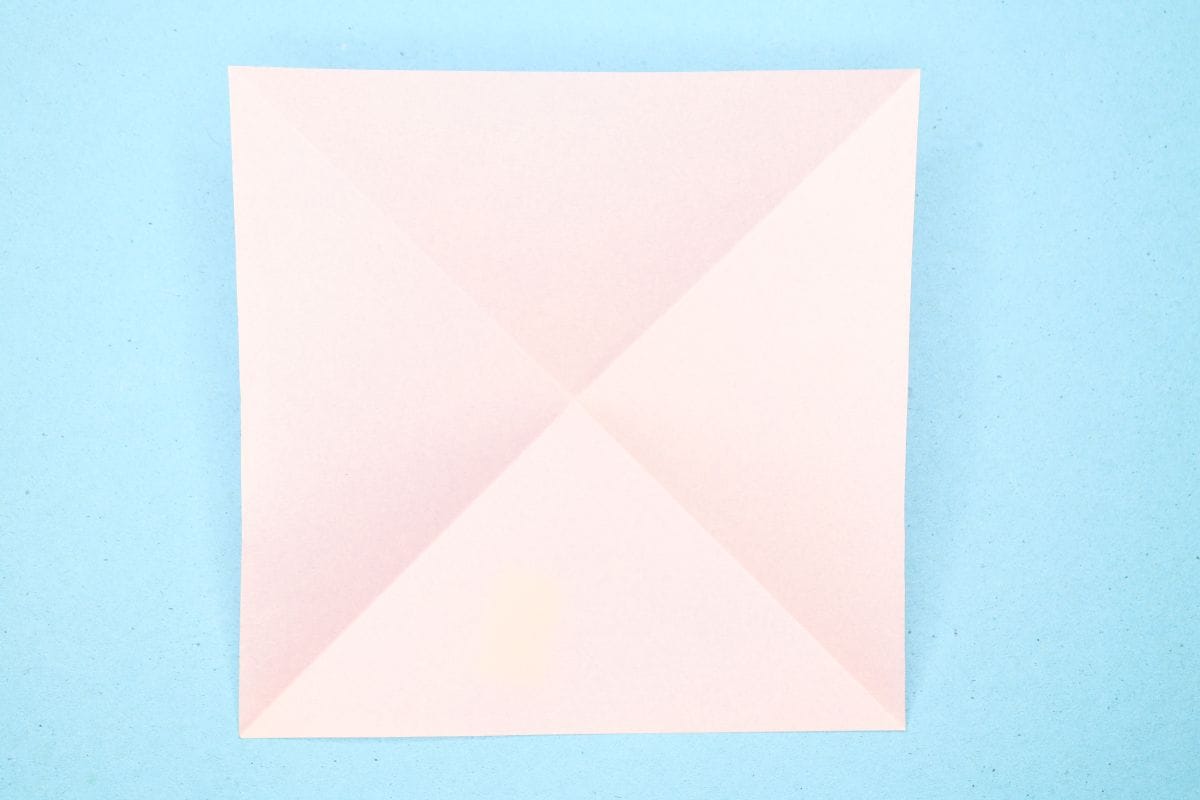
Fold the paper in half along the diagonal.
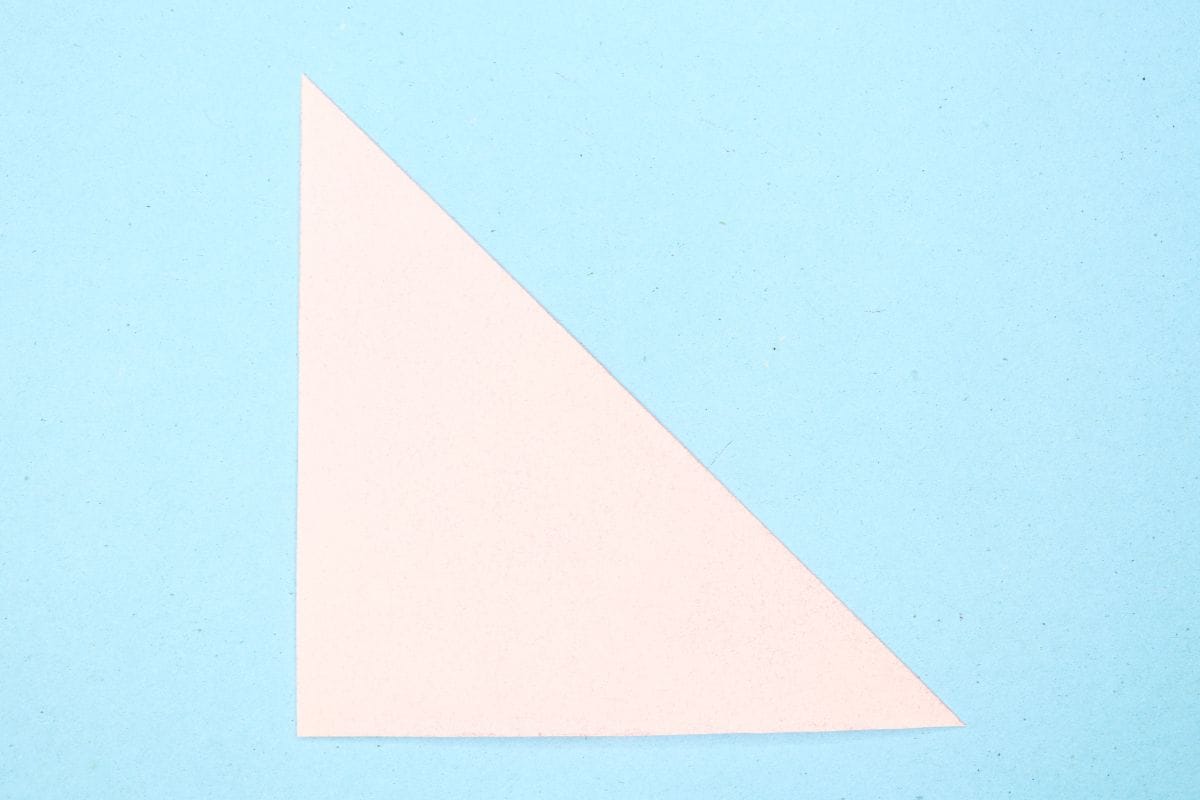
Step 3
3
Unfold. We just needed a crease line.
Step 4
4
Fold the paper in half along the diagonal in the opposite direction
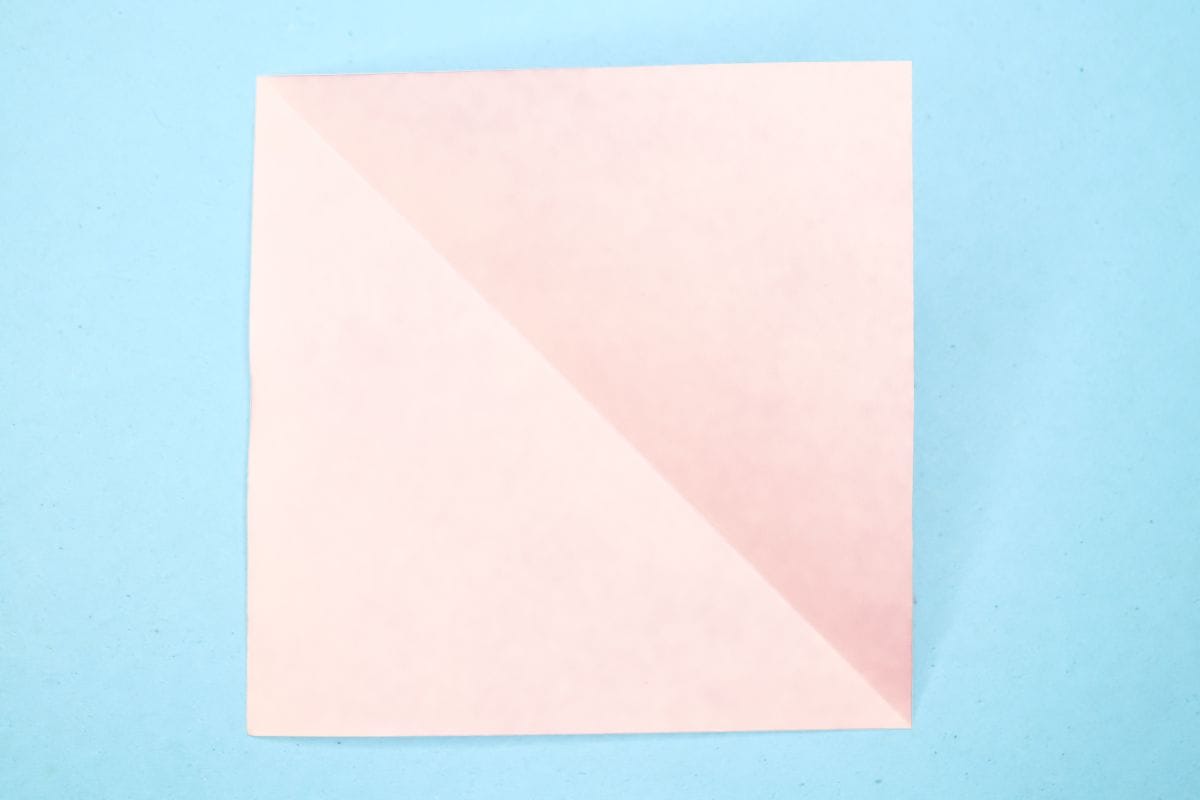
Step 5
5
Unfold. We just needed a crease line.
Step 6
6
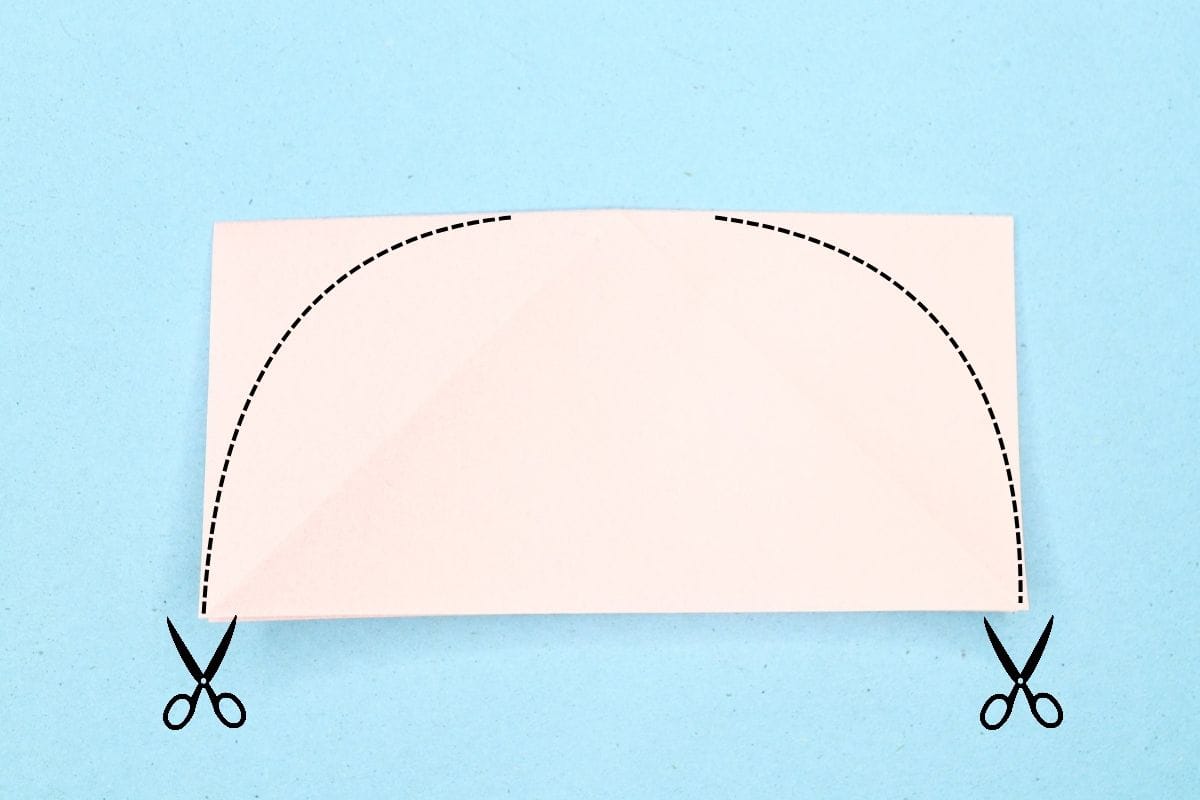
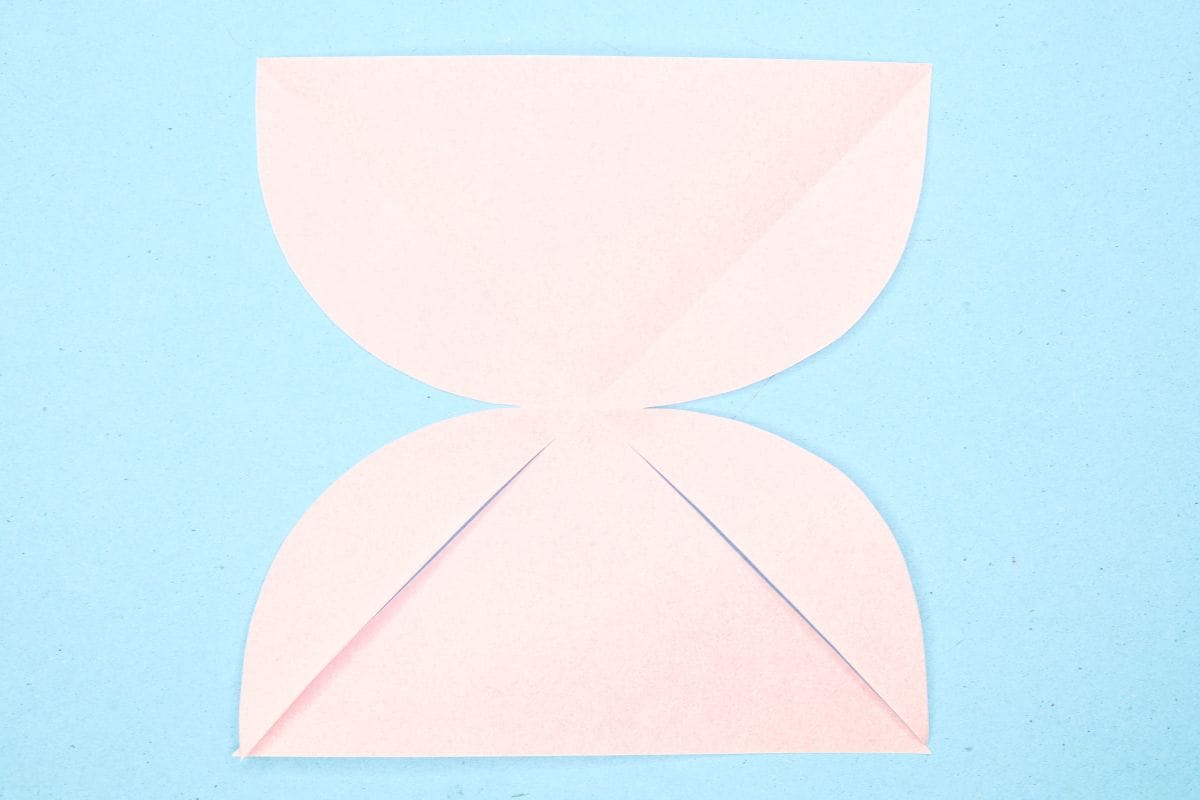
Cut along the marked area with scissors.
Step 7
7
The shape should match the image after cutting.
Step 8
8
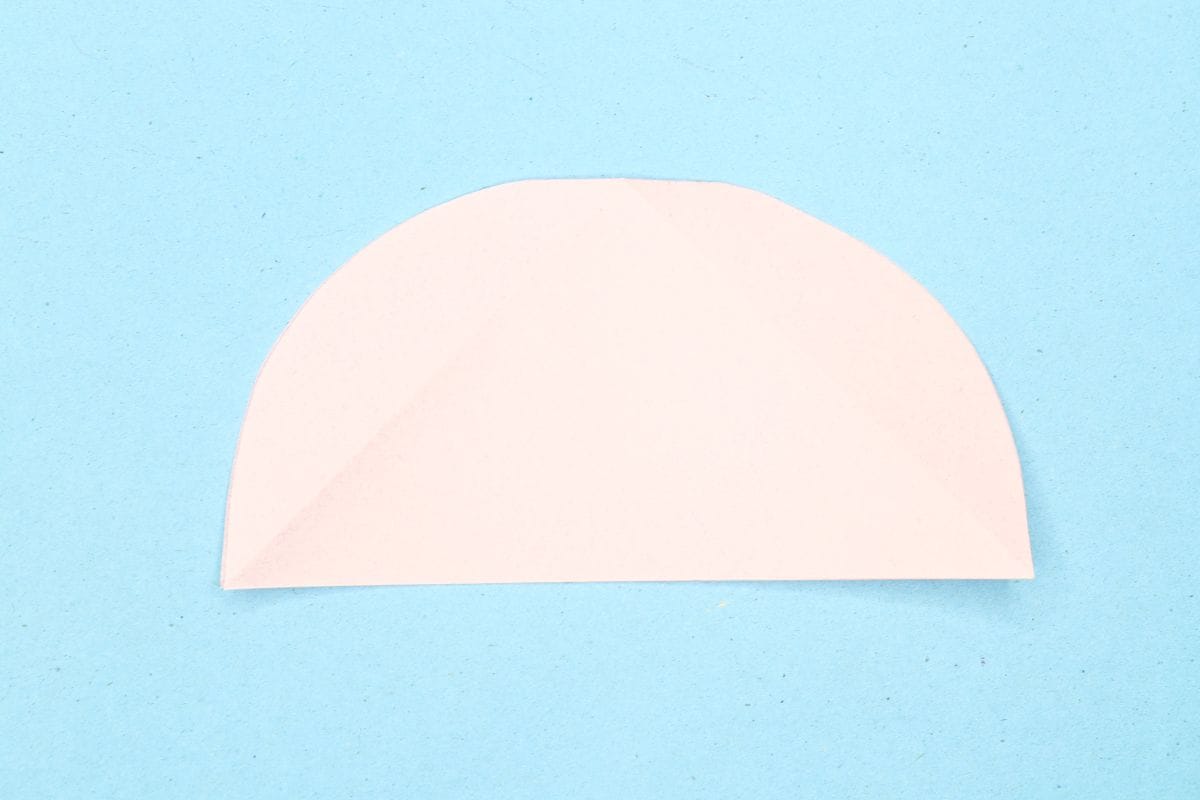
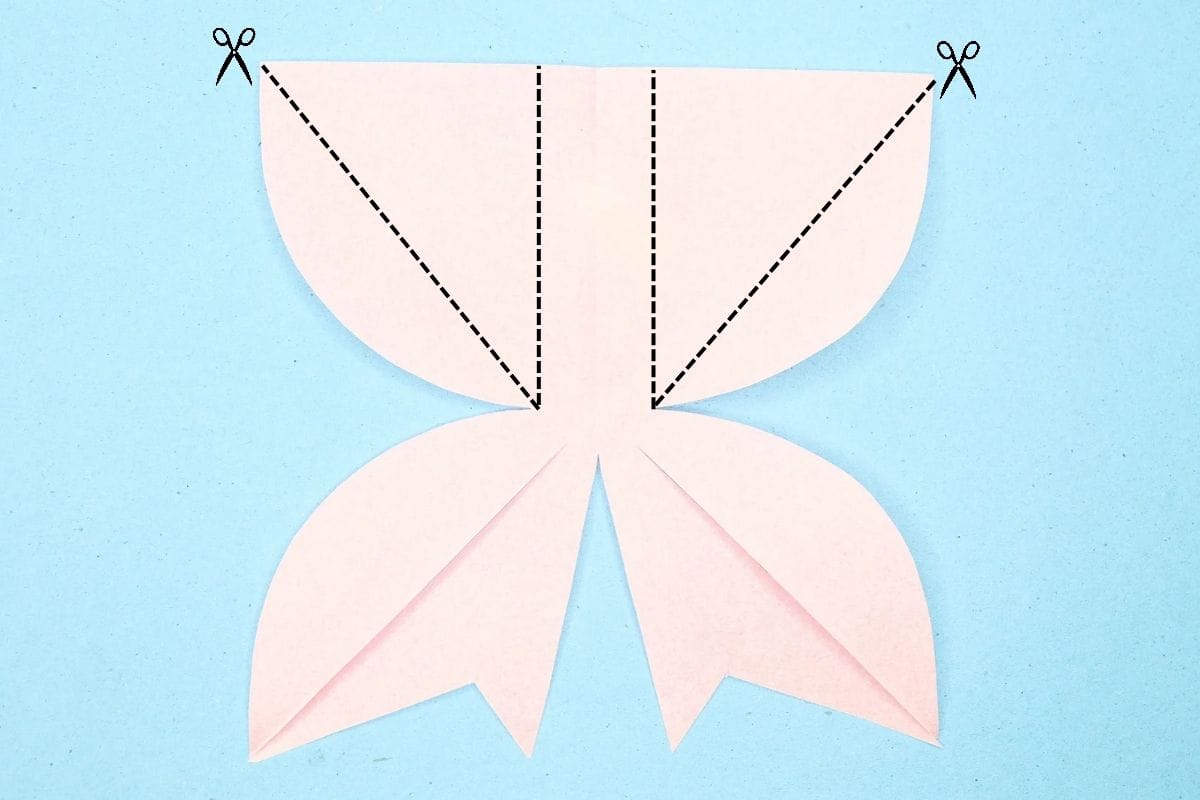
Unfold the paper and cut along the marked area with scissors.
Step 9
9
The shape should match the image after cutting.
Step 10
10
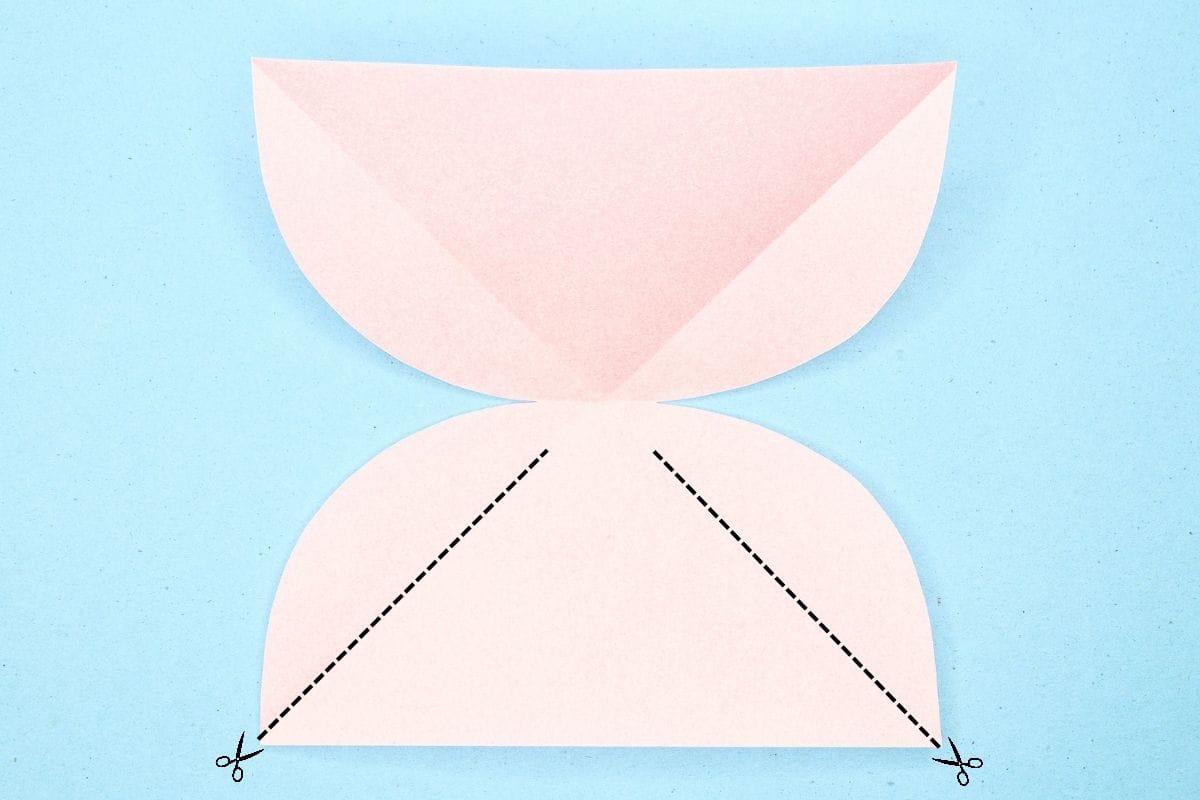
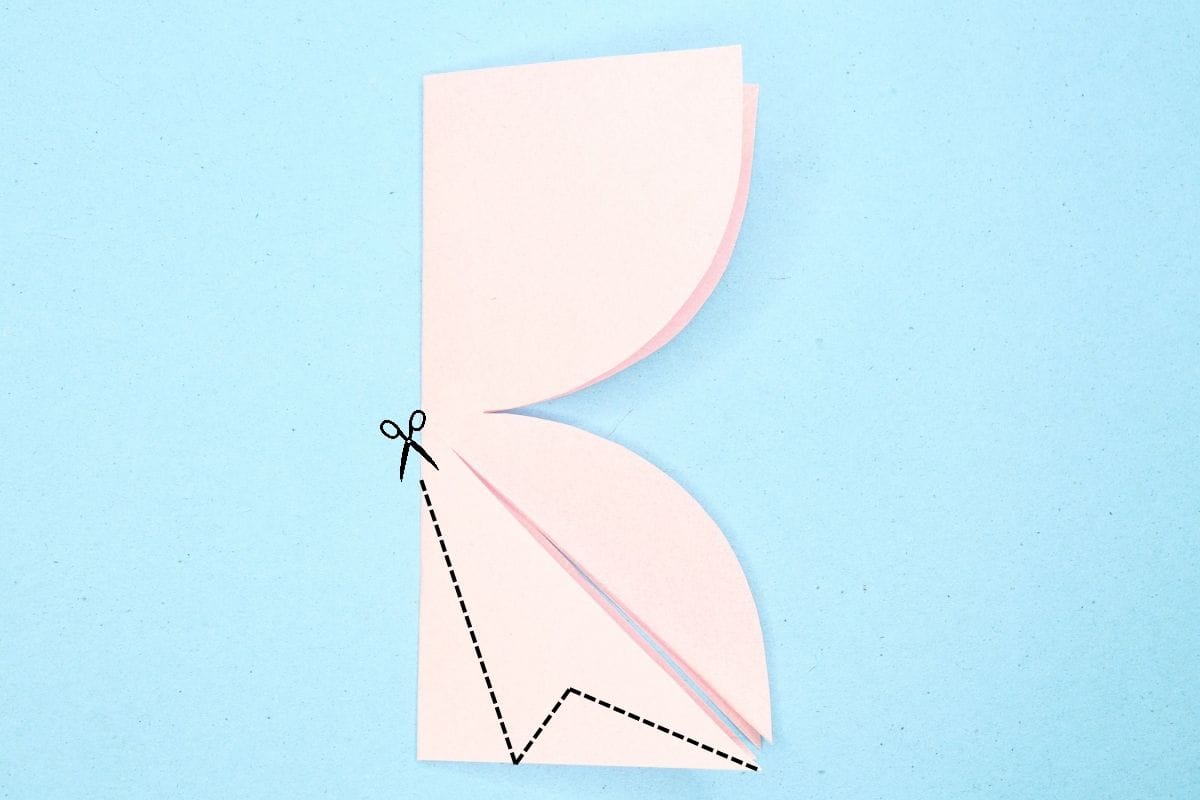
Fold the paper in half from left to right and cut along the marked area with scissors.
Step 11
11
The shape should match the image after cutting.
Step 12
12
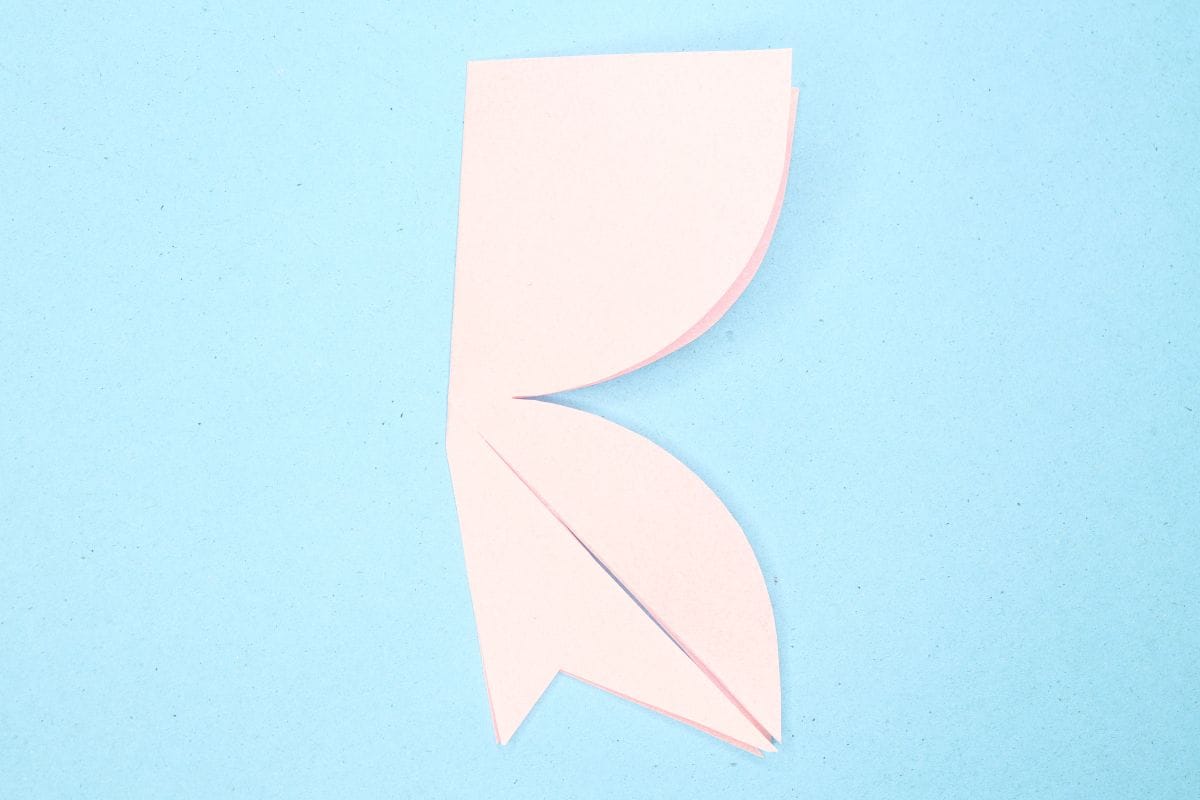
Unfold the paper and cut along the marked area with scissors.
Step 13
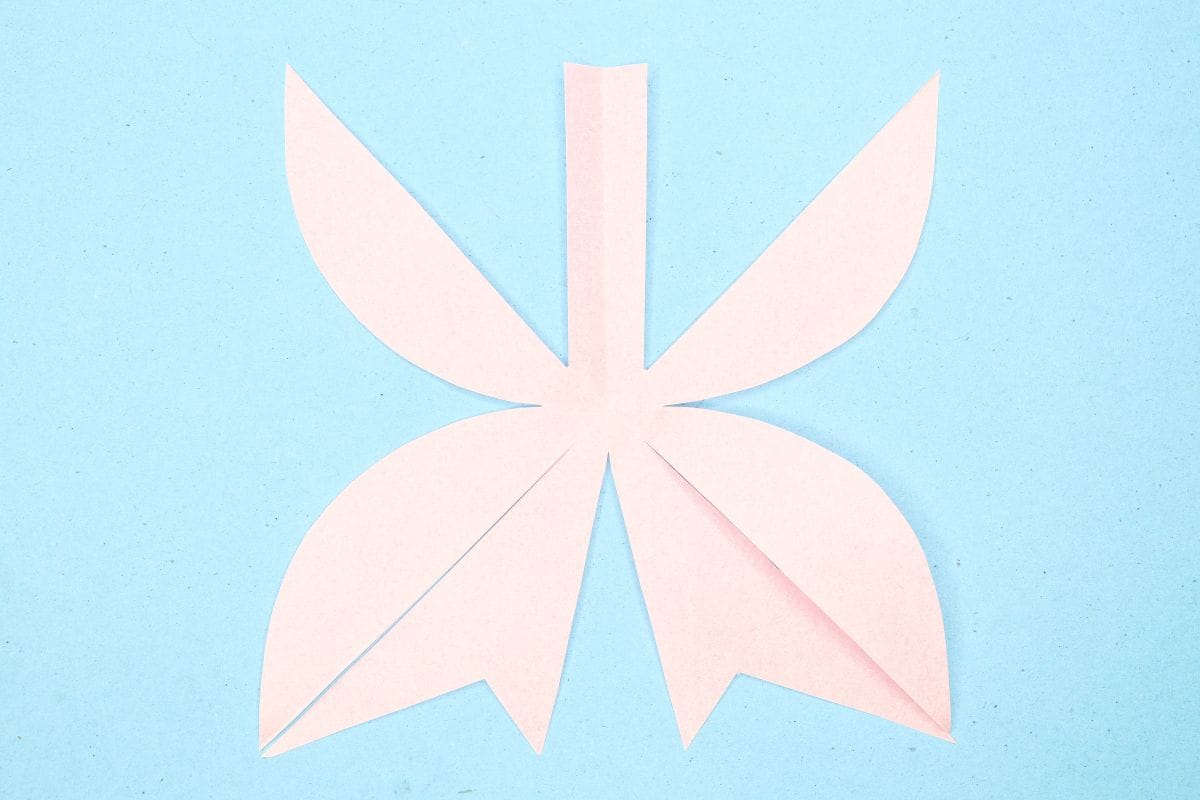
13
The shape should match the image after cutting.
Step 14
14
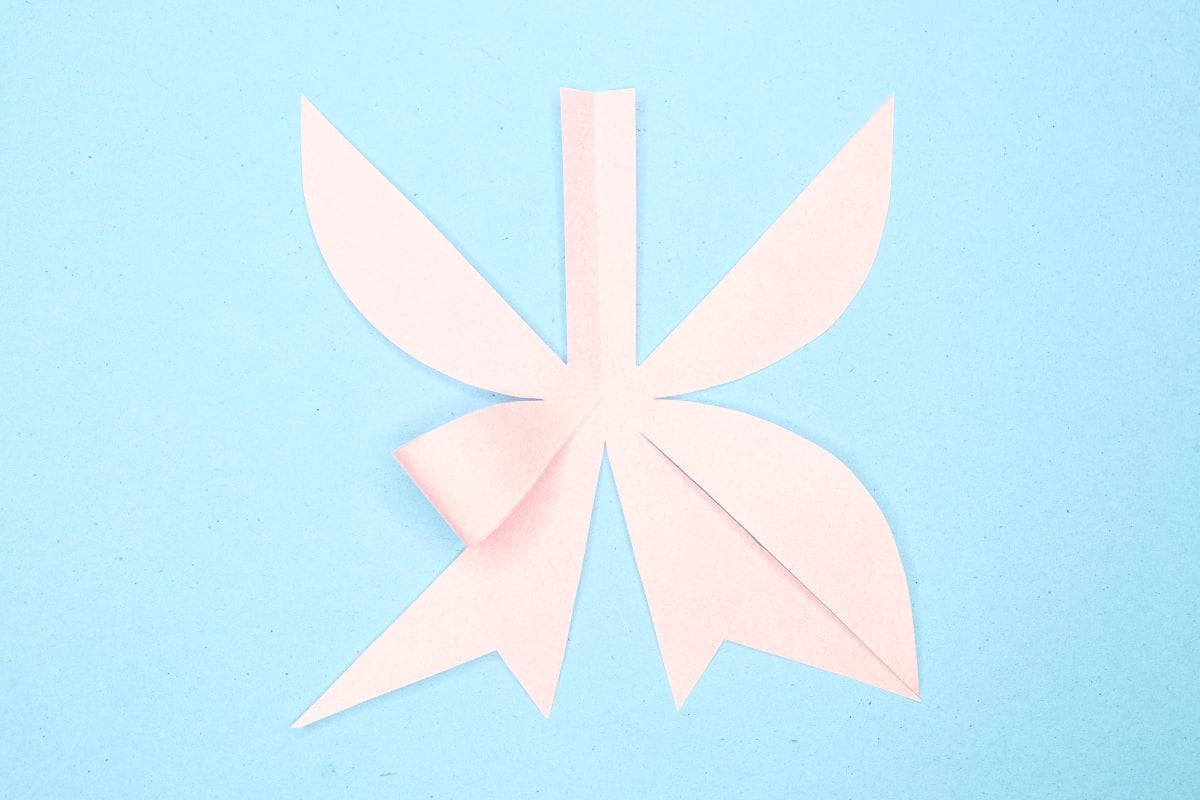
Attach the bottom left corner to the center using glue.
Step 15
15
Attach the bottom right corner to the center using glue.
Step 16

16
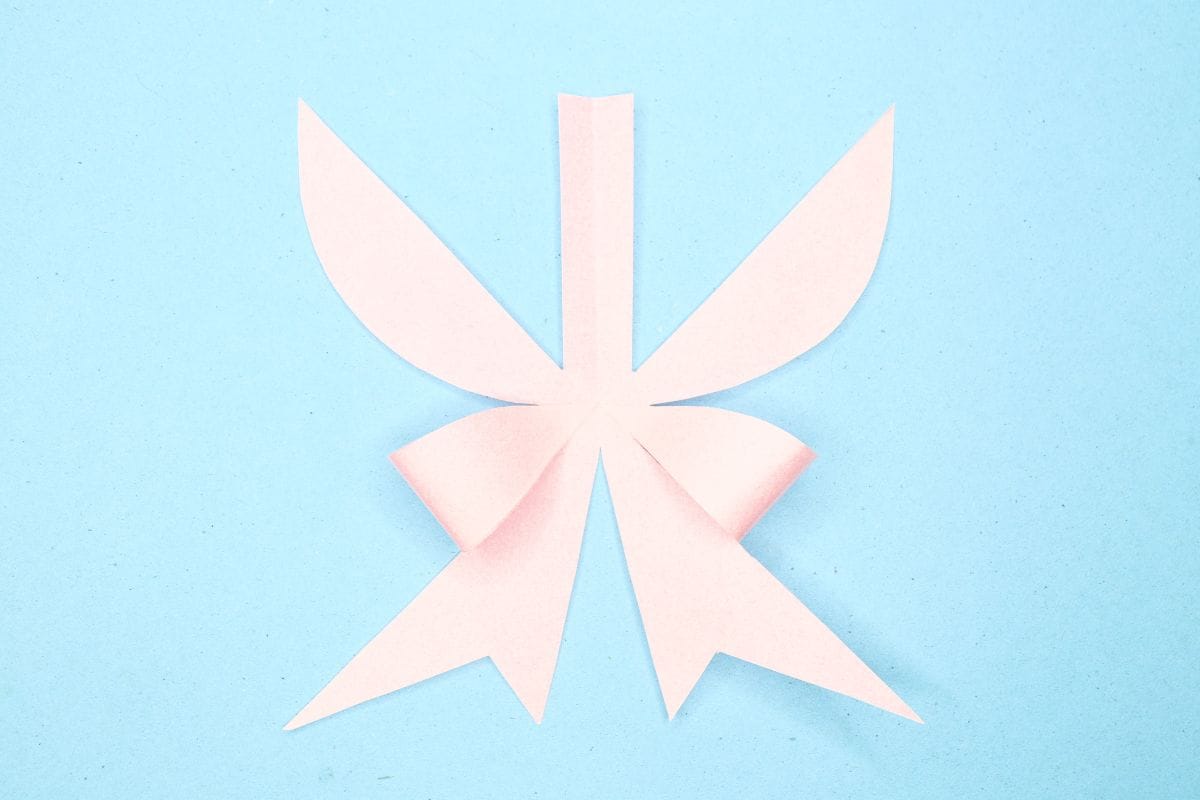
Attach the top left and right corner to the center using glue.
Step 17
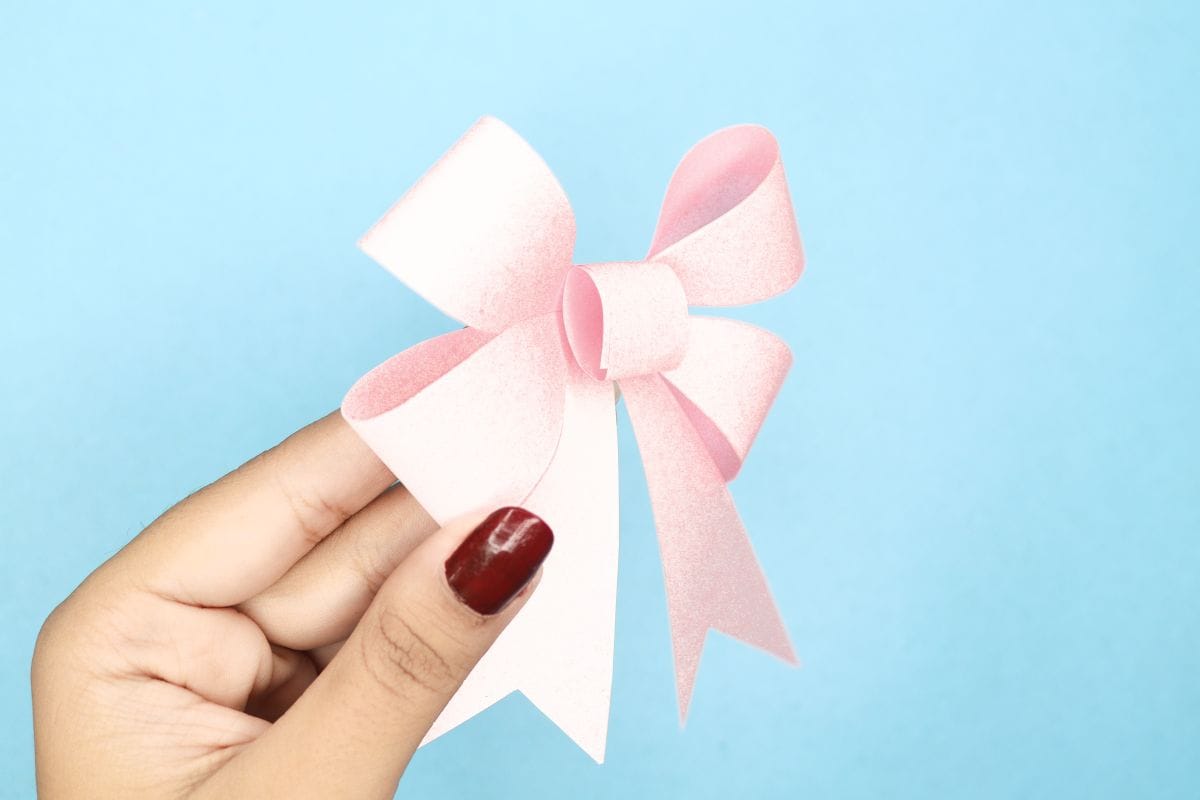
17
Roll down the center strip as shown.
Step 18
18
Glue the strip that was rolled down to the center point.
Step 19
19
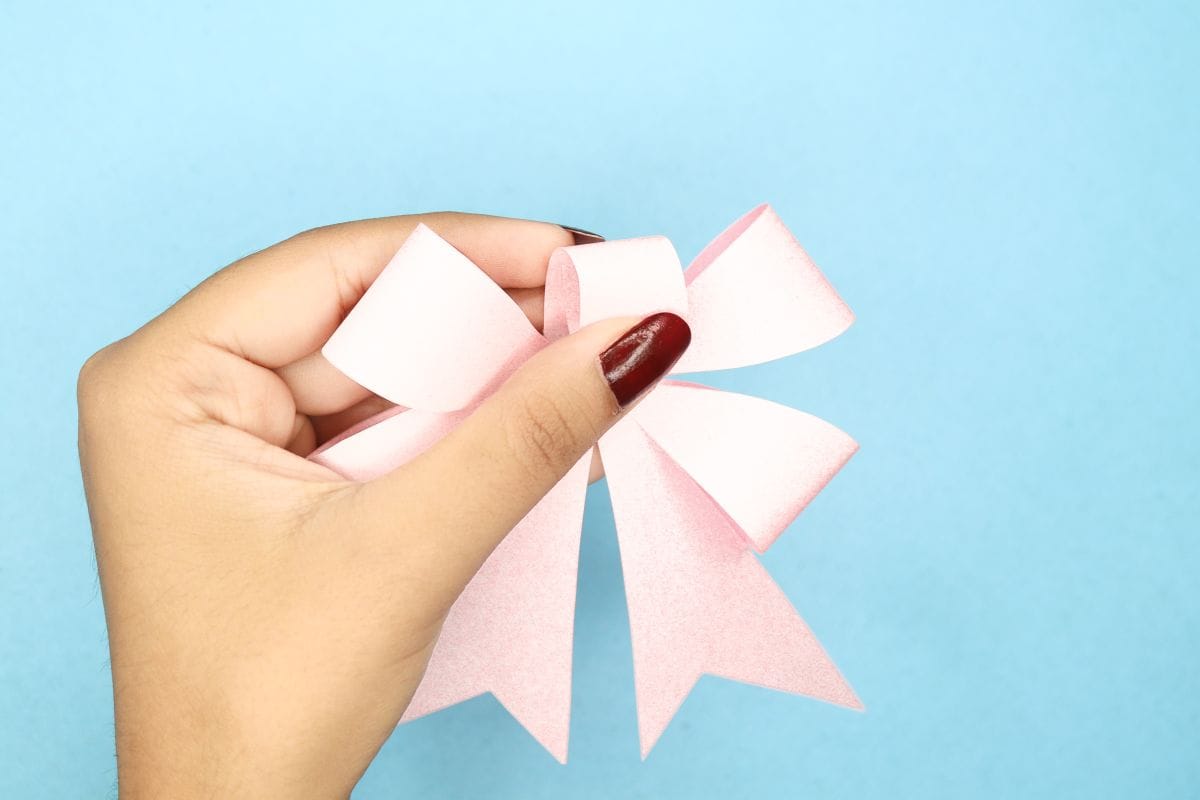
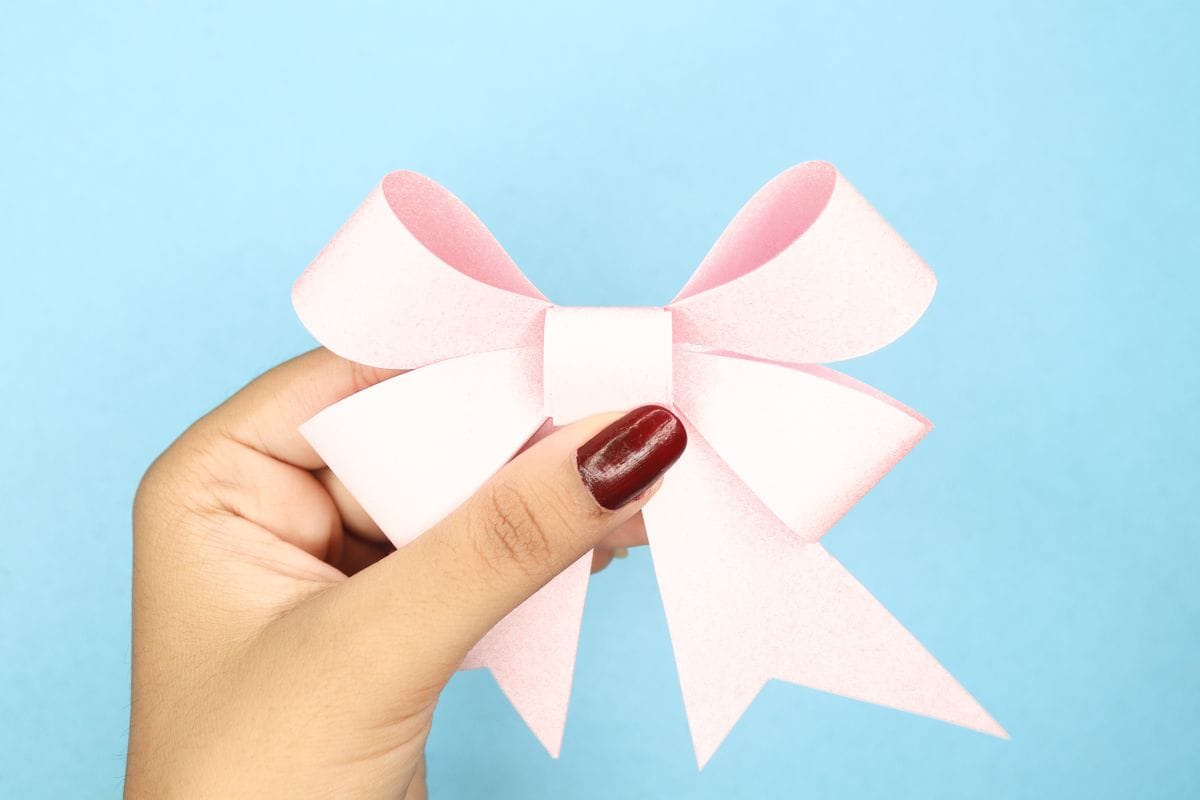
It should look like the image.
Step 20
20
Ta-da! The ribbon is now ready to decorate a gift.
Share and Comment
We would love to see your creations! Scroll down to the comments section and share a photo of your origami.
Leave a Reply