This origami swan is perfect for beginners, since it relies on just a few simple mountain and valley folds. It’s a wonderfully classic design, understated yet elegant. The finished model makes a stunning wedding display, a minimalist decoration, or even a charming chopstick rest for a Japanese dinner.
How to Make an Origami Paper Swan
Category: Origami Animals
Difficulty: Intermediate
The classic swan is one of the simplest origami bird models you can make, and one of the most rewarding. With its graceful curves and elegant silhouette, the finished swan looks far more impressive than the handful of folds it actually takes. If you’re new to the craft, this is the perfect place to begin. Just follow the steps below to fold your own paper swan.
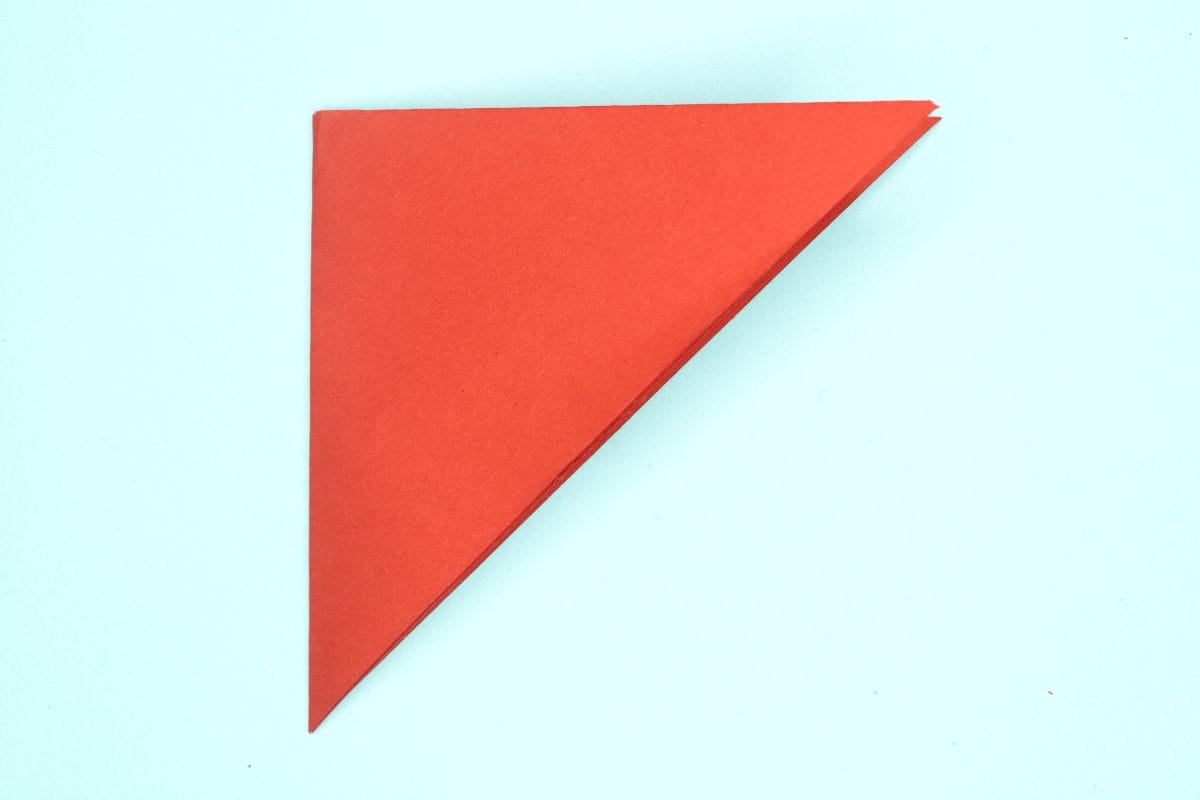
Step 1
1
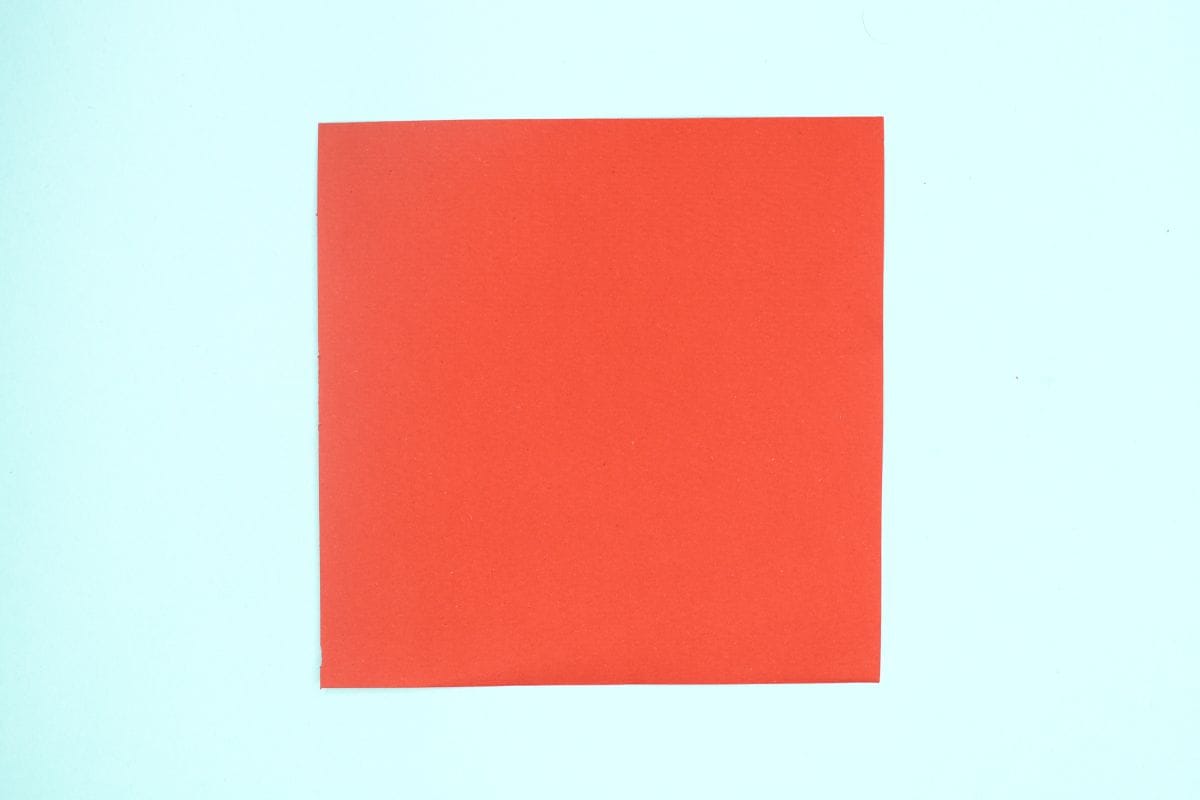
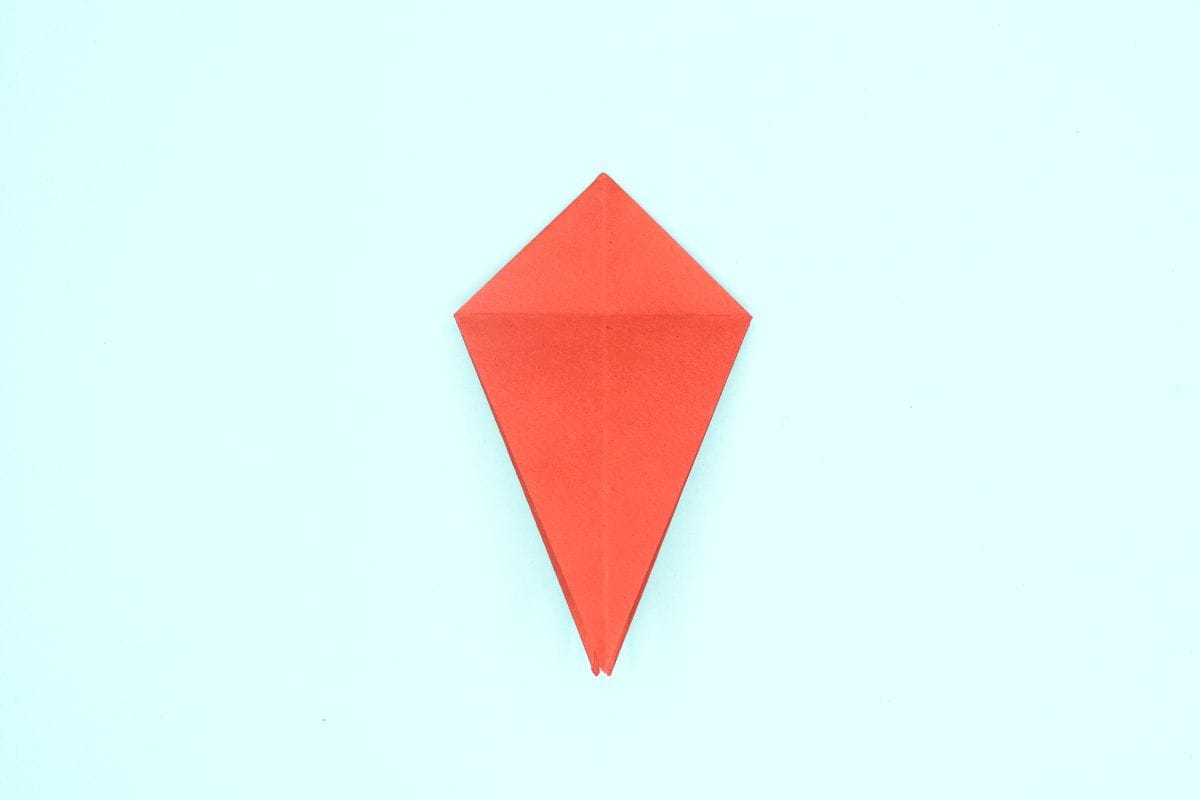
Start with a square sheet of an origami paper. I am using an 7×7 inches origami paper.
If you only have regular paper, follow these instructions on how to make a square origami paper.
If you only have regular paper, follow these instructions on how to make a square origami paper.
Step 2
2
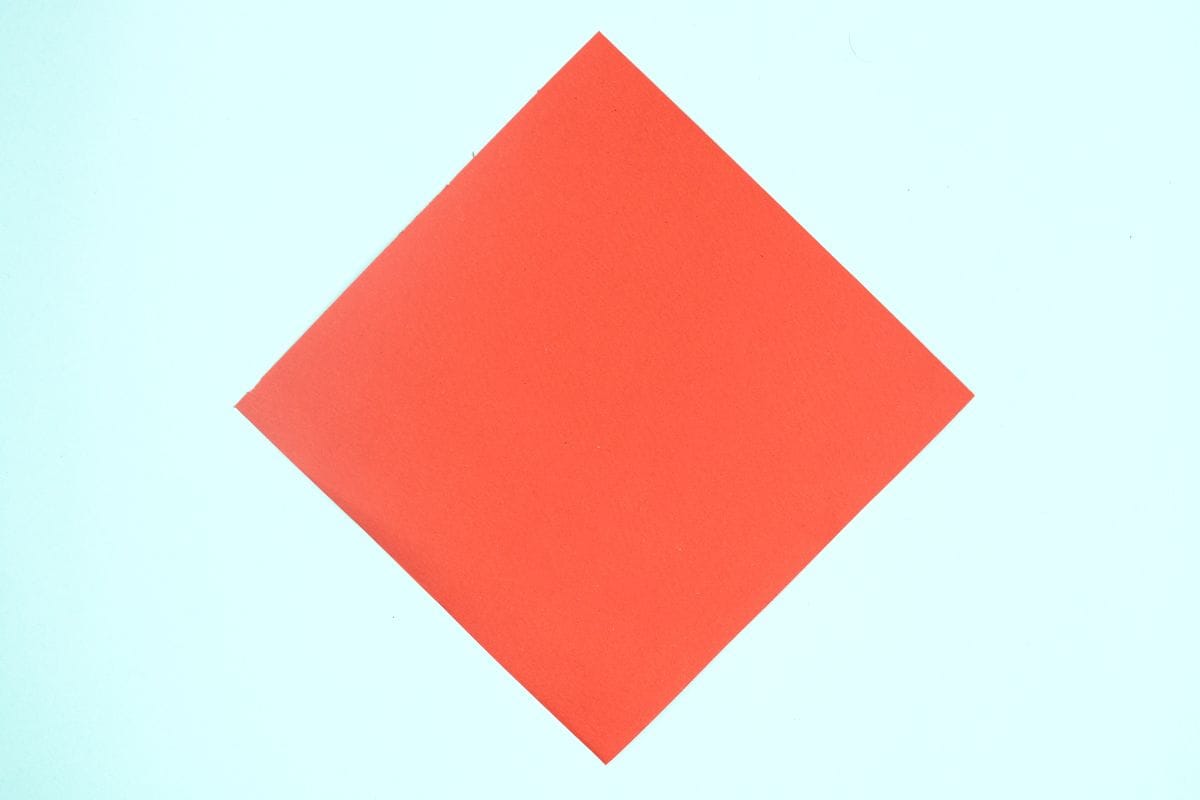
Rotate the paper into a diamond.
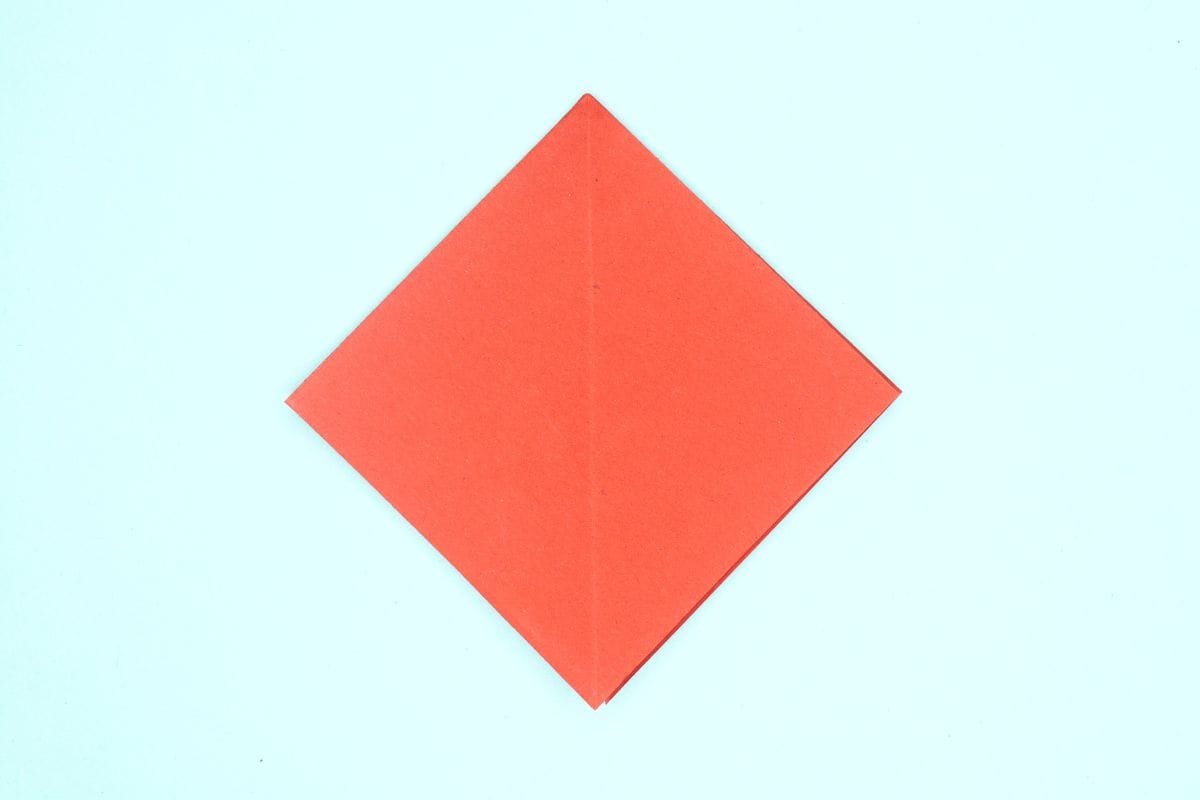
Step 3
3
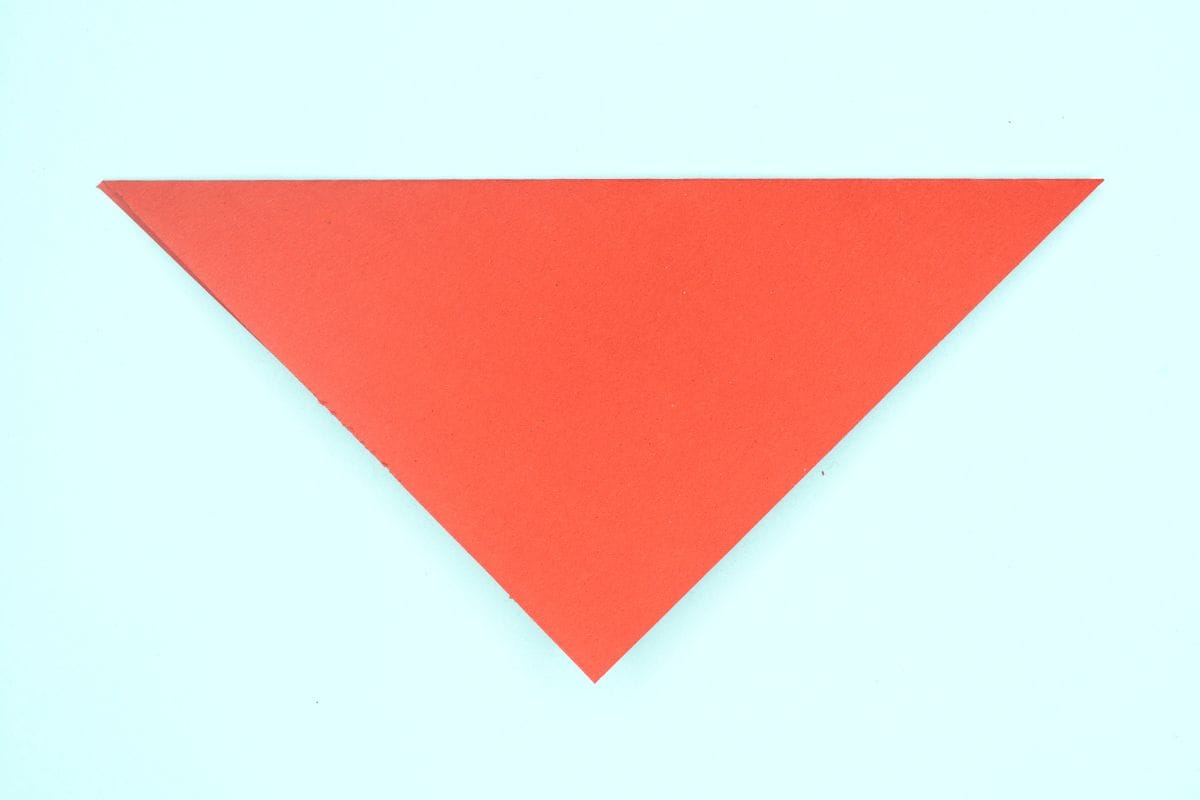
Fold the paper in half top to bottom.
Step 4
4
Fold in half again, left to right.
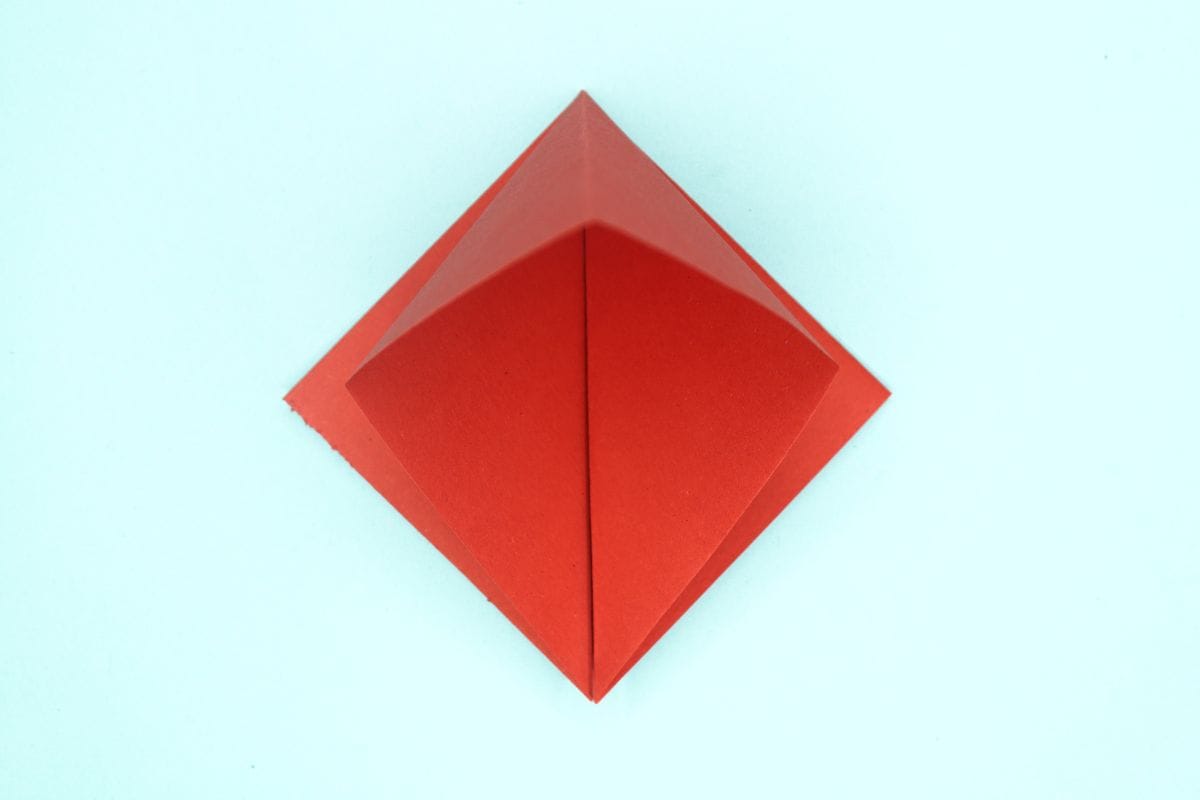
Step 5
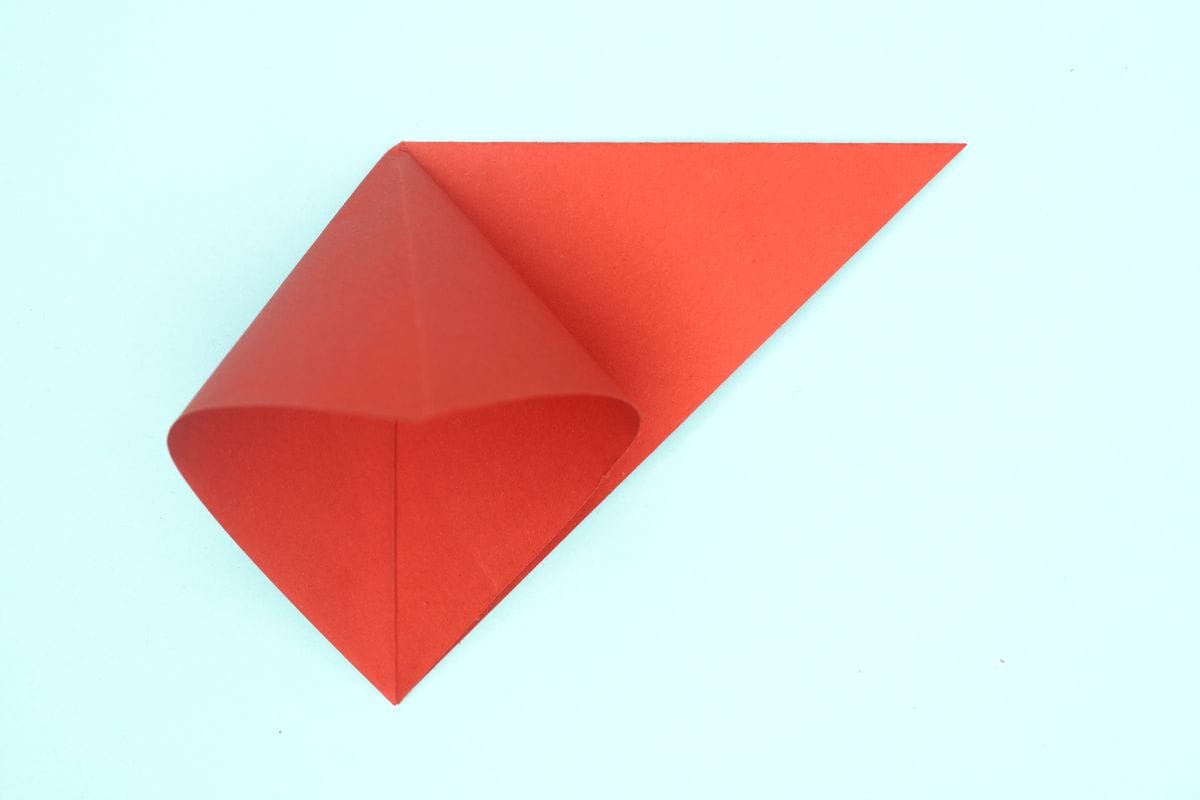
5
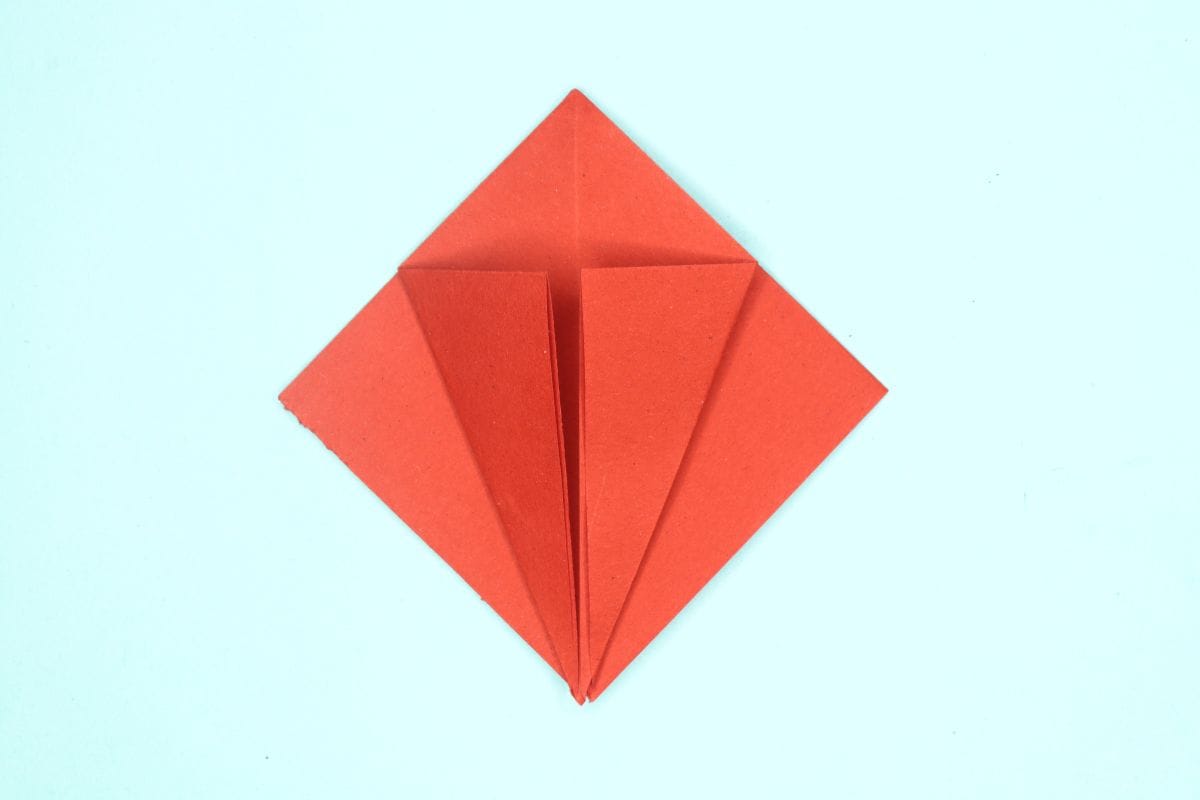
Stand straight the top flap and open it up.
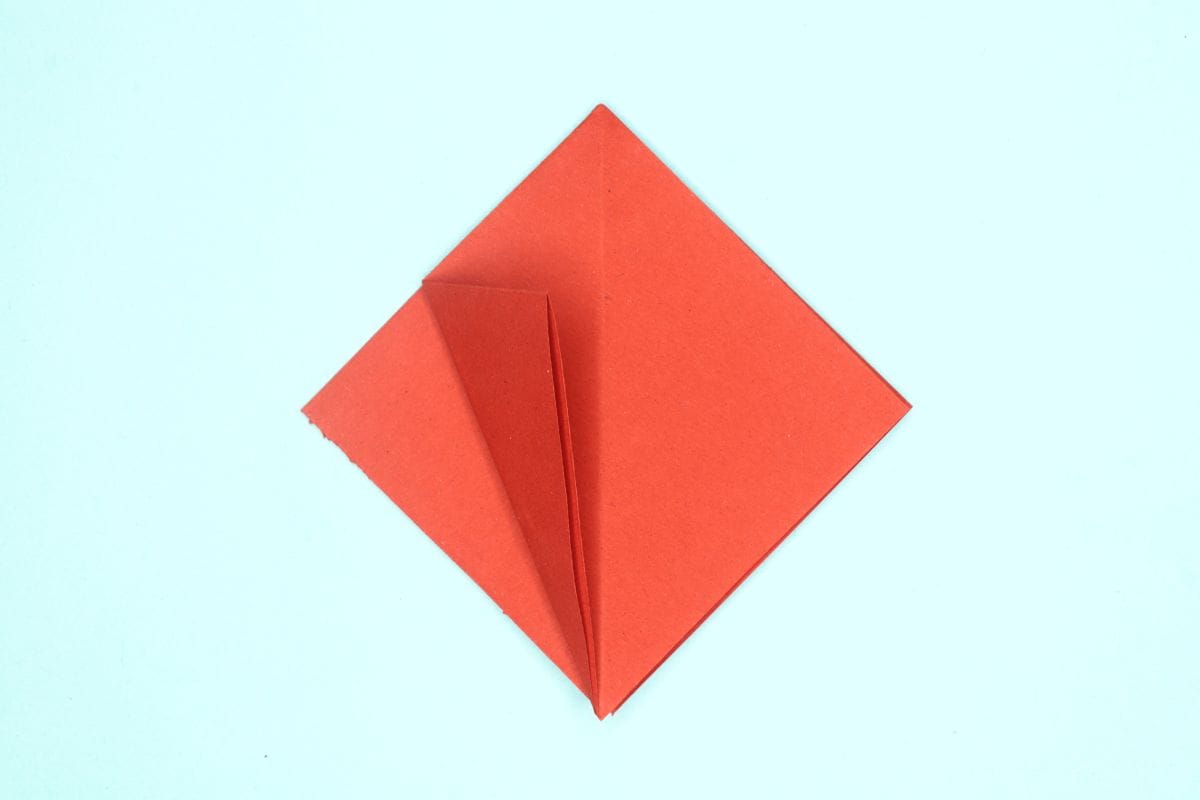
Step 6
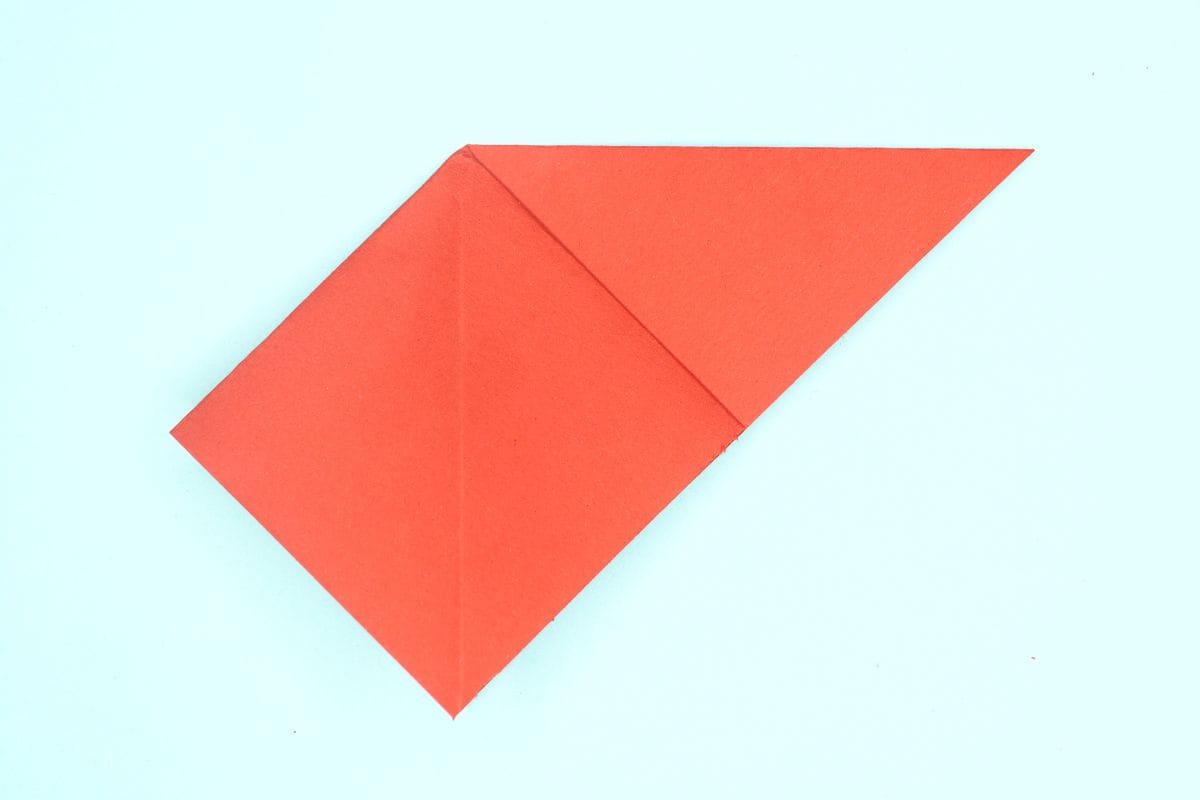
6
Squash down the flap.
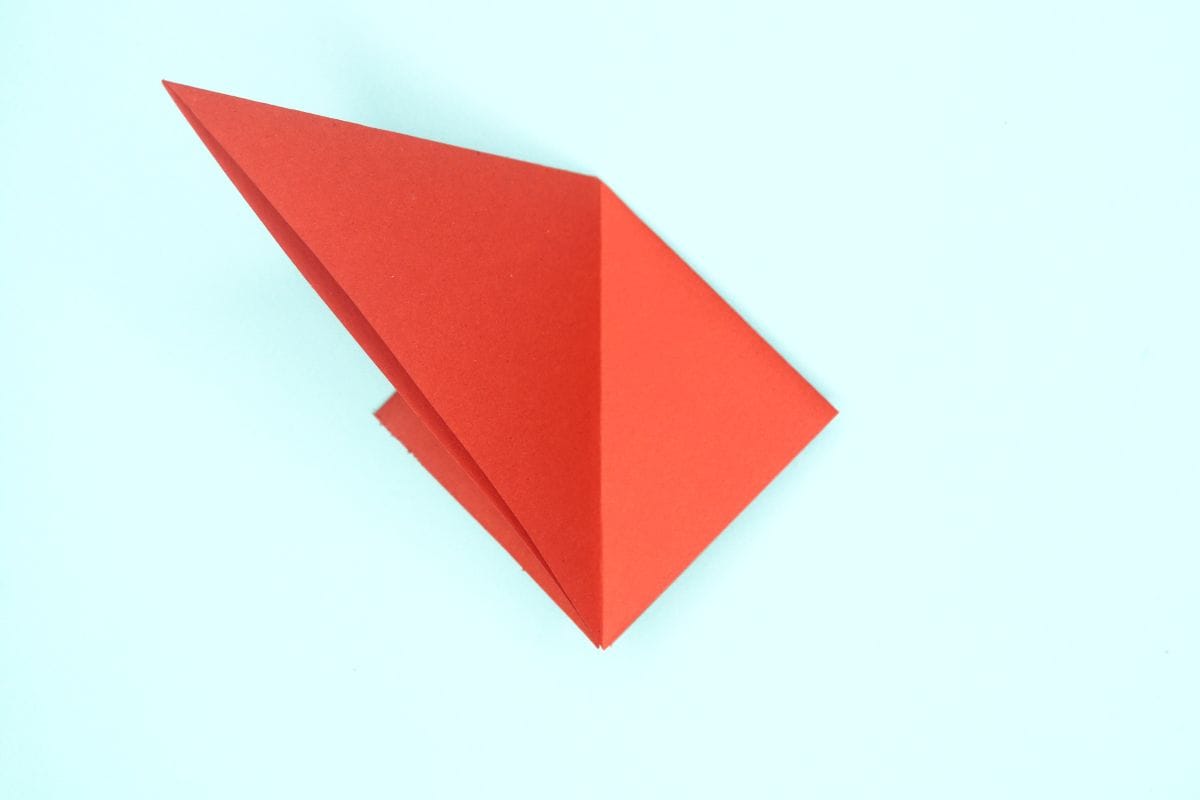
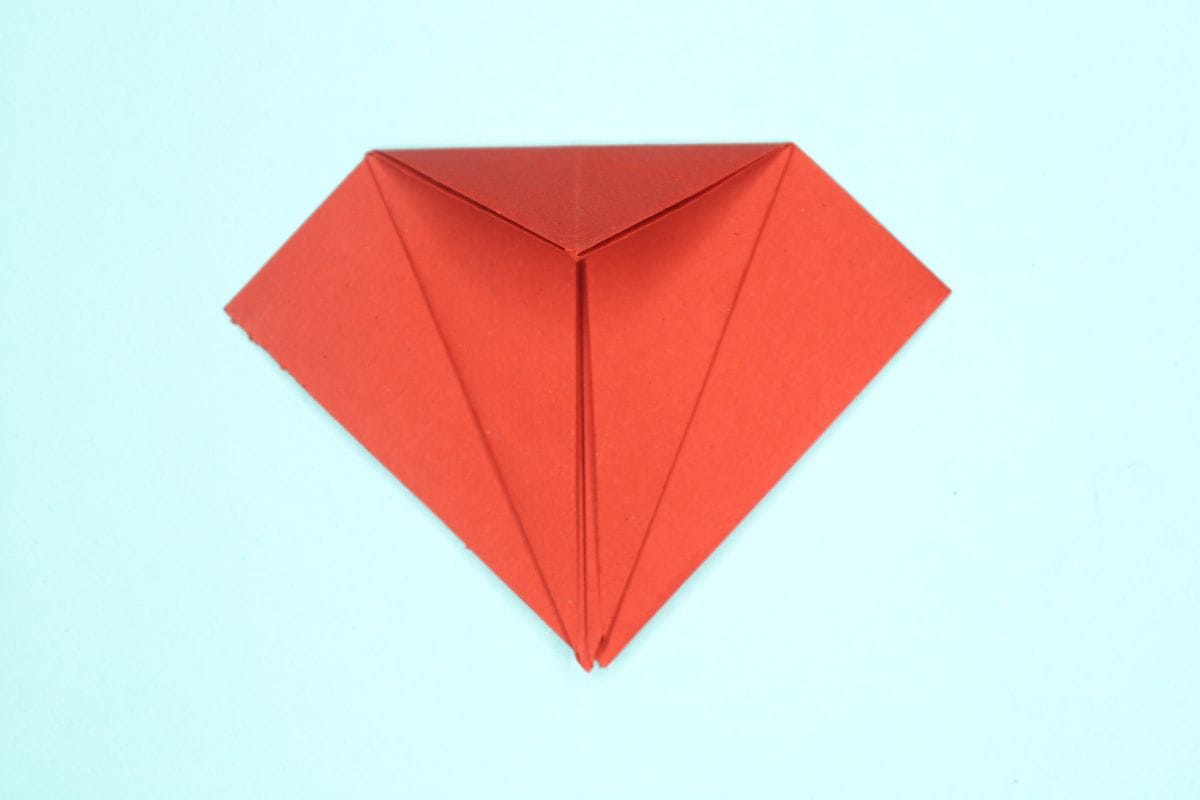
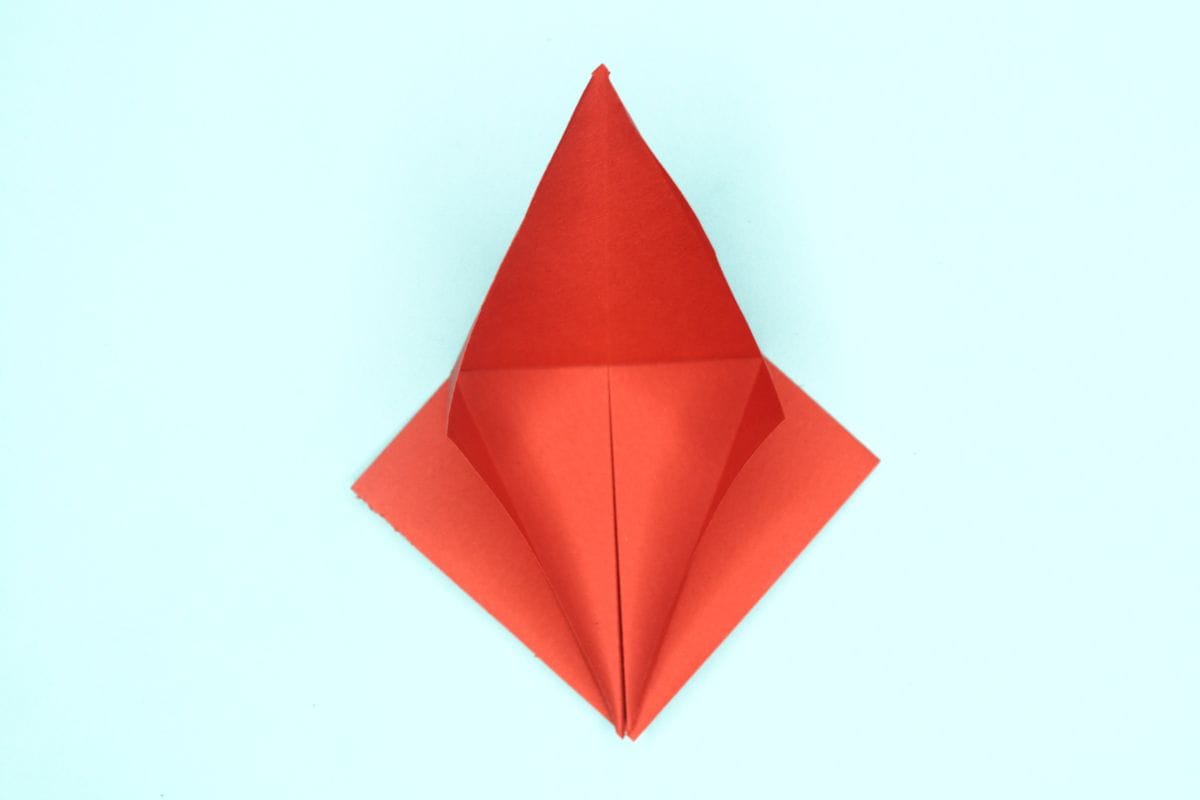
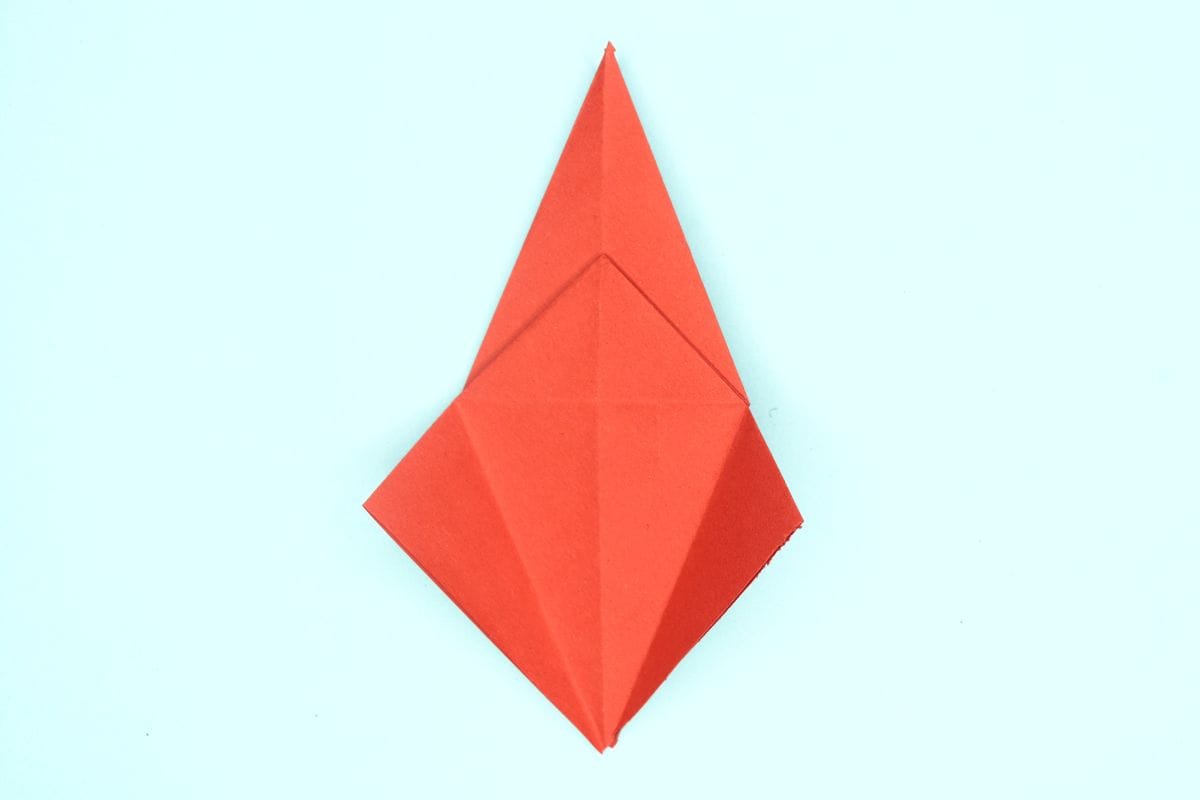
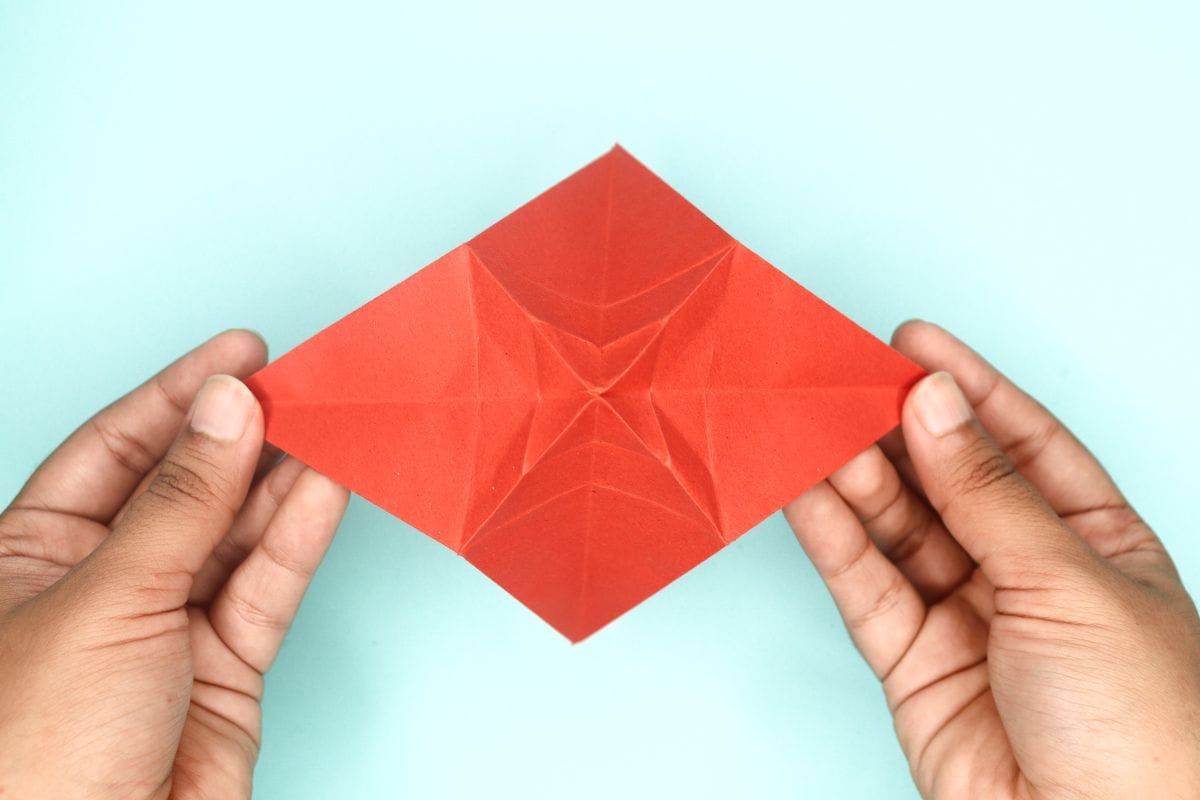
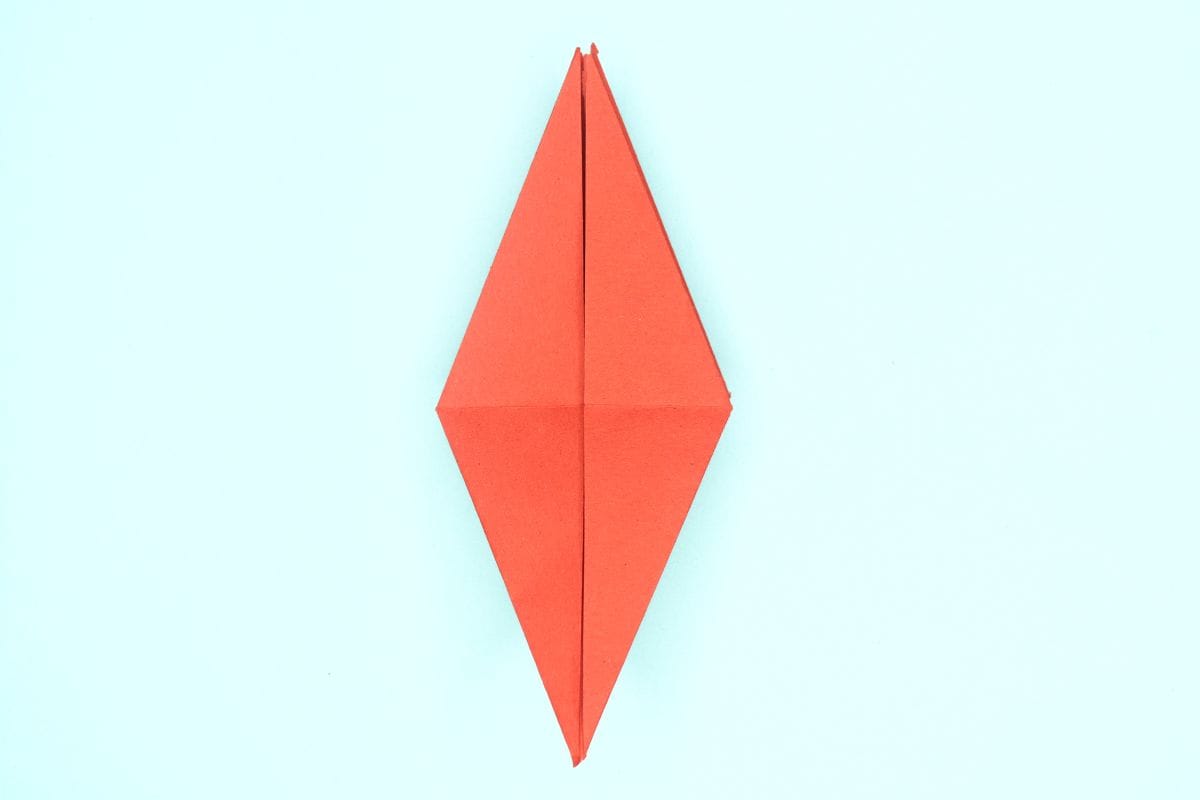
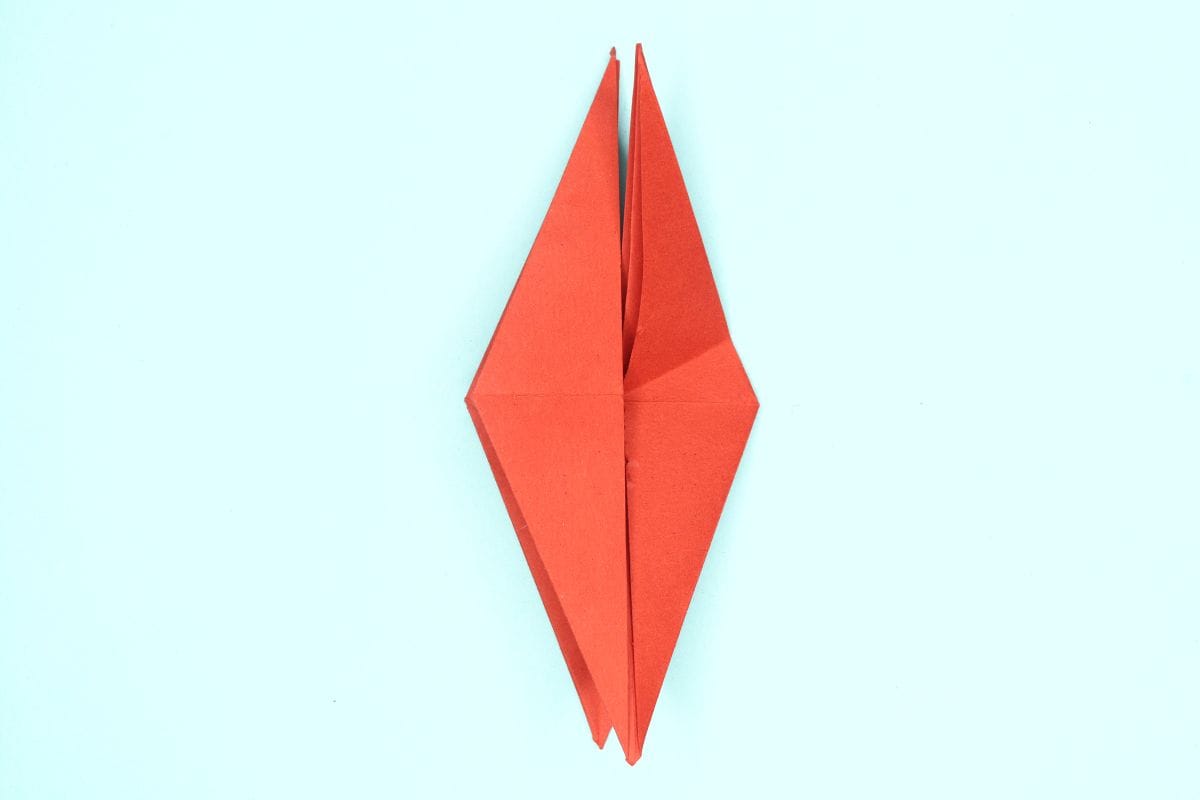
Step 7
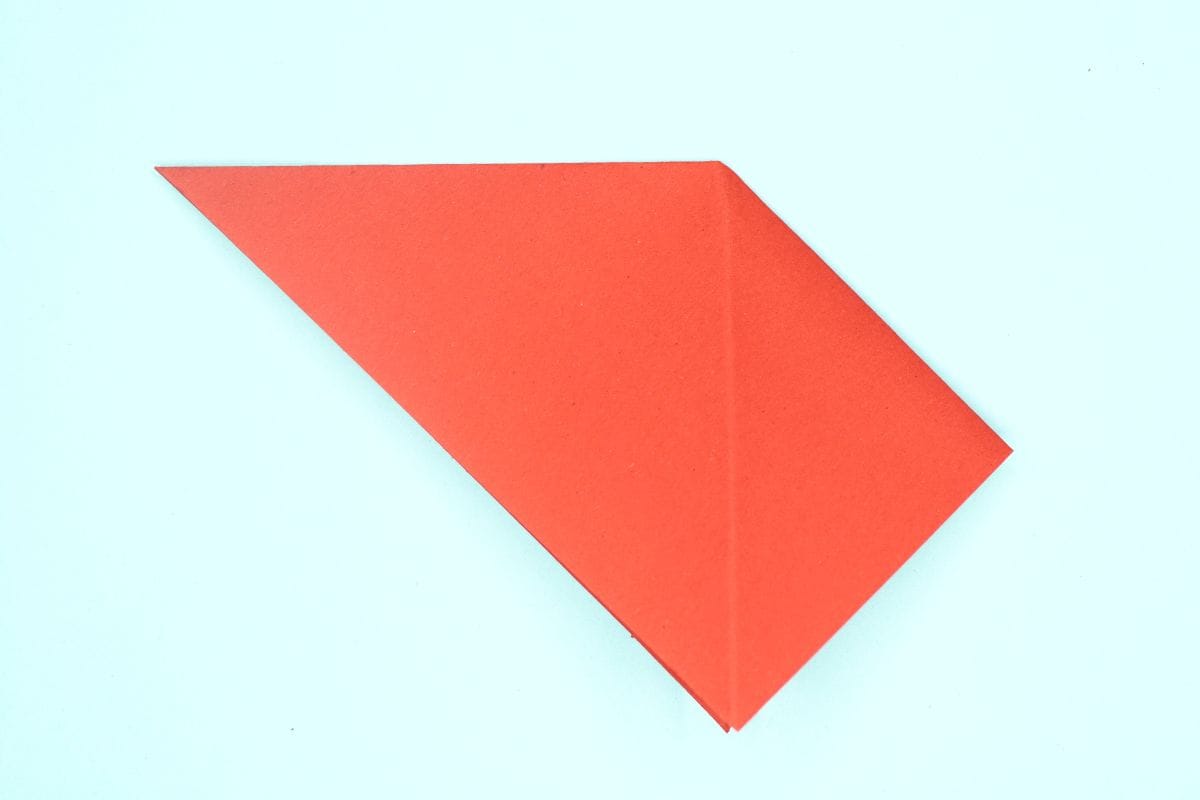
7
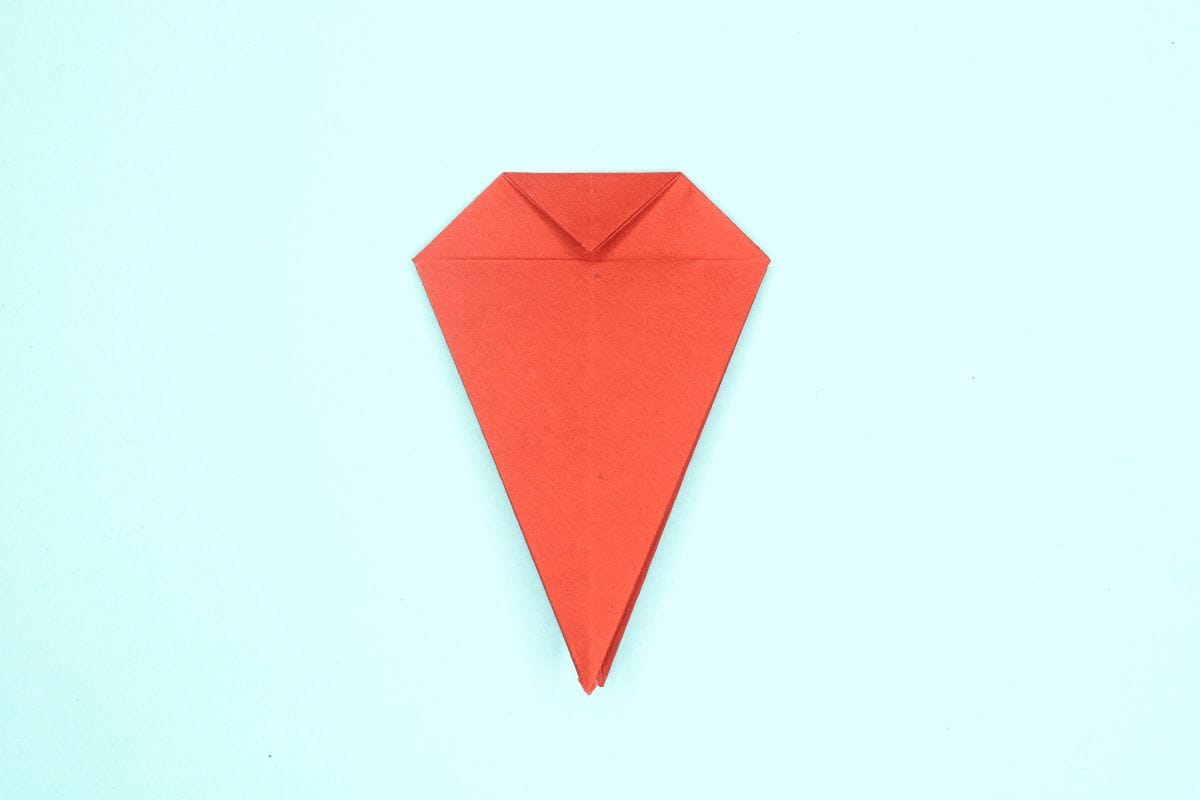
Turn the model over.
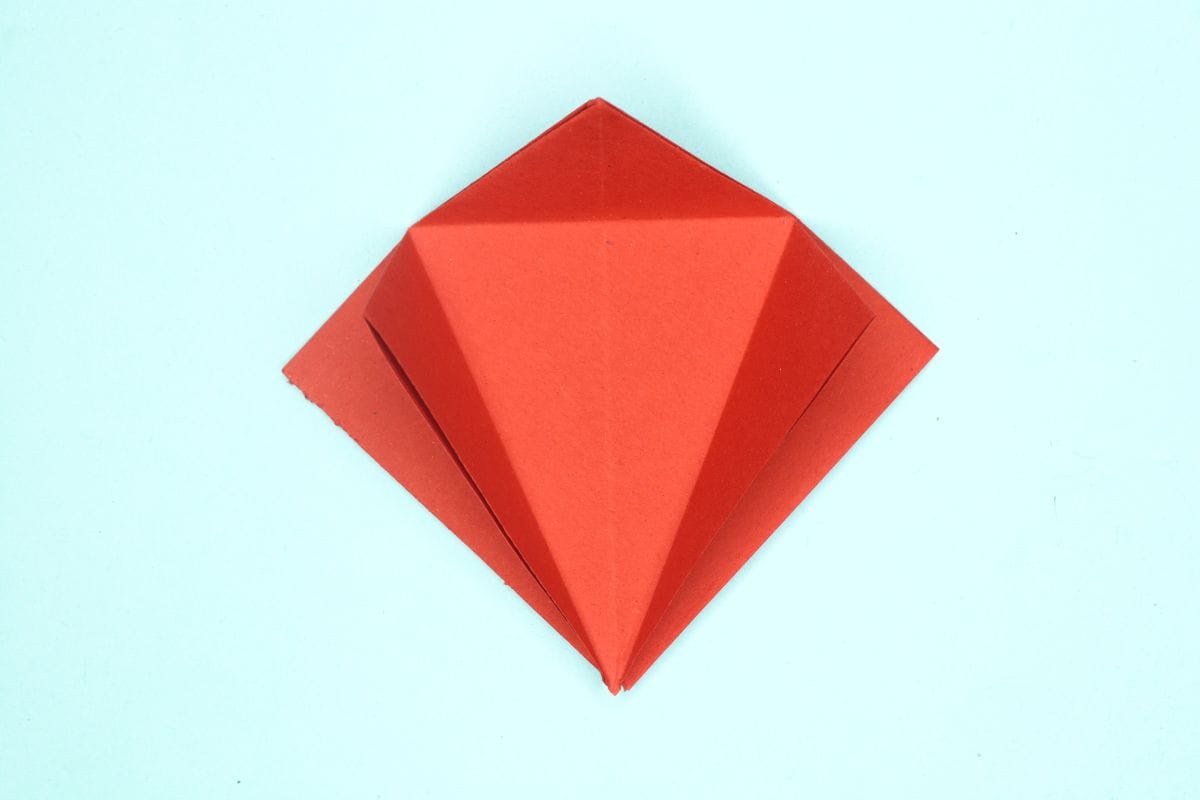
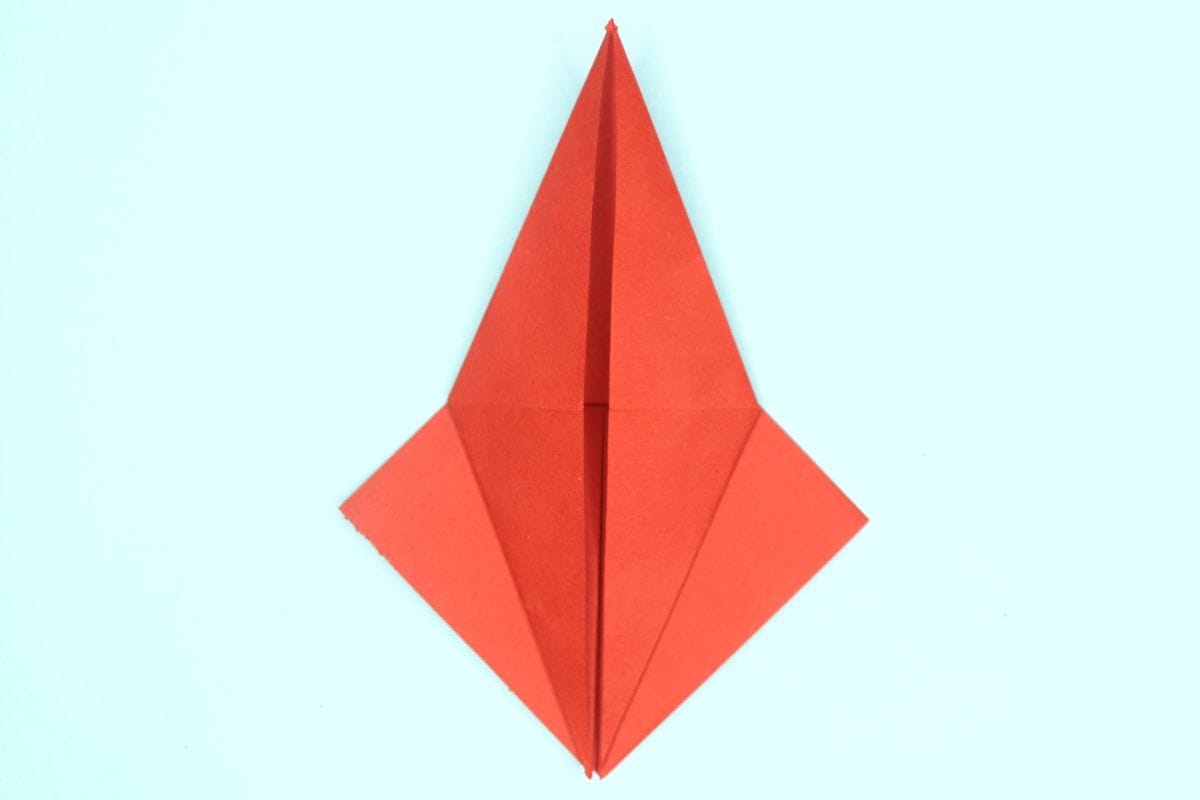
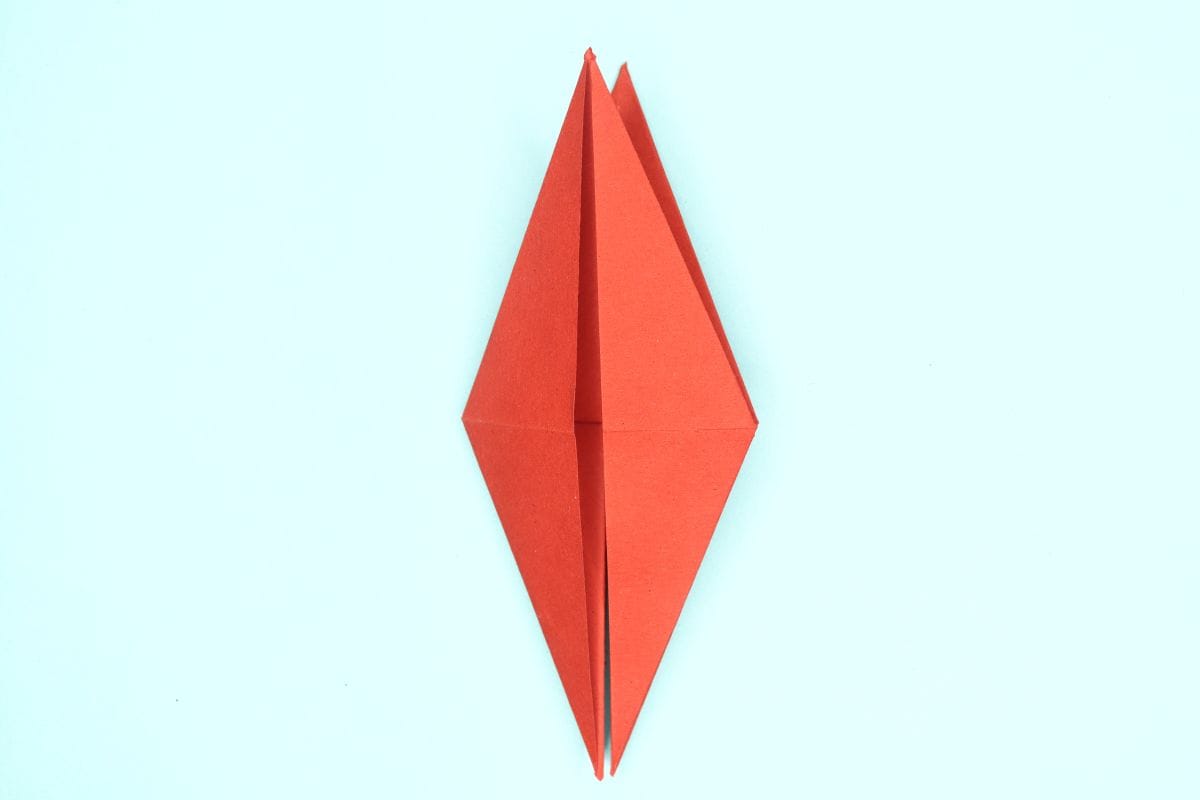
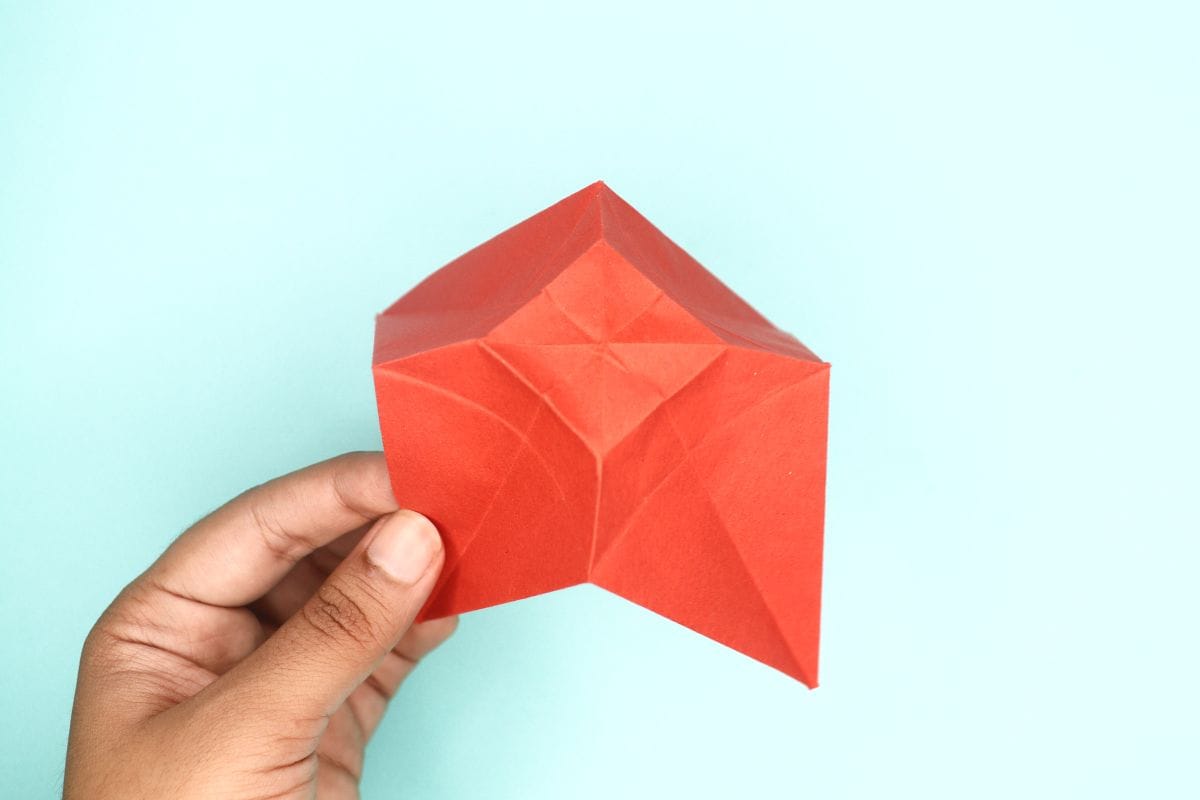
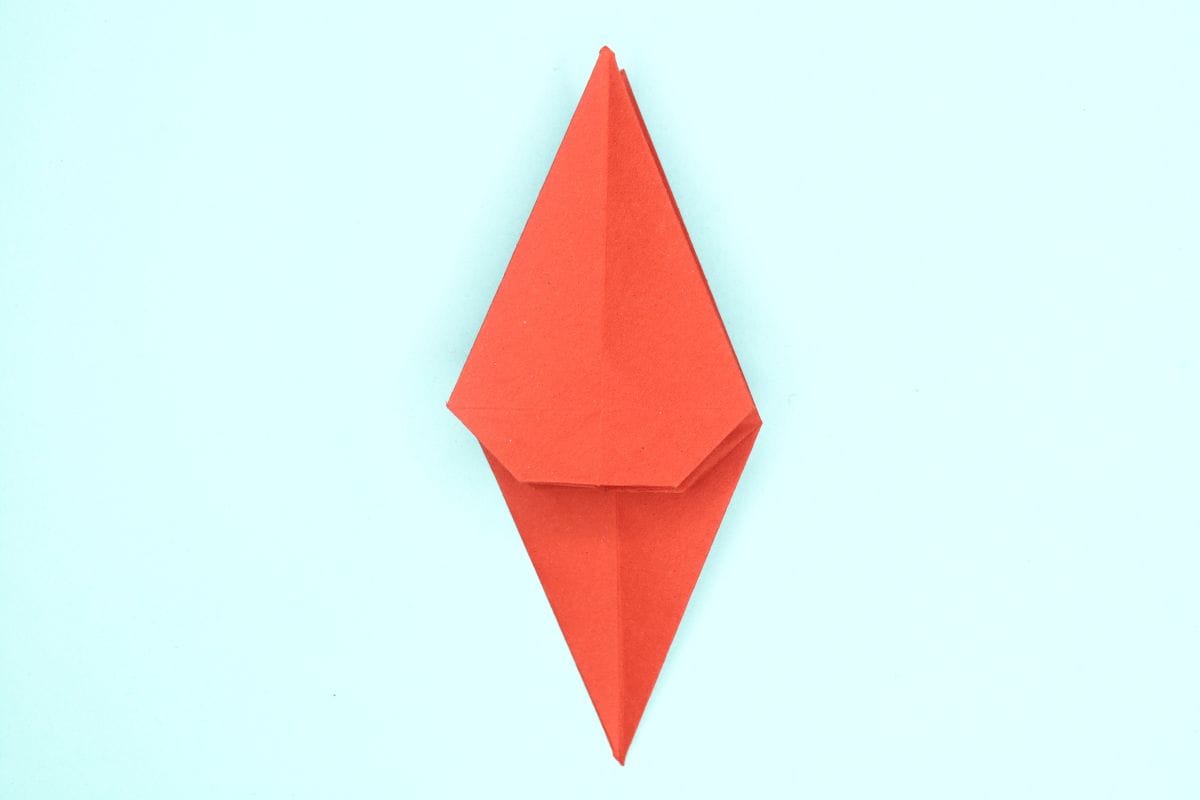
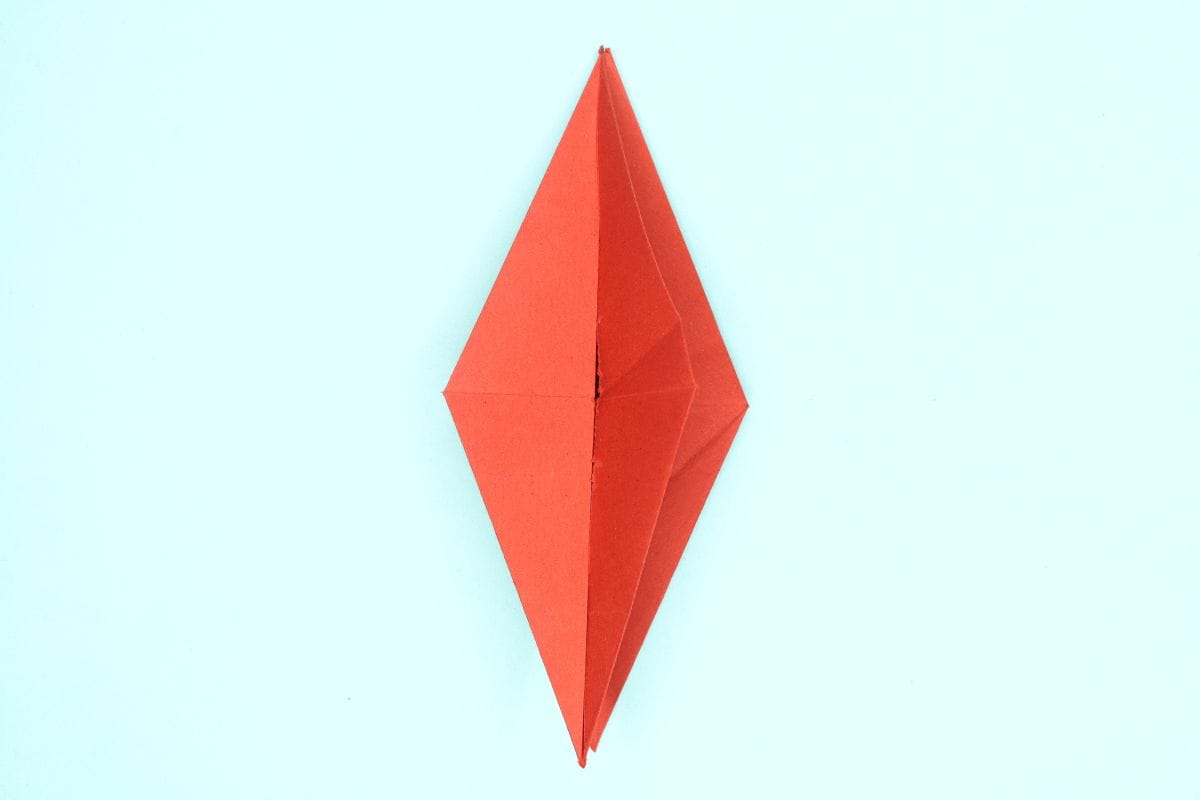
Step 8
Step 9
9
Open the flap.
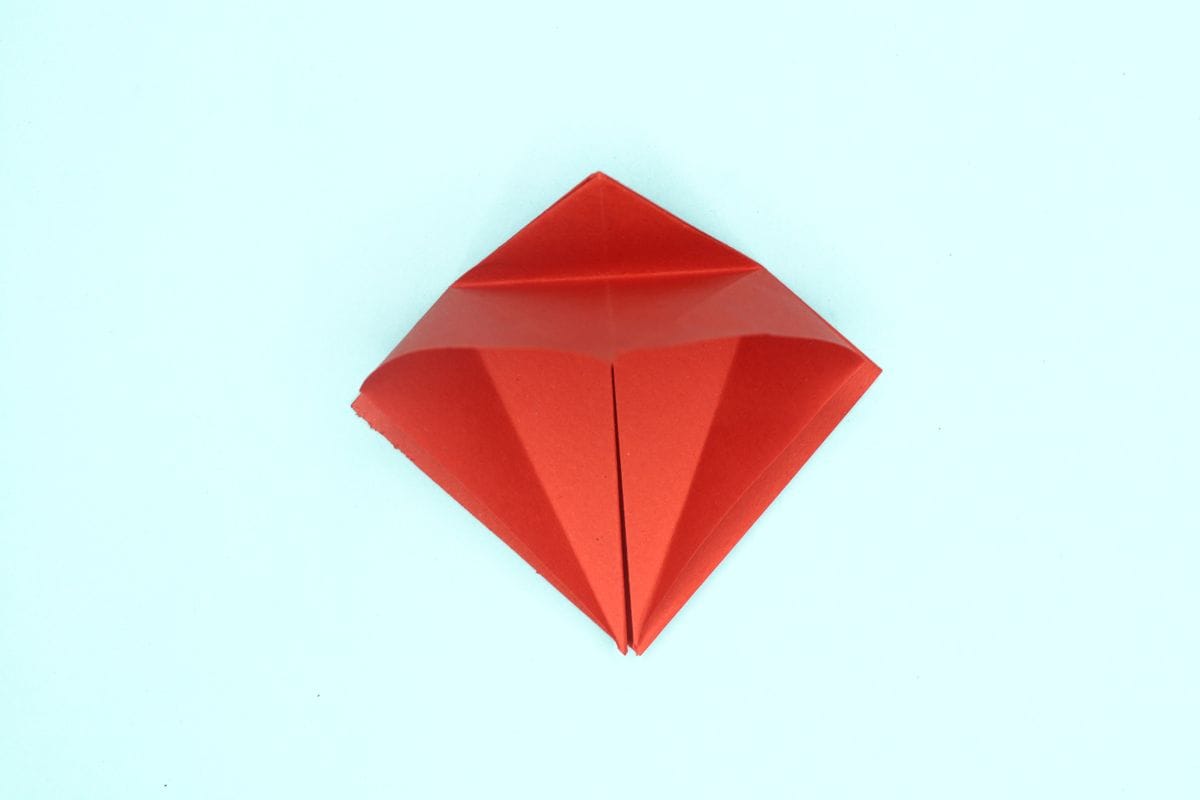
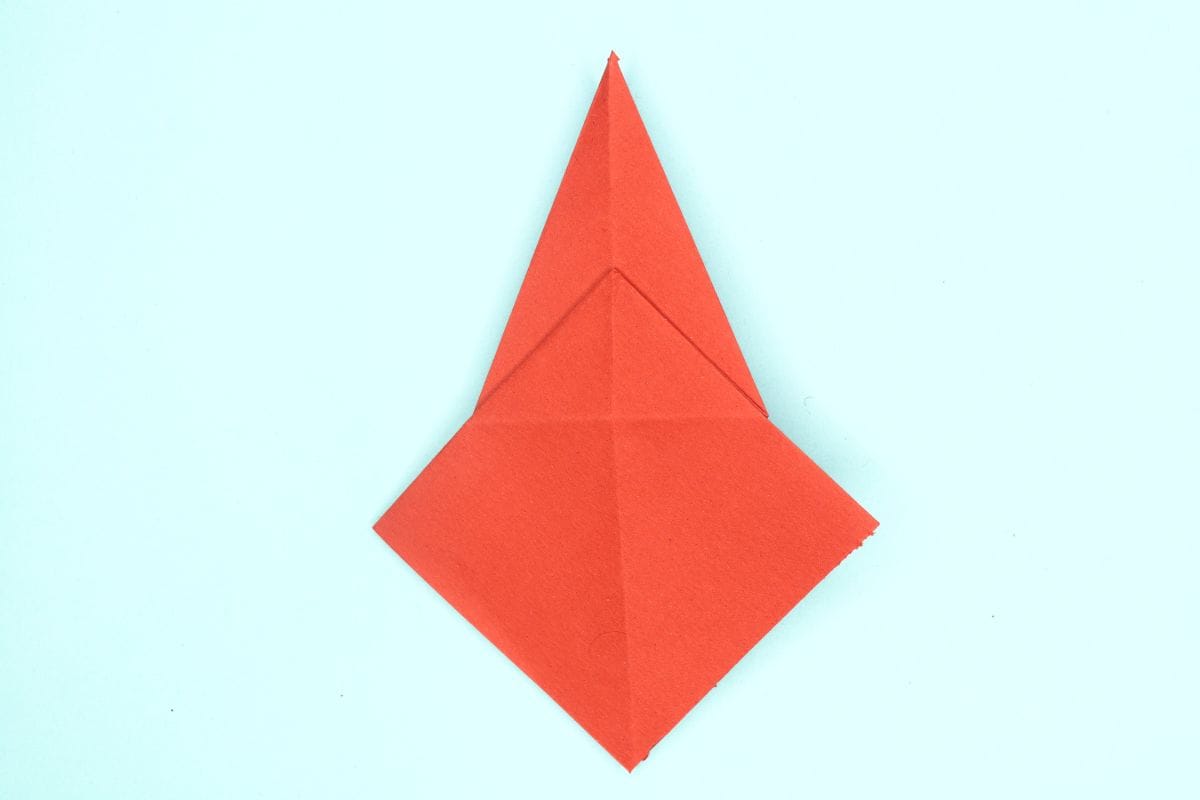
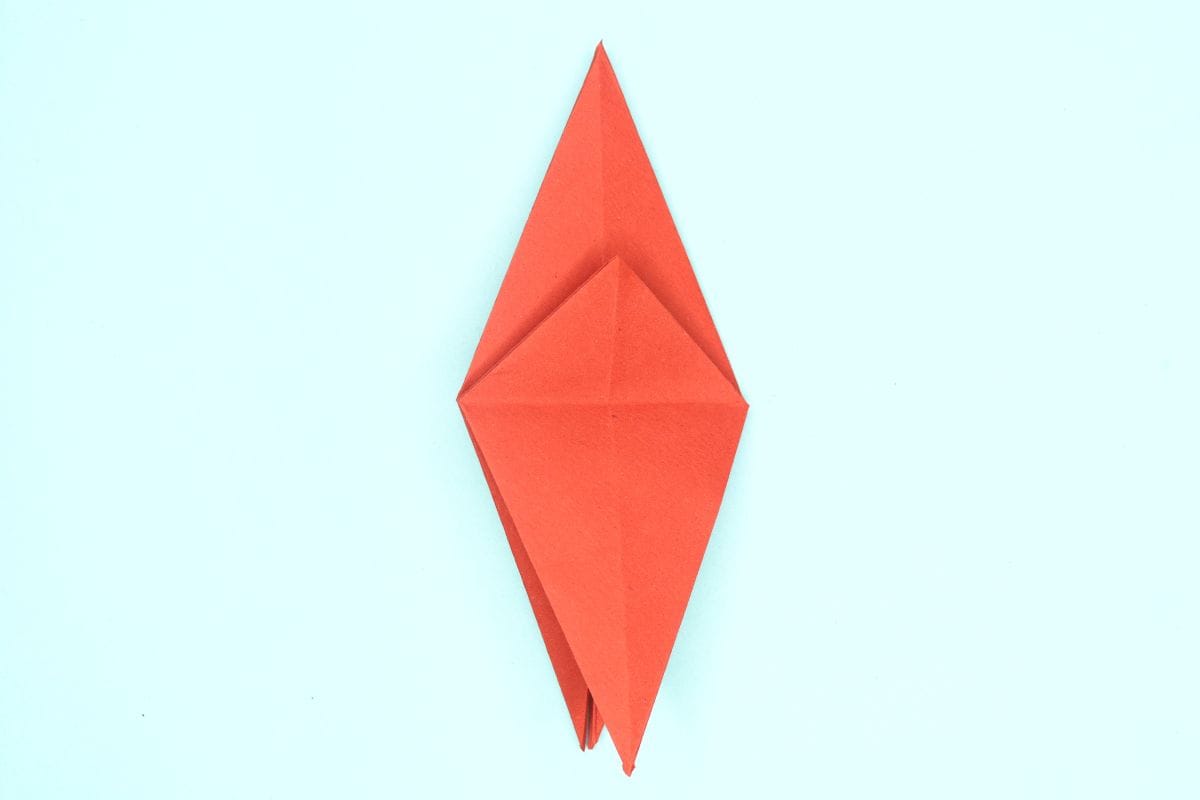
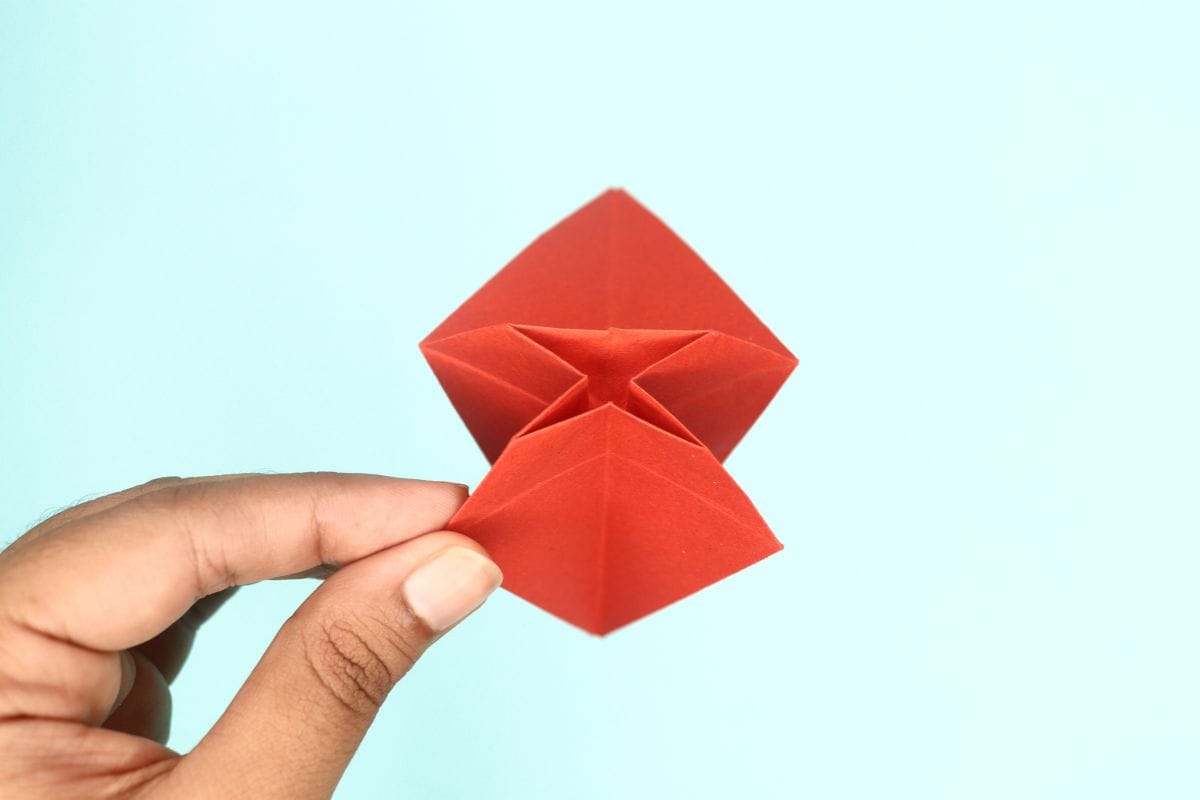
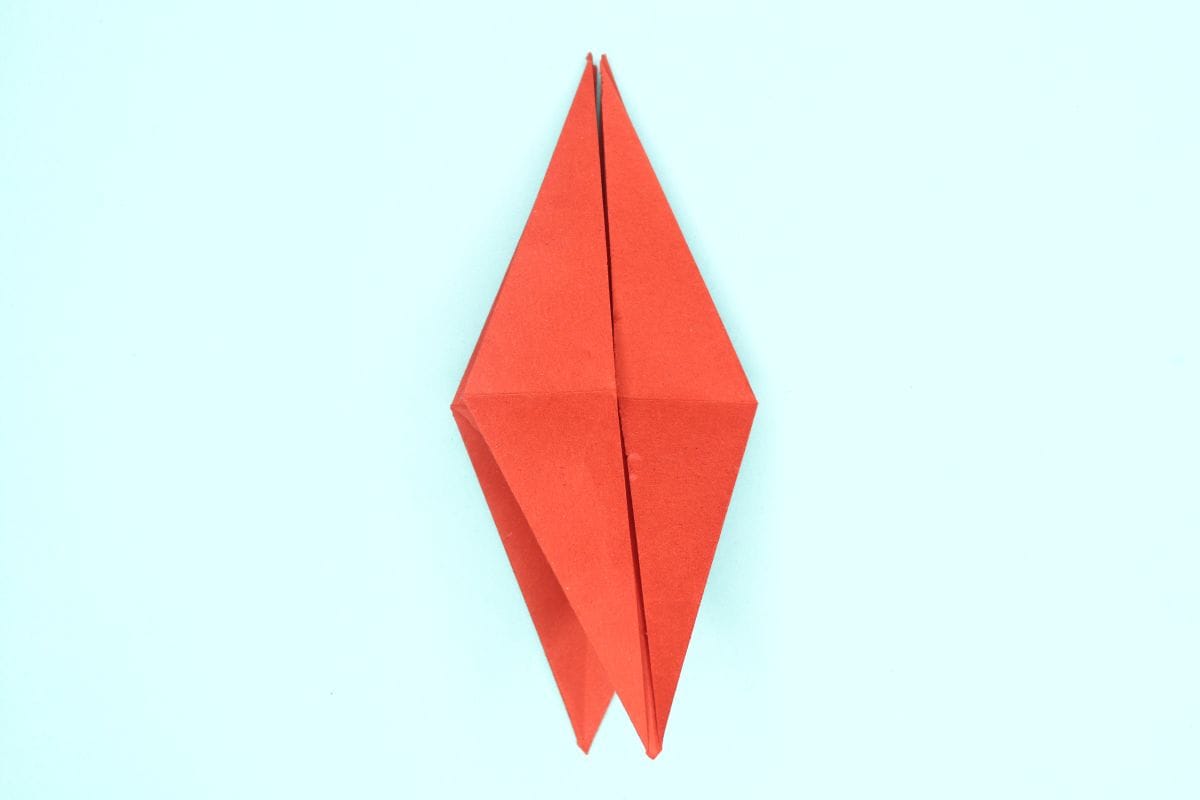
Step 10
10
Squash down the flap as shown.
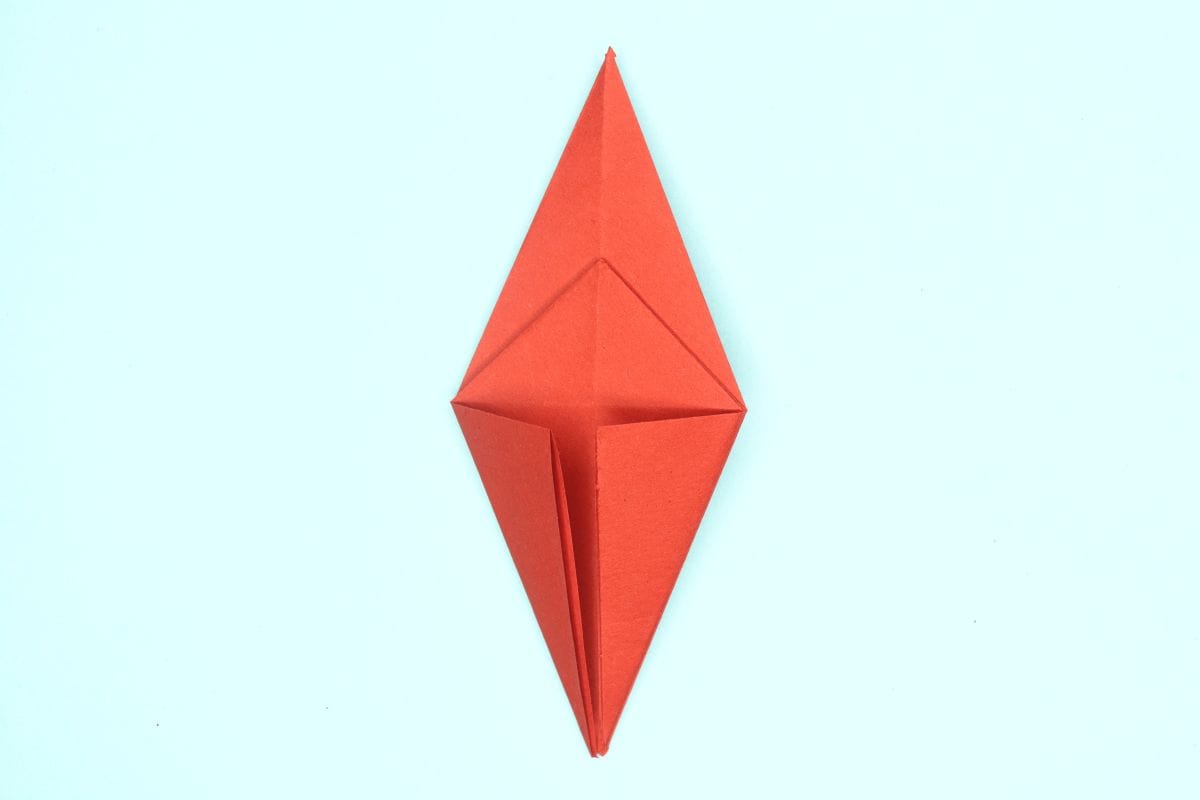
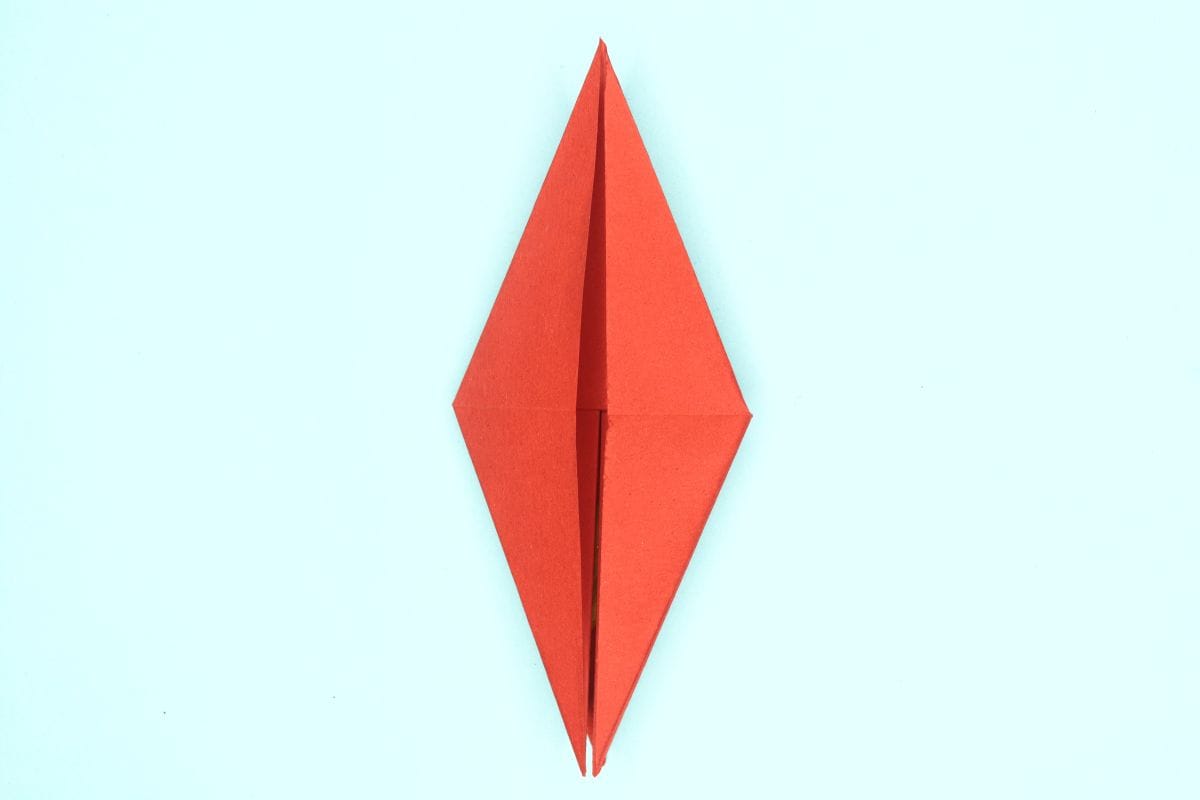
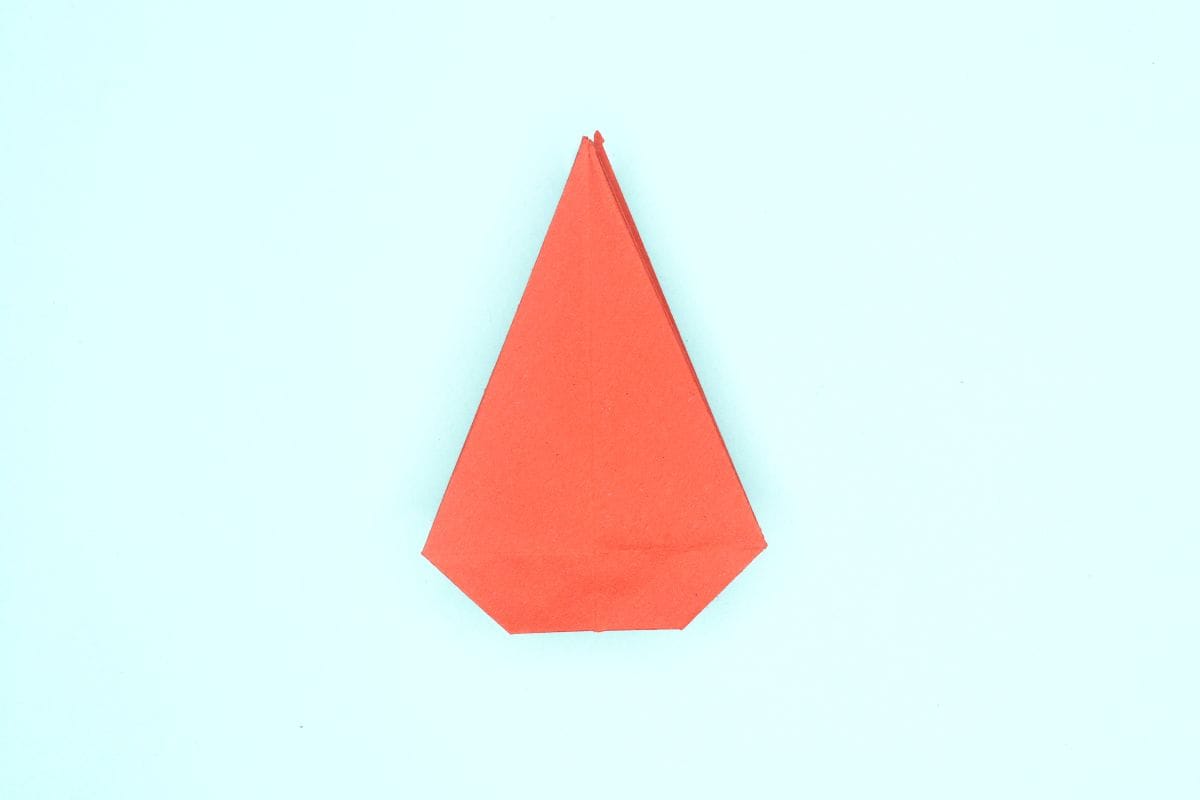
Step 11
11
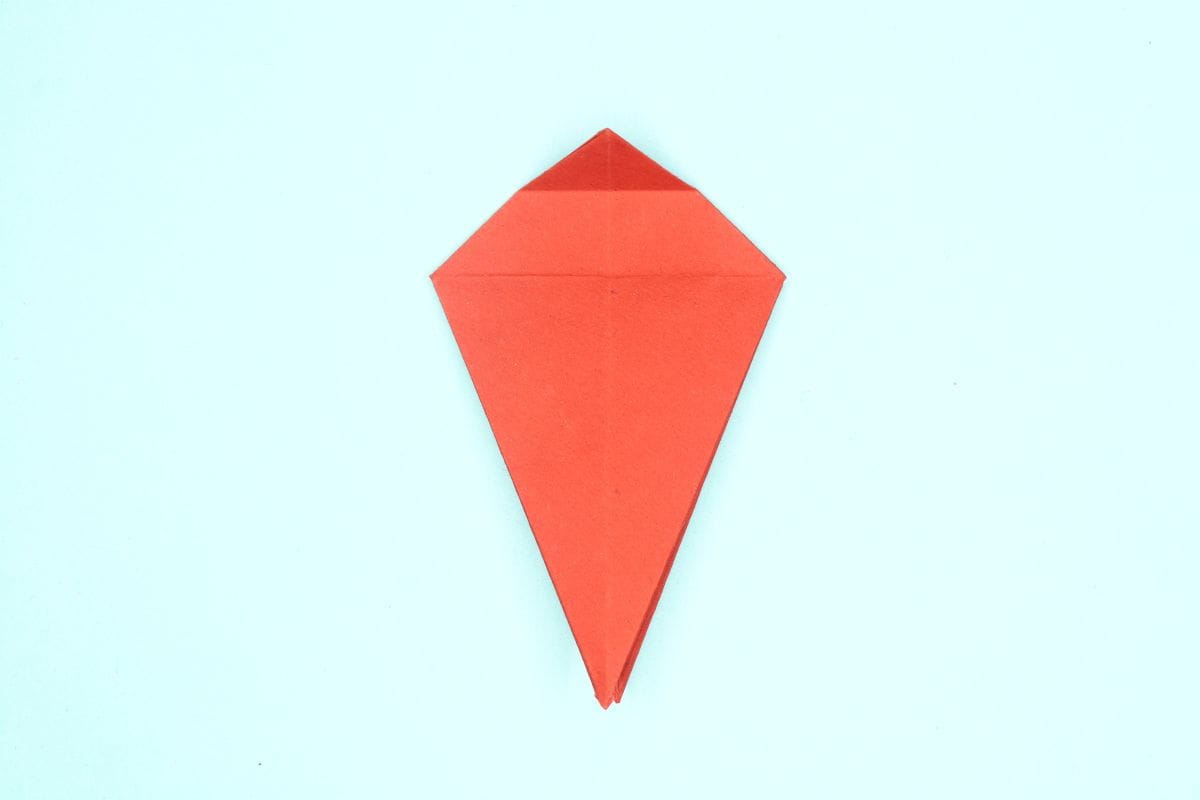
Fold the bottom left edge to meet the center crease.
Step 12
12
Fold the bottom right edge to meet the center crease.
Step 13
13
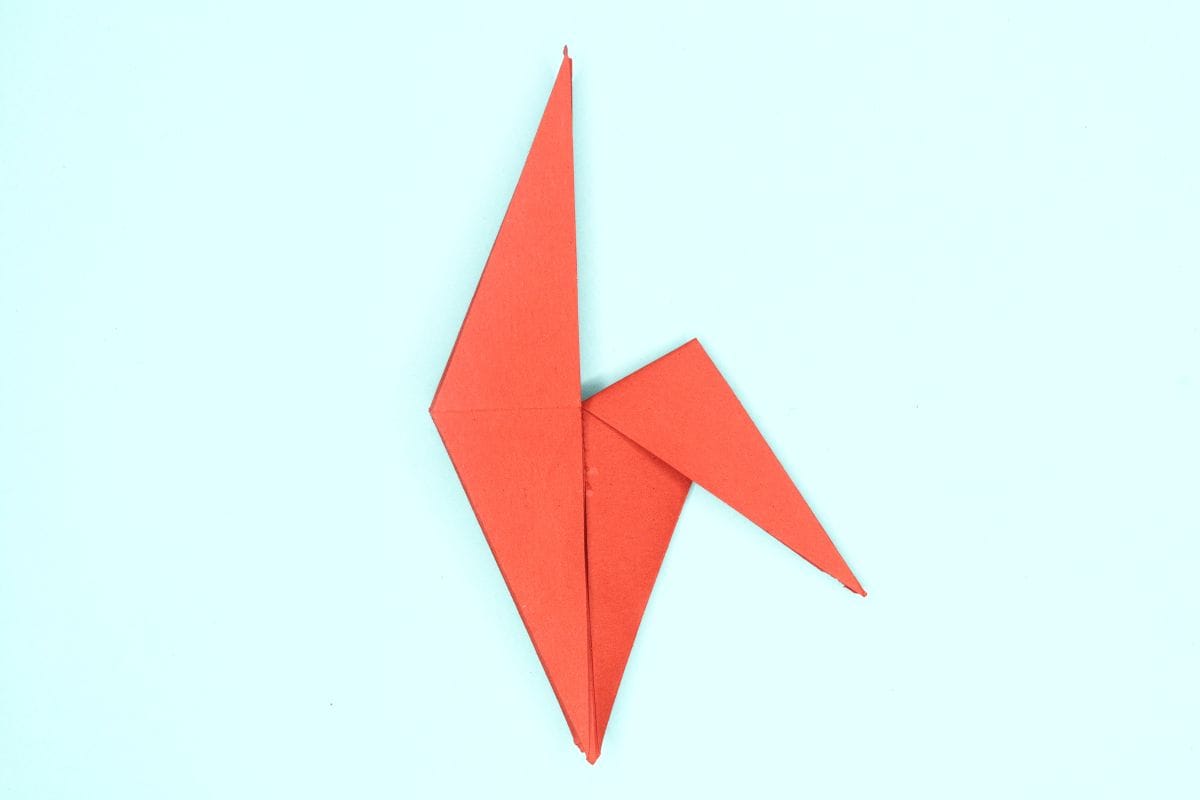
Fold down the top triangle.
Step 14
14
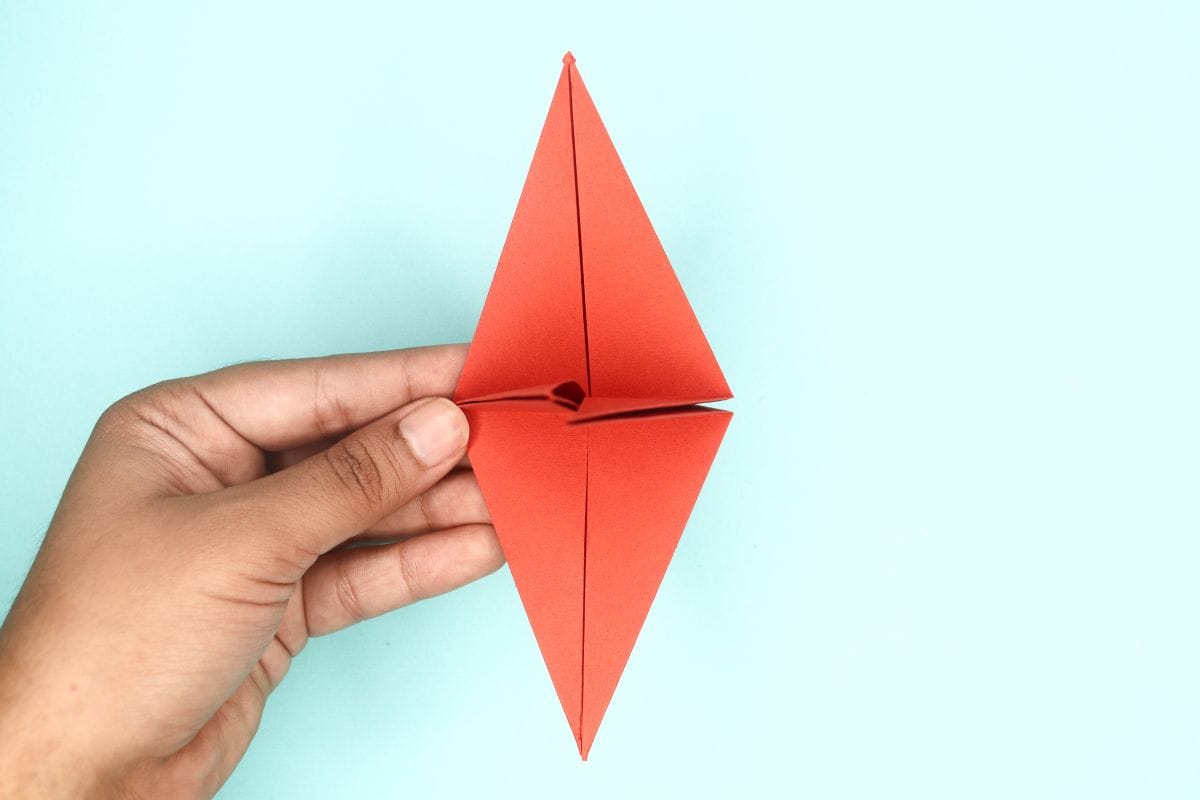
Unfold the top, left and right flaps.
Step 15
15
Open the top flap upwards.
Step 16
16
Fold it all the ways upwards.
Step 17
17
Press down the flap which will ultimately bring the left and right edges to the center.
Step 18
18
Turn the model over.
Step 19
19
Fold the left and right edges to the center.
Step 20
20
Unfold the edges.
Step 21
21
Repeat the steps 15-17 on this side now.
Step 22
22
Fold down the top triangle.
Step 23
23
Turn the model over.
Step 24
24
Fold down the top triangle.
Step 25
25
Fold down the top corner to meet the crease line.
Step 26
26
Unfold.
Step 27
27
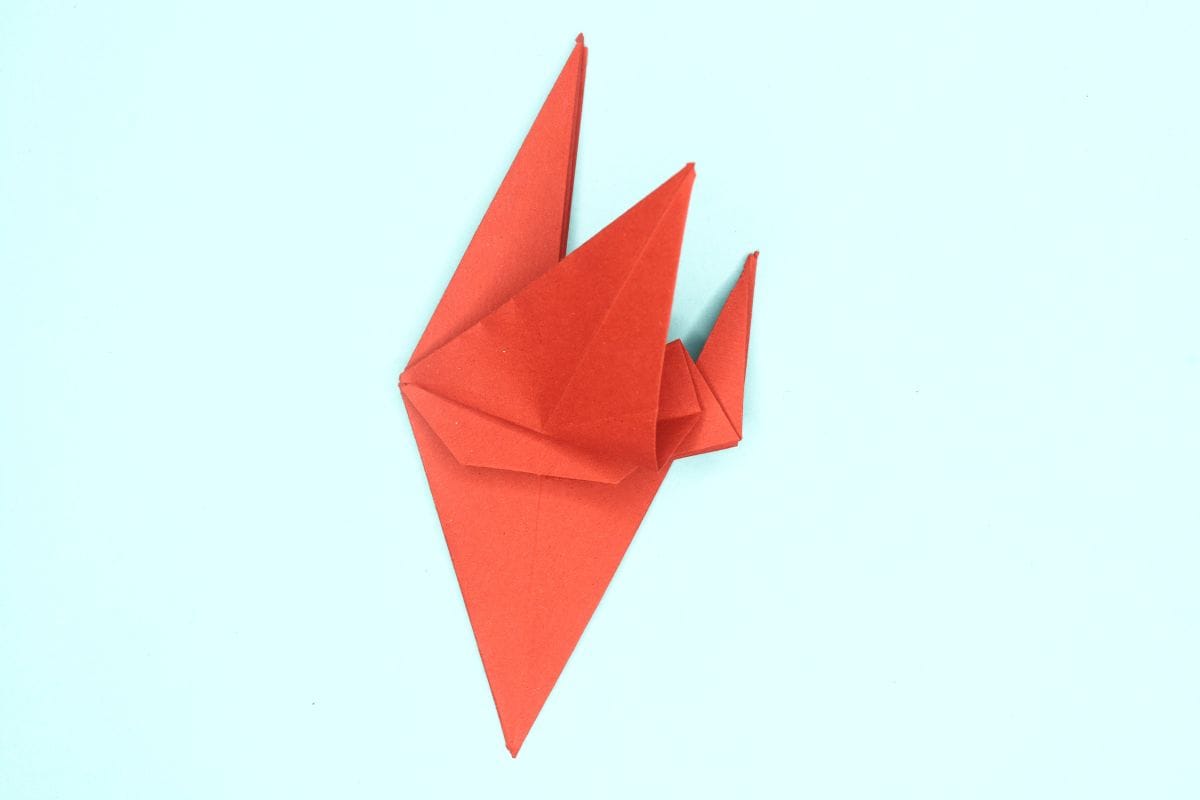
Open up the figure from the bottom.
Step 28

28
Pull apart the upright flaps.
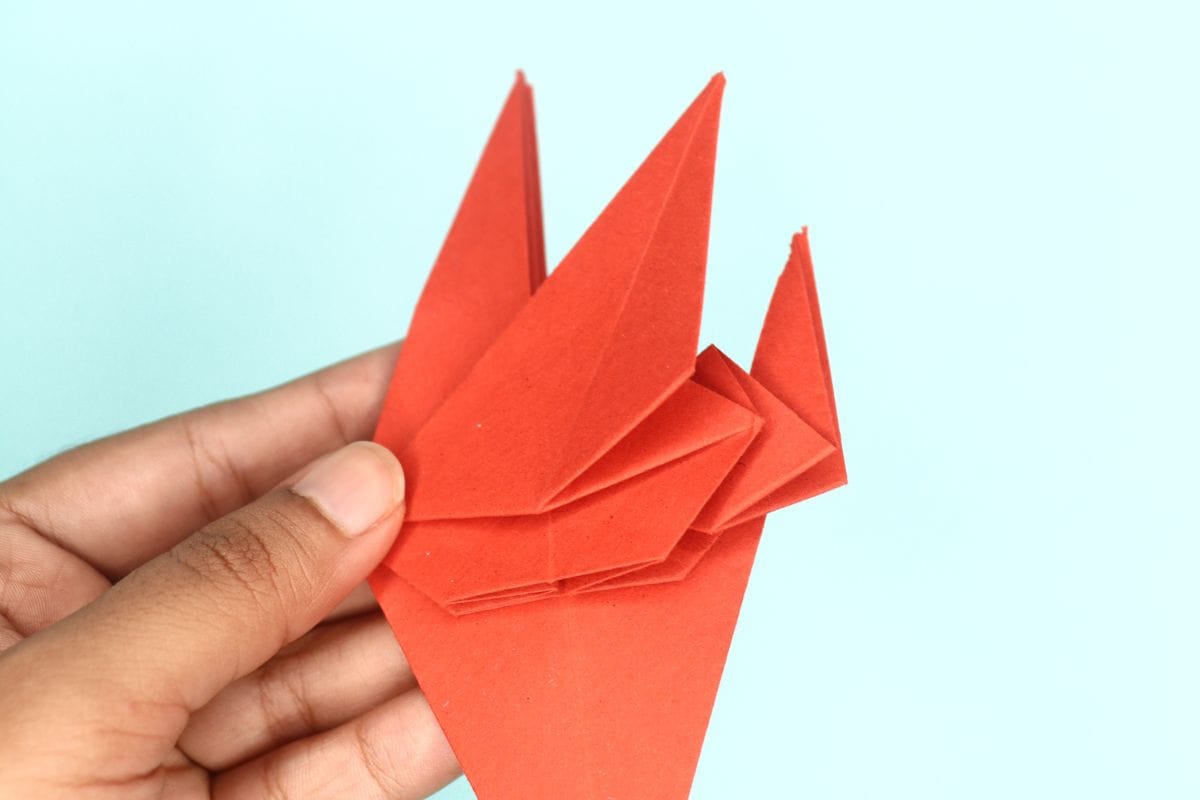
Step 29
29
Turn the paper over so you’re looking at it from the top.
Step 30
30
Flatten the peak at the top.
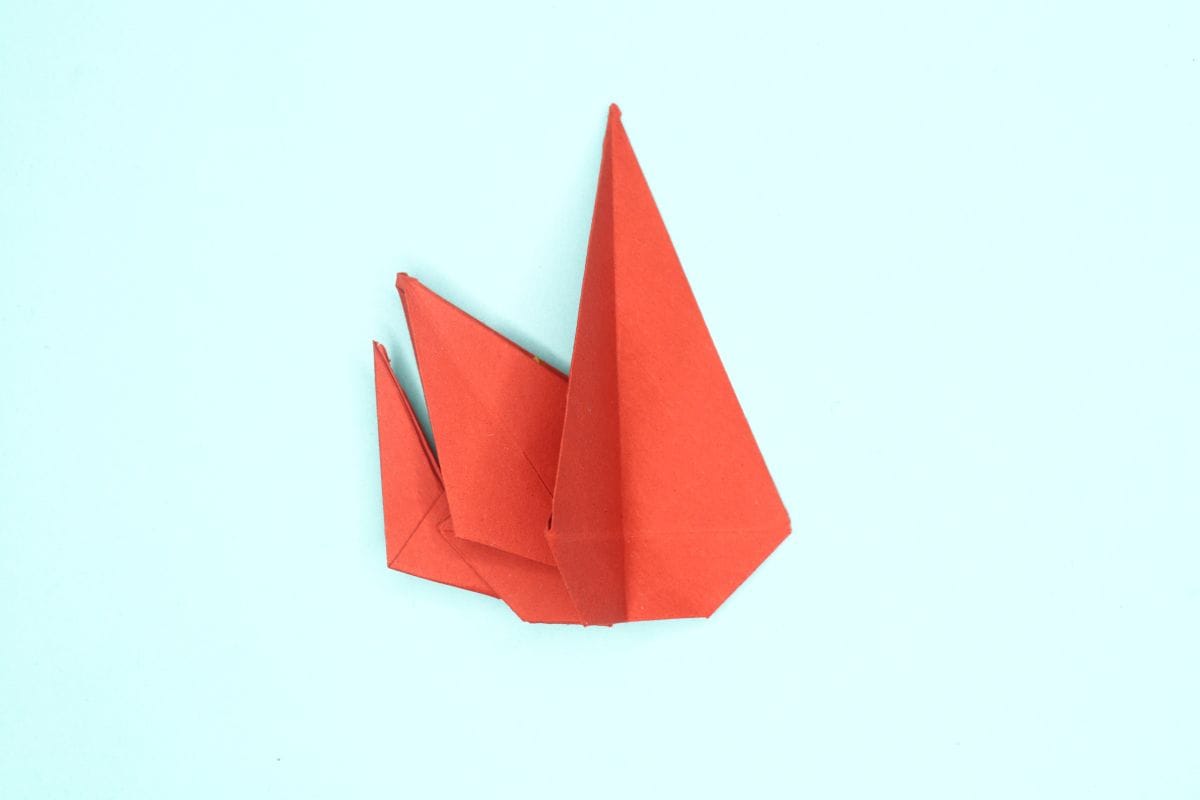
Step 31
31
Use all the creases available in that square to invert it.
Step 32

32
Flatten the figure.
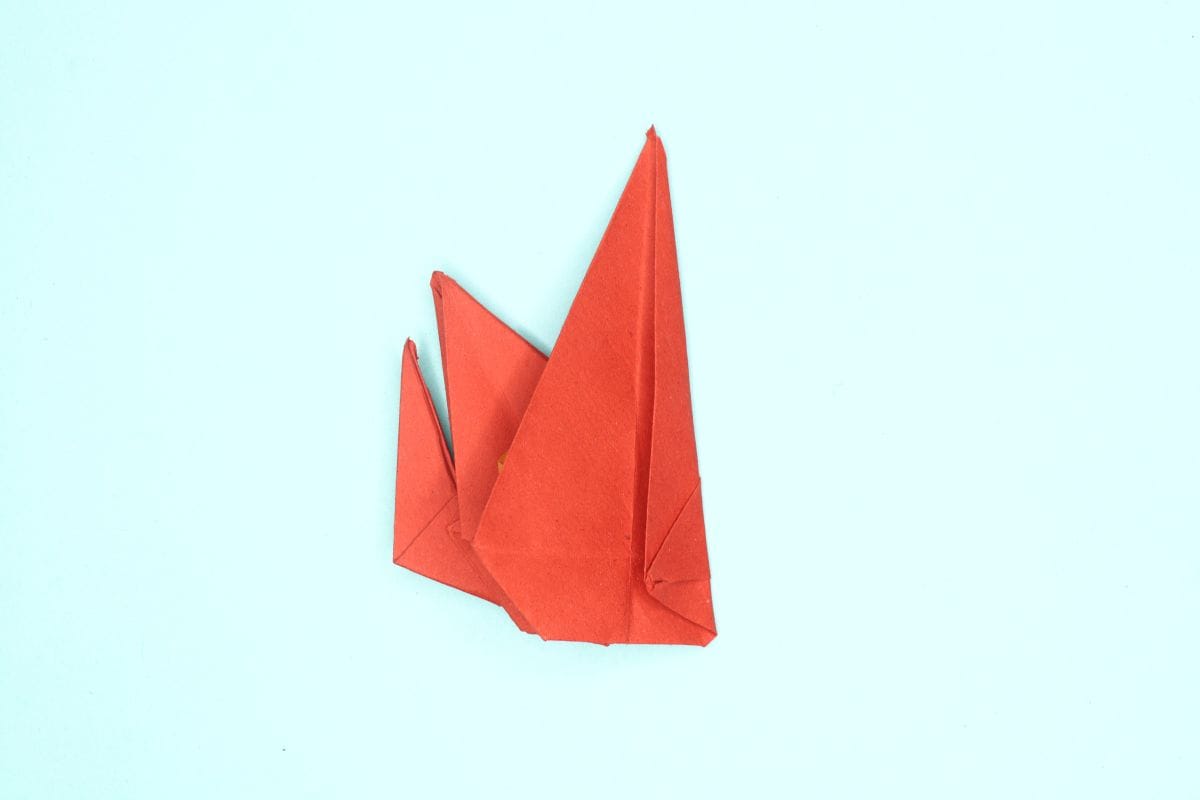
Step 33
33
Turn the figure upside down.
Step 34
34
Fold the top flap downward.
Step 35
35
Turn the model over.
Step 36
36
Fold the top flap downward.
Step 37
37
Fold the right flap down, but tilt it right a little so that the edge on the right side of the flap line up with the edge of the base.
Step 38
38
Unfold. We just needed a crease line.
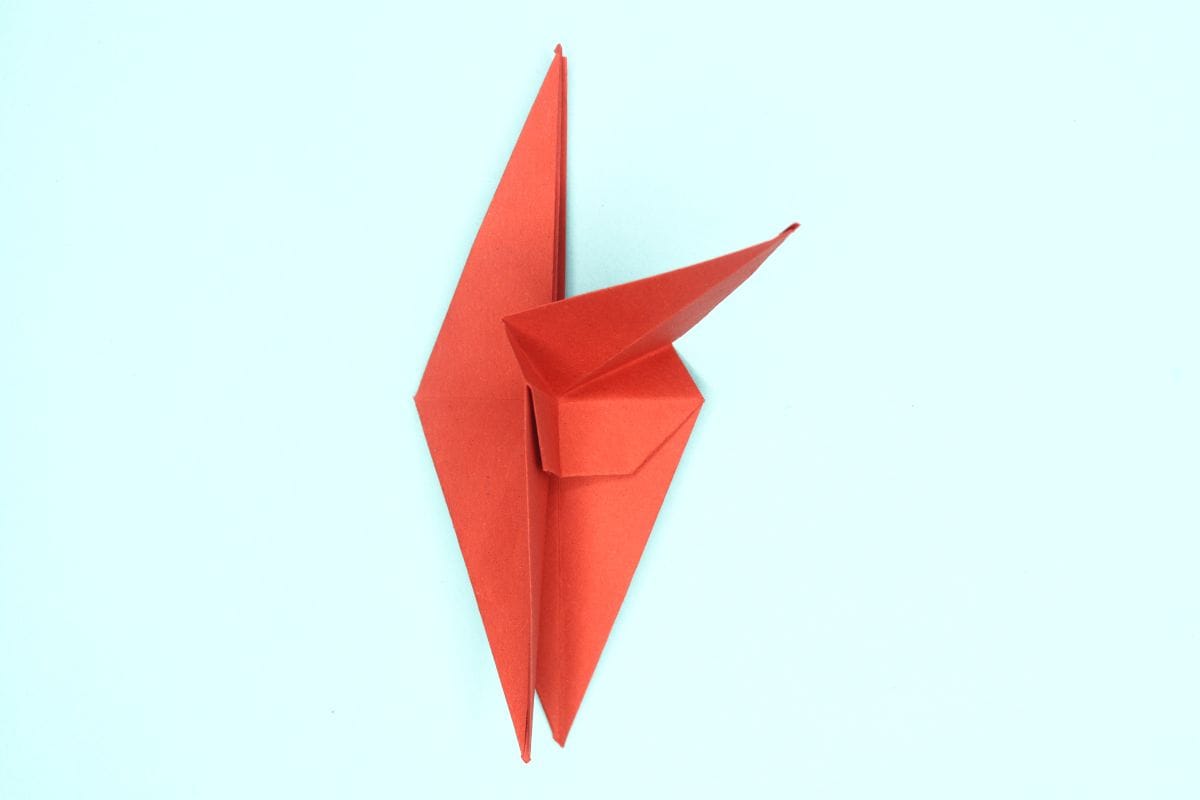
Step 39
39
Inside reverse fold the tail. To do this, slightly open the right side of the figure like you see in the picture in this step.
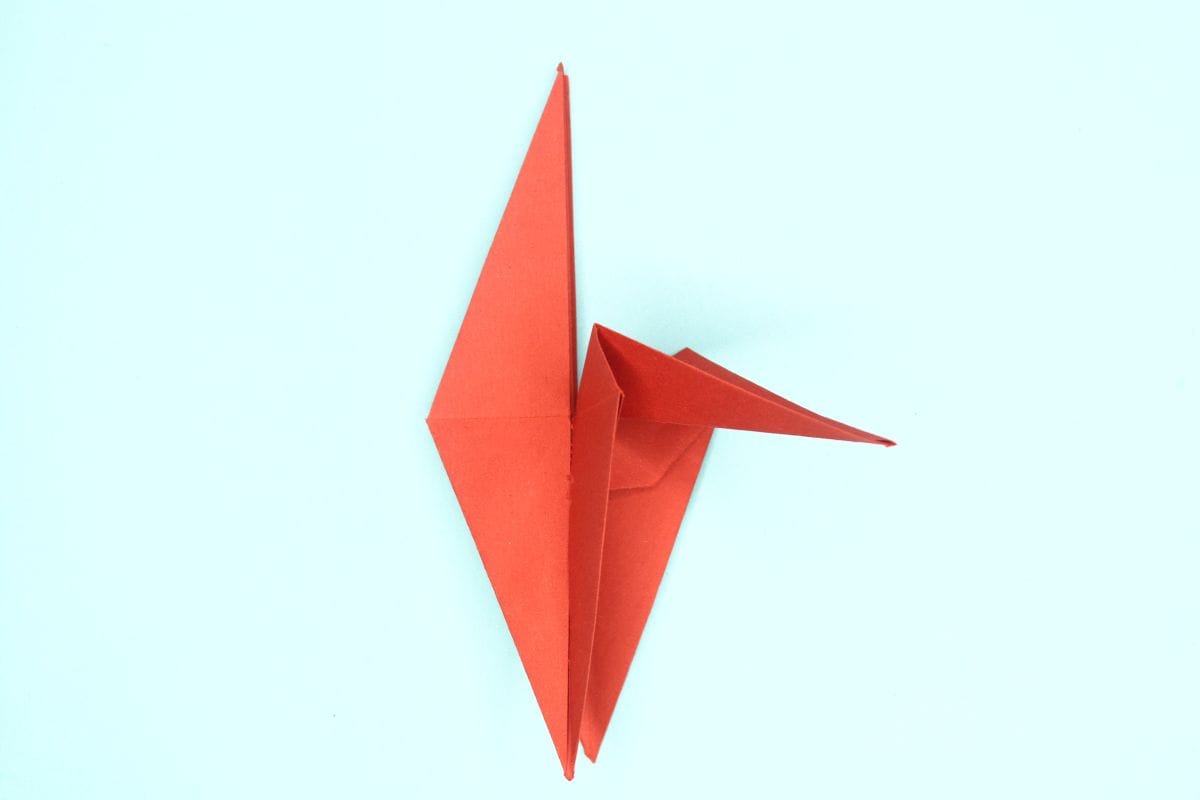
Step 40
40
Start bringing down the top corner.
Step 41
41
Bring the corner slightly below the center.
Step 42

42
Flatten the fold well.
Step 43
43
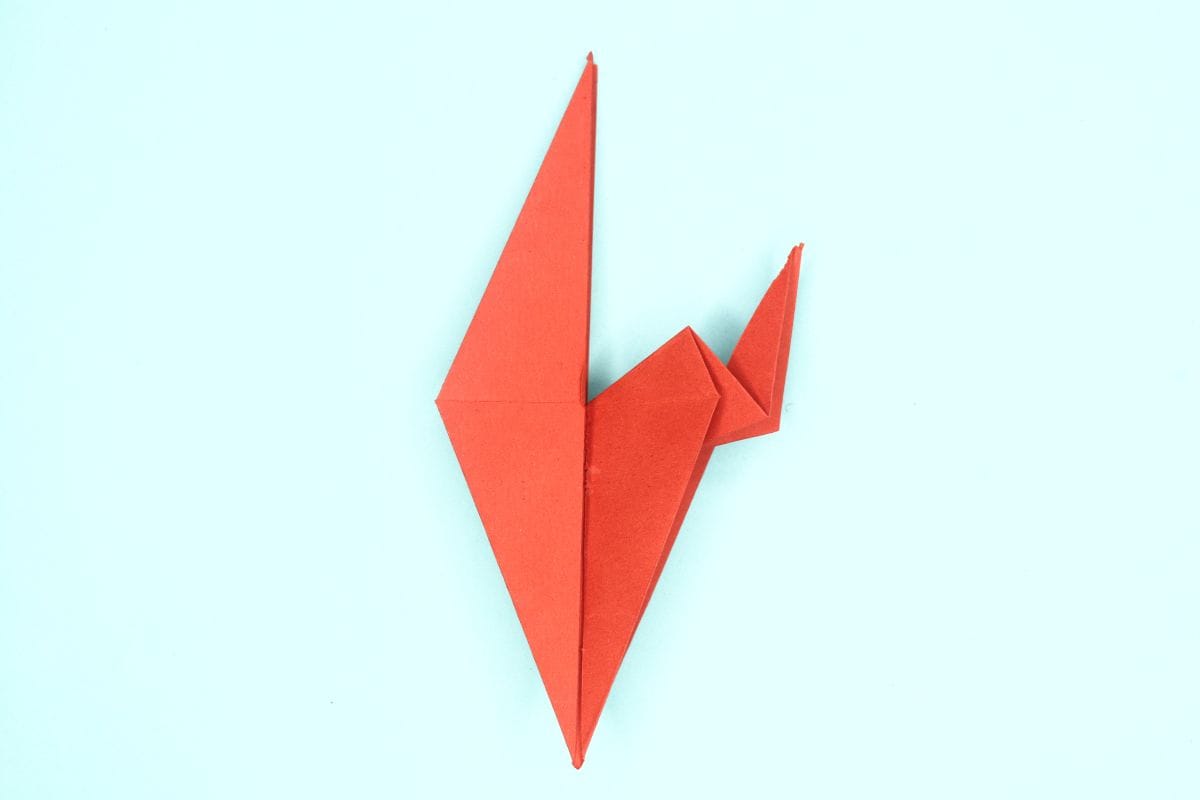
Take a portion of the tail and do another inside reverse upwards like in the picture.
Step 44
44
Fold the bottom flap diagonally upward at an angle. The right edge of the wing should line up when you fold it.
Step 45
45
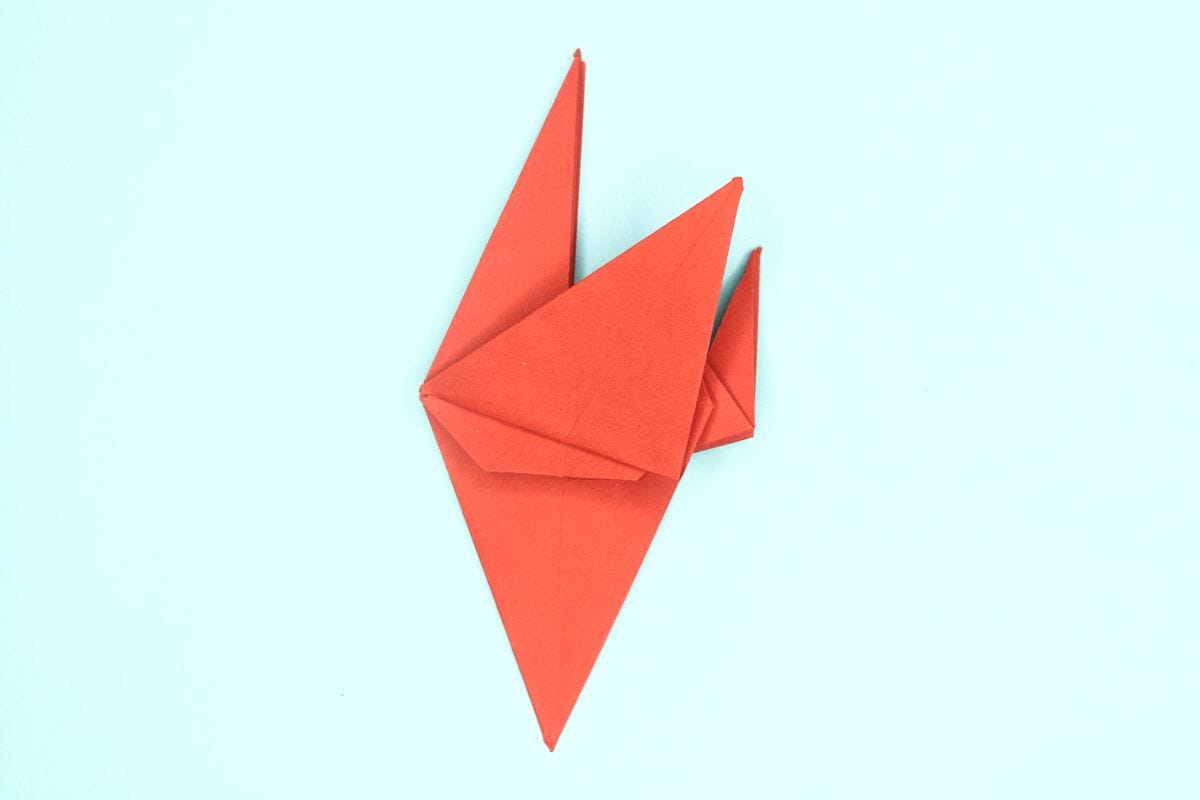
Fold the bottom corner of the wing up.
Step 46
46
Unfold. We just needed a crease line.
Step 47
47
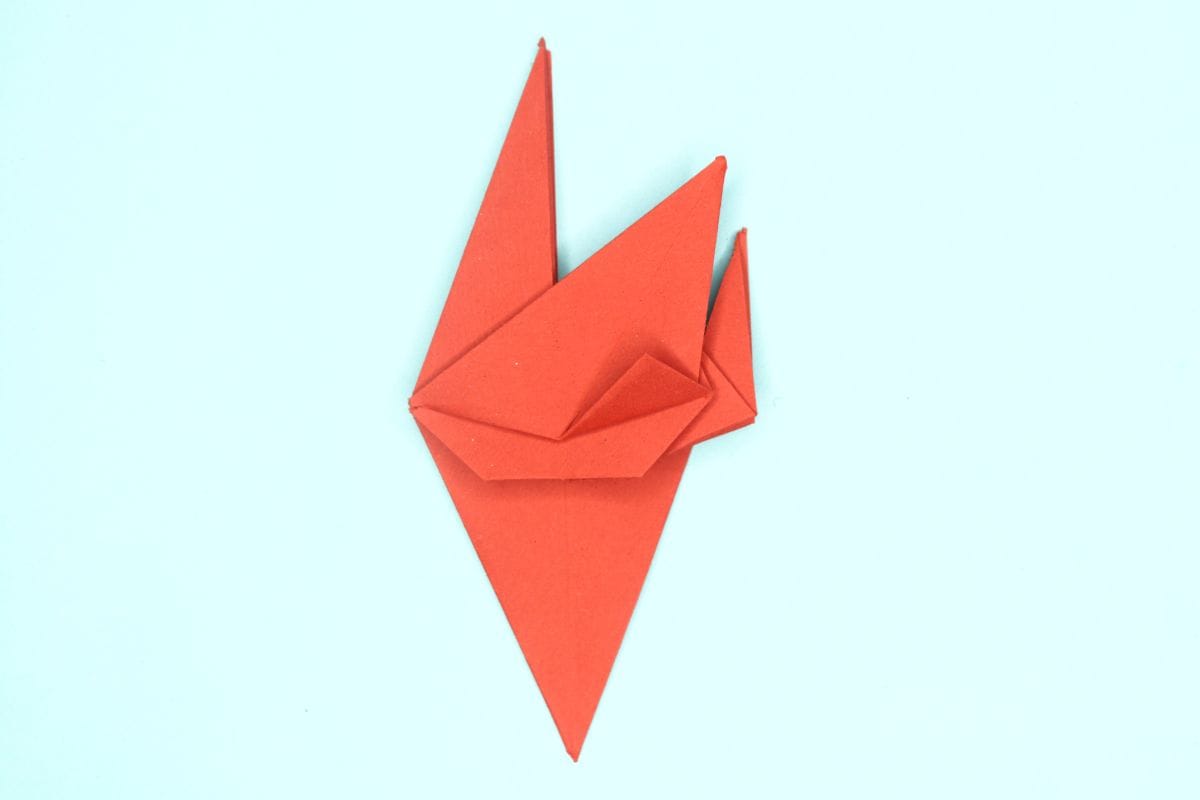
Open the pocket of flap.
Step 48
48
Do an inside reverse fold to that corner.
Step 49

49
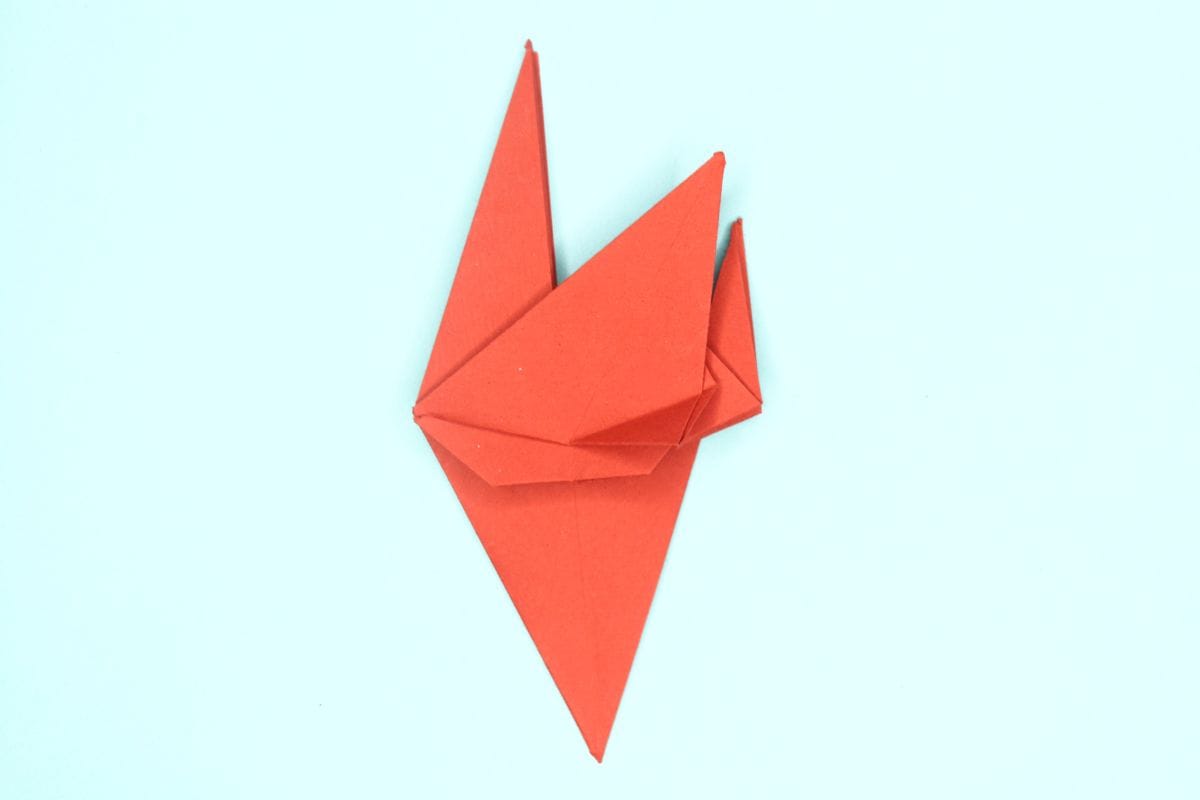
Flatten the fold.
Step 50

50
Turn the model over.
Step 51

51
Repeat the steps 44-49 on this side too.
Step 52
52
Fold the top flap of the right side to the left side.
Step 53
53
Fold the right edge to meet the center vertical crease.
Step 54

54
Fold the left edge to meet the center vertical crease.
Step 55

55
Fold the flaps back together.
Step 56

56
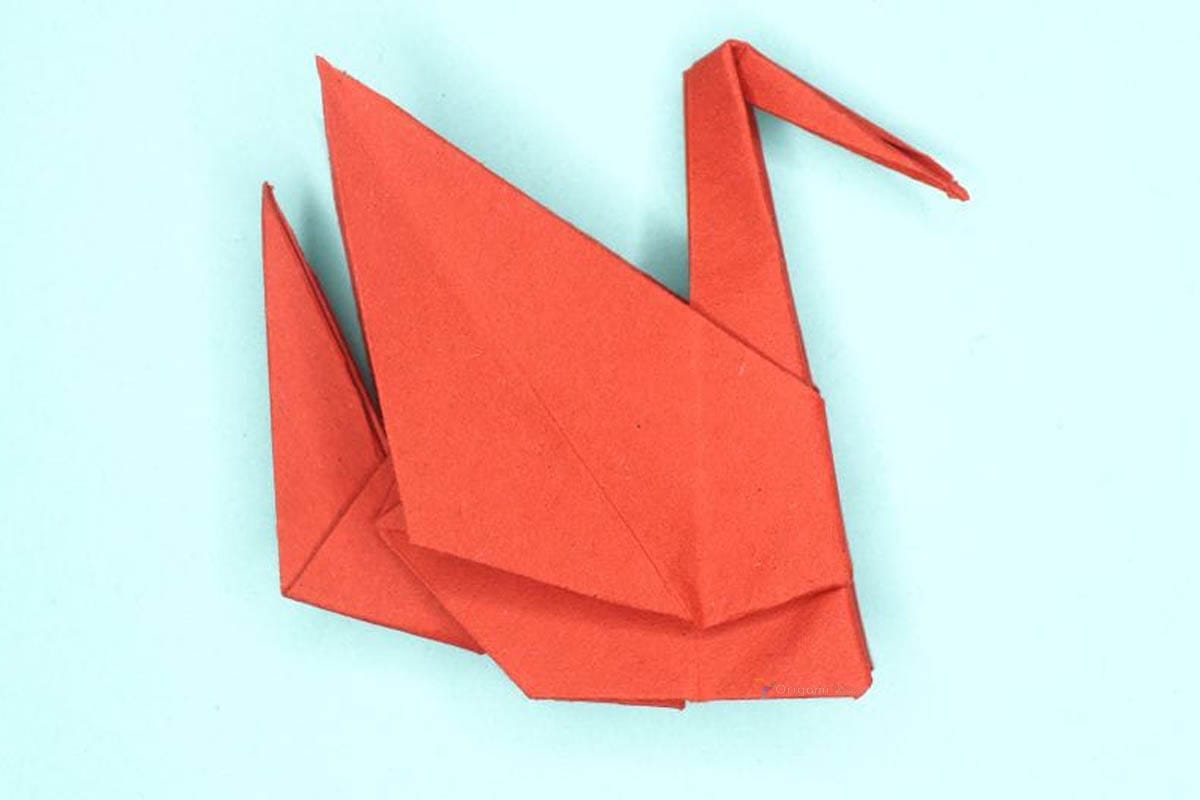
Do an inside reverse fold of the top corner to make the face of the swan. Your origami swan is done!
Share and Comment
We would love to see your creations! Scroll down to the comments section and share a photo of your origami.
Leave a Reply