Make a Paper Swan: Origami Swan Instructions & Diagrams
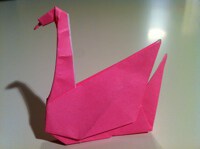 One of the most basic origami bird models available is the classic swan. The origami swan is a breathtaking piece of artwork. Swans are among the most widely produced forms in origami, a kind of folded paper craft. This is the ideal model to start with if you are new to origami.Follow the steps below to make this Origami paper Swan.
Difficulty: Medium
This origami swan is perfect for novices because it only calls for a small number of mountain and valley folds. The origami swan is an extremely conventional design. This origami model can be used as a stunning wedding display, minimalist decoration, or a wonderful chopstick stand for a Japanese supper. Although they occasionally appear at graduations and other major milestone celebrations, they are particularly well-liked as decorations during weddings and anniversary parties.
Many people attempt the origami Swan but give up because they find it too difficult. However, you can make origami swans with a few easy folds, whether you want to impress someone with your origami abilities or you are thinking about decorations for your next event. You can learn how to create the best Origami Swan by using the instructions in this article as a reference. After just a few minutes of practice, your swan will appear quite elegant and attractive, even though the results may initially be a little shabby.
The historical art of paper folding is called origami. Origami is a very attentive and creative technique that offers therapeutic as well as academic benefits. Recognizing a person's sense of accomplishment and satisfaction improves general wellness. This is the same delight that creators have when conjuring something from nothing.
There are some trick folds, but nothing outrageous that will make you give up if you follow the instructions carefully.
Frequently Asked Questions About Origami Swan
What Does the Origami Swan Represent?
Swans are a well-known symbol of everlasting love and are frequently used as wedding and celebration decorations since they can pair up for life. Moreover, because Saraswati and Brahma ride them in Hindu mythology, origami swans have also come to represent art and significant life events.
Why is Origami so Difficult?
Paper folding can be difficult for novices to master since the instructions are frequently overly detailed and difficult to follow. In addition, sometimes, picking the incorrect paper might be frustrating. Use foil paper instead of pure foil to get around this.
What Makes Origami so Significant?
Origami is important as a creative outlet since it improves mental acuity, fine motor abilities, and hand-eye coordination. Beyond its impact on a person, origami is essential to Chinese and Japanese culture.
Which Materials Work Best for Creating Paper Swans?
An origami swan can be made or folded with only a square piece of paper, but the kind of paper chosen has a significant impact on how the swan turns out. Numerous craft stores carry origami paper, or you may get some online.
For example, the swan's wings and beak can be given charming accents by using two different colors of paper. A modular dollar bill origami swan that can be assembled from folded bills is a well-liked and distinctive table decoration for a graduation celebration or wedding shower.
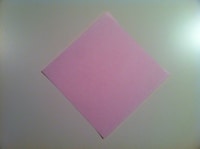 |
Step 1: Start with a square piece of origami paper. If you only have regular 8.5x11 paper, follow these instructions to make a square sheet. |
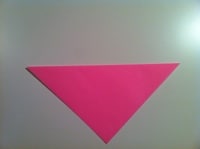 |
Step 2: Take the top corner and fold it over to the bottom corner. |
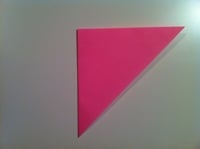 |
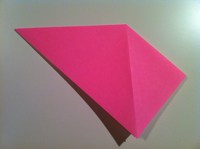
Step 3: Fold the left corner over to the right. |
 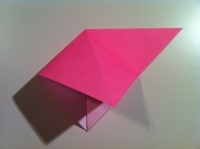  |
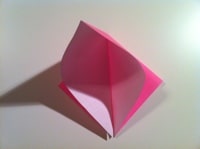
Step 4: With the flap you just folded with, open it up and crease the left and right sides so you can flatten it. The top corner should fold down to the bottom corner |
 |
Step 5: Turn the paper over so we can repeat it on the other side. |
  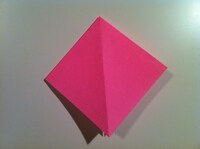 |
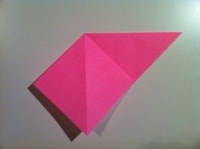
Step 6: Take the left flap and open it up, then crease the left and right sides so the top corner can meet the bottom corner. Your paper should look like the 3rd picture in this step |
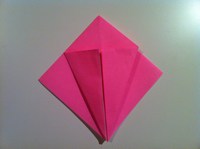 |
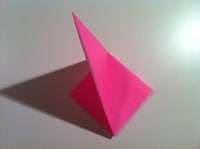
Step 7: Take the left and right corners of the top layer and fold it to meet at the middle. |
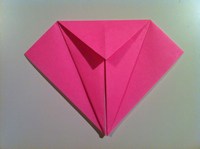 |
Step 8: Fold the top triangle down. Go to Next page to continue making the origami swan. |
