Take your first step into origami with this very simple paper bird! In this tutorial, you’ll learn how to fold an easy origami bird using just a single square of paper. With only a few basic folds, your paper transforms into a charming little bird that looks ready to flutter away. This is a perfect project for beginners, kids, or anyone looking for a quick and relaxing craft.
How to Make a Very Simple Origami Bird
Difficulty: Easy
Make a fun and simple origami bird for kids with clear step-by-step instructions that guide you from start to finish.
Step 1
1
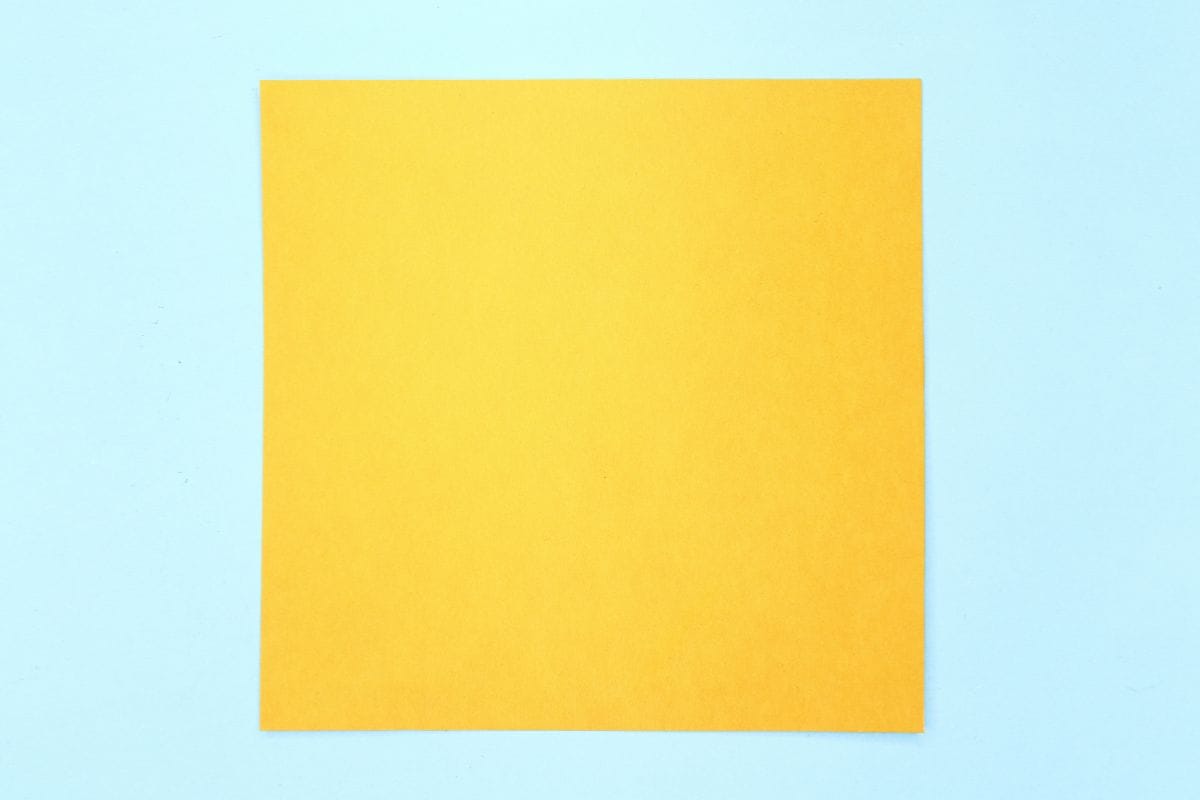
Start with a square sheet of origami paper. I am using an 7×7 inches origami paper.
If you only have regular paper, follow these instructions on how to make a square origami paper.
If you only have regular paper, follow these instructions on how to make a square origami paper.
Step 2

2
If you are using double-sided origami paper, keep the white side facing up. Rotate the paper to make it resemble a diamond.
Step 3

3
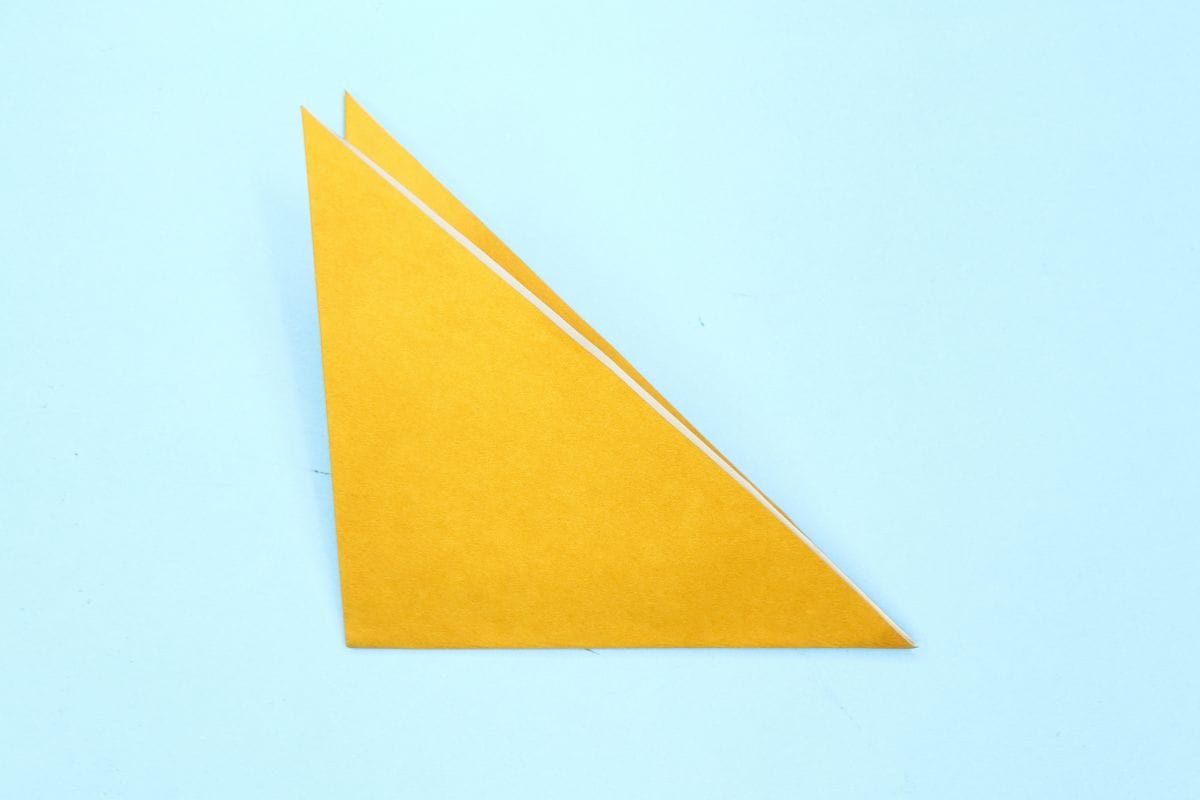
Fold in half by moving the left corner toward the right.
Step 4
4
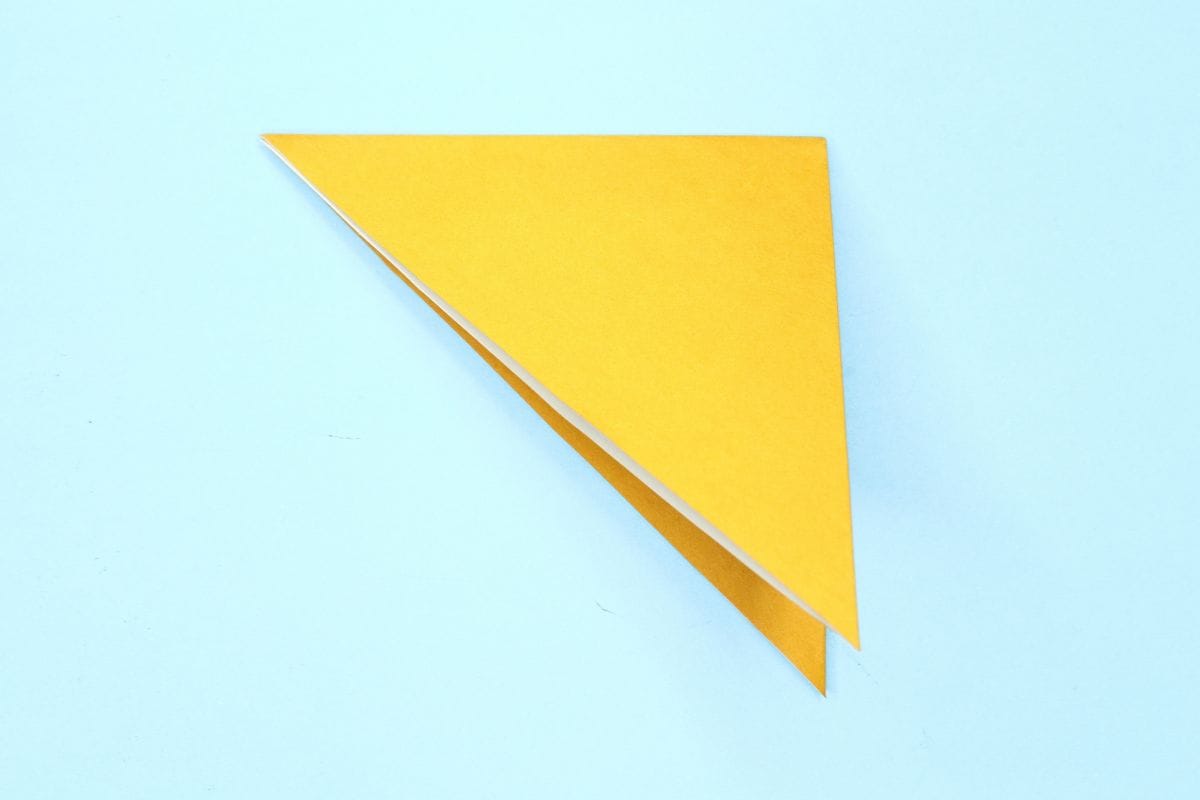
Fold the bottom corner to the top corner.
Step 5
5
Flip the paper over.
Step 6
6
Fold the top layer upward at an angle. This is the wing of the bird.
Step 7

7
Turn the model over horizontally.
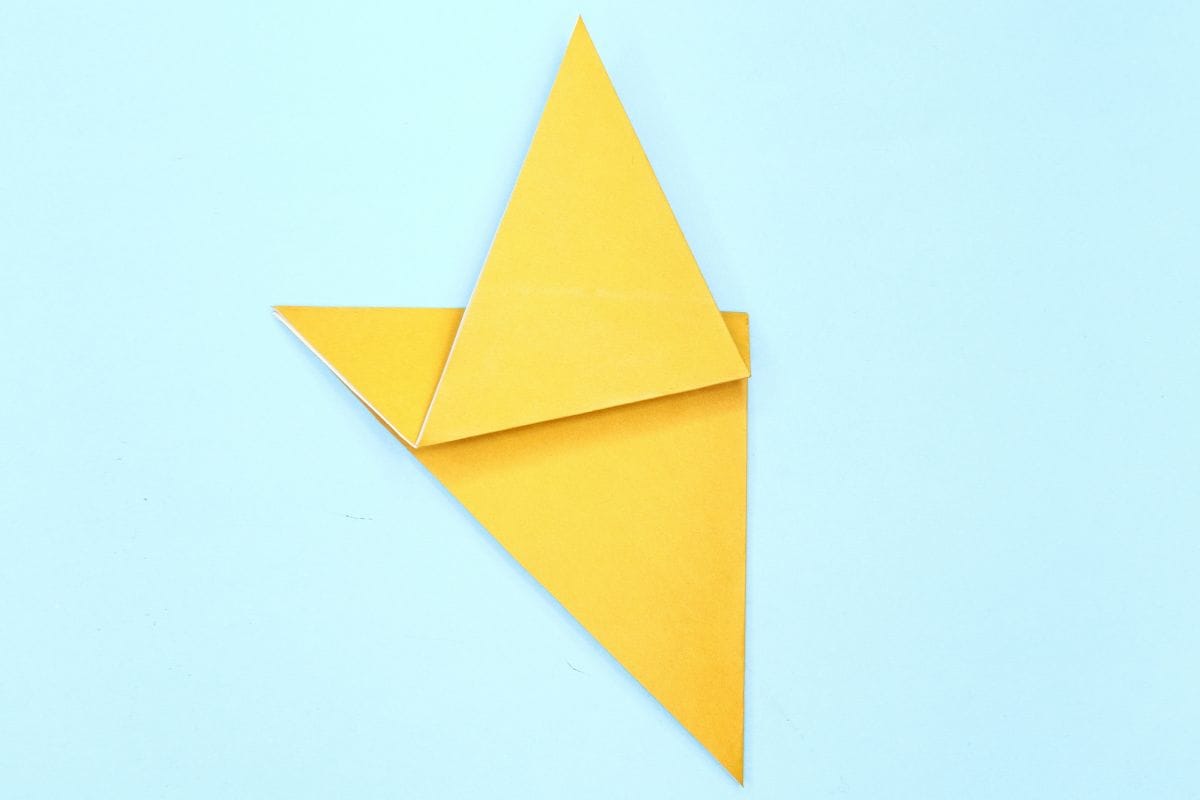
Step 8
8
Fold the top layer upward at an angle. Make sure both wings matches now.
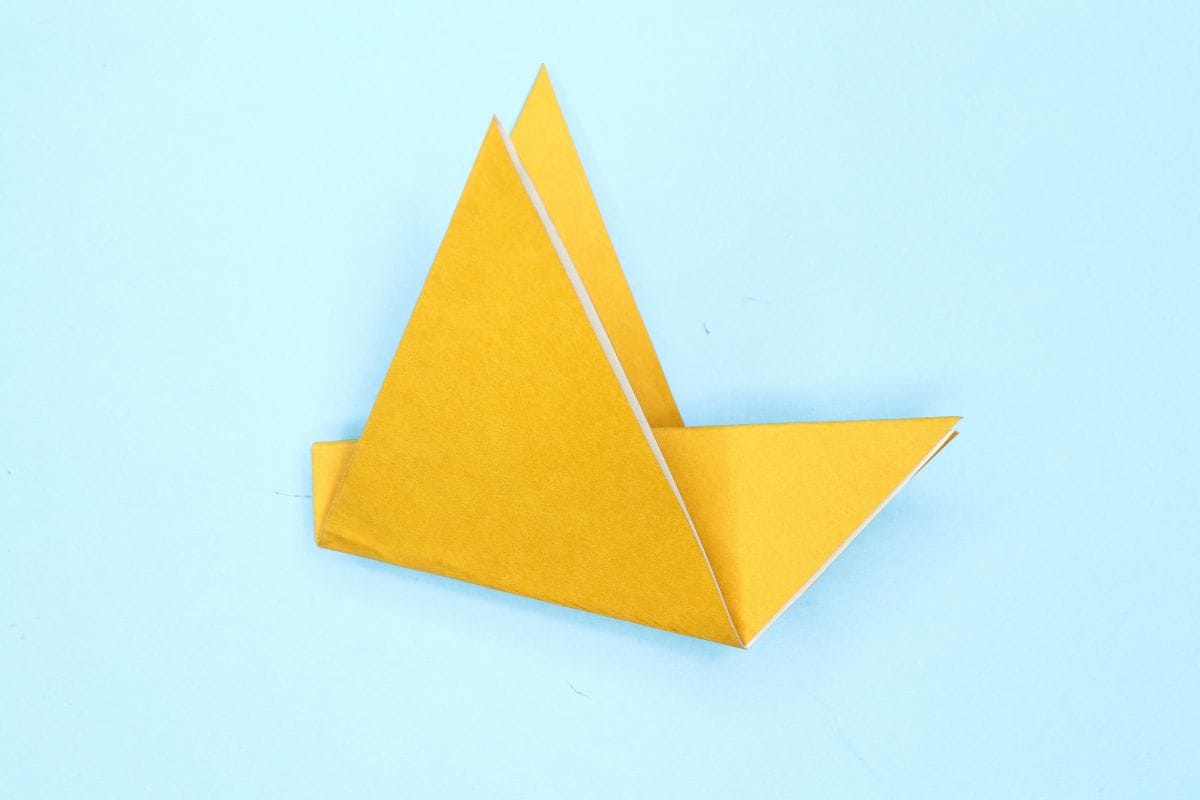
Step 9
9
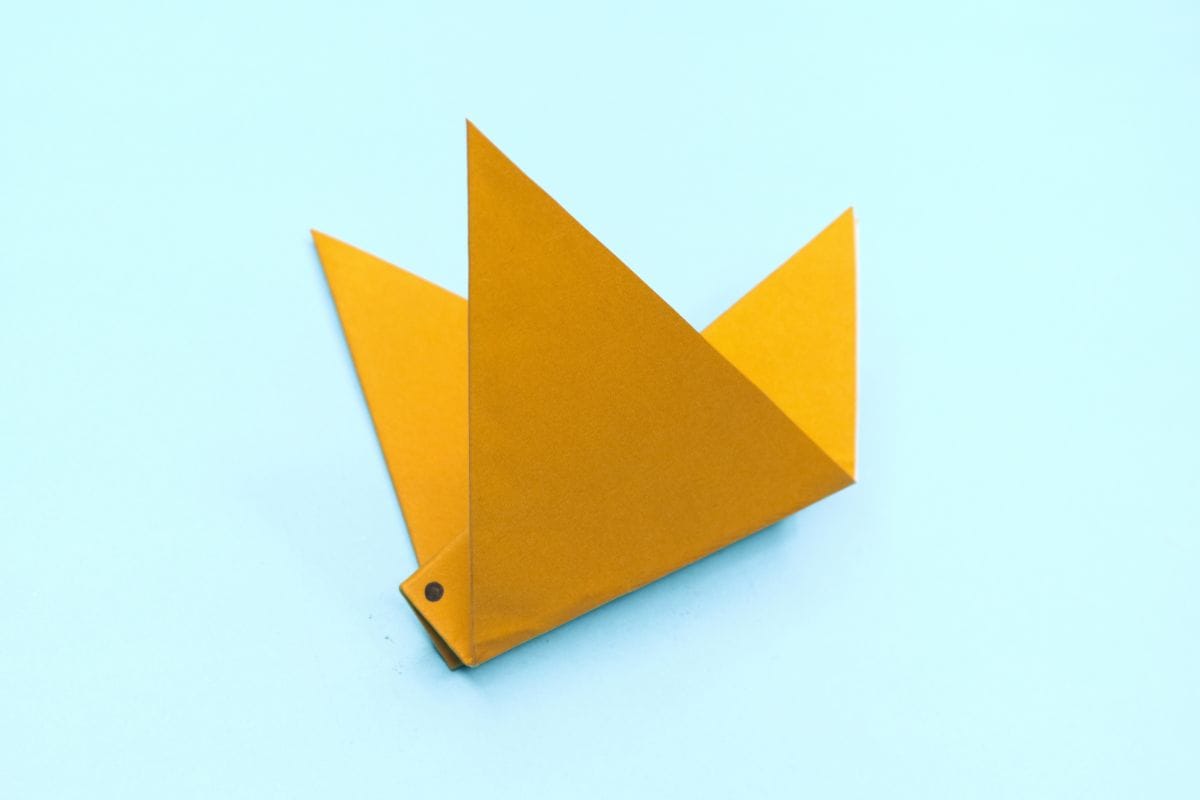
Draw the eyes and your bird is ready to fly.
Share and Comment
We would love to see your creations! Scroll down to the comments section and share a photo of your origami.
Leave a Reply