
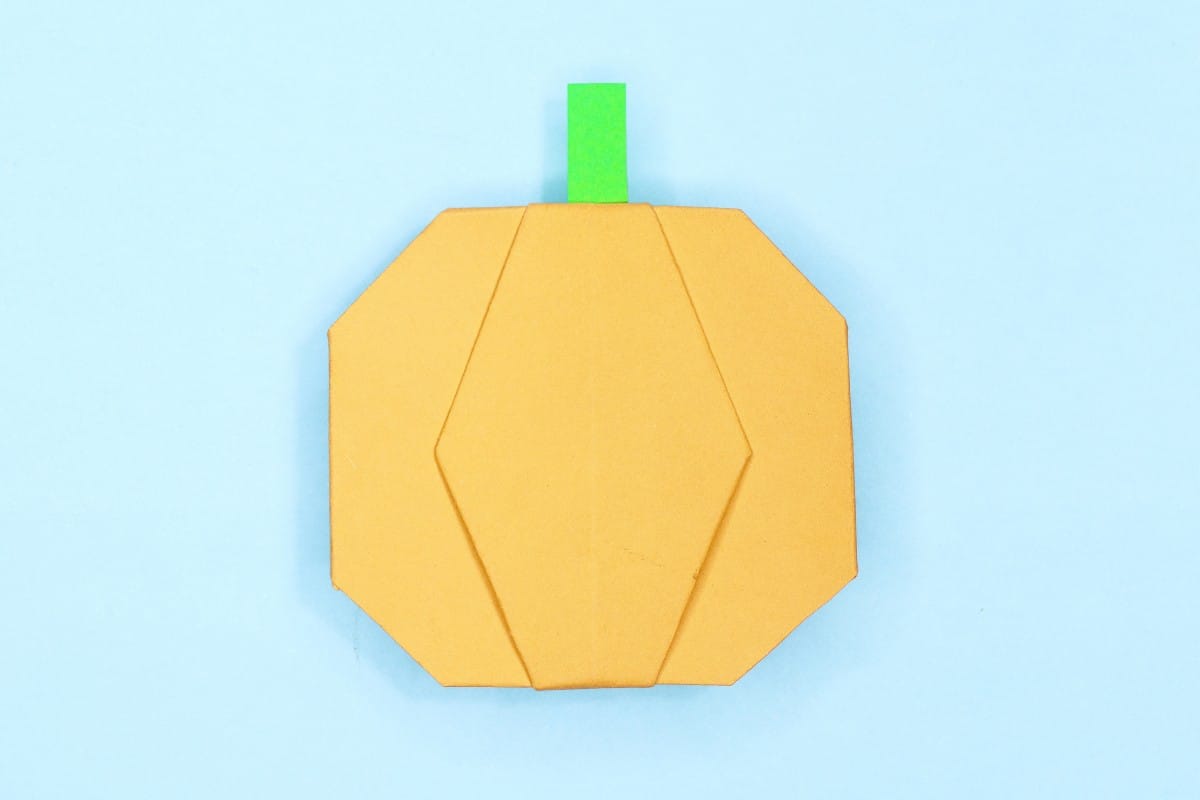
Get into the fall spirit with this fun origami pumpkin! No messy carving needed—just fold, crease, and bring your perfect paper pumpkin to life. Whether for Halloween, autumn decor, or just for fun, this simple craft is sure to add a festive touch!
How to Make an Origami Pumpkin
Category: Holiday Origami
Difficulty: Intermediate
Learn how to fold a perfect origami pumpkin with our easy step-by-step instructions. Fun, simple, and perfect for Halloween or fall decorations!
Step 1

1
Start with a square sheet of origami paper. I am using an 7×7 inches origami paper.
If you only have regular paper, follow these instructions on how to make a square origami paper.
If you only have regular paper, follow these instructions on how to make a square origami paper.
Step 2

2
Fold it in half by moving the bottom edge toward the top edge.
Step 3

3
Unfold.
Step 4

4
Fold it in half by moving the left edge toward the right.
Step 5

5
Unfold.
Step 6

6
Turn over the paper.
Step 7

7
Fold the top right corner toward the bottom left corner.
Step 8

8
Unfold.
Step 9

9
Fold the top left corner toward the bottom right corner.
Step 10

10
Unfold.
Step 11

11
Turn the paper over.
Step 12

12
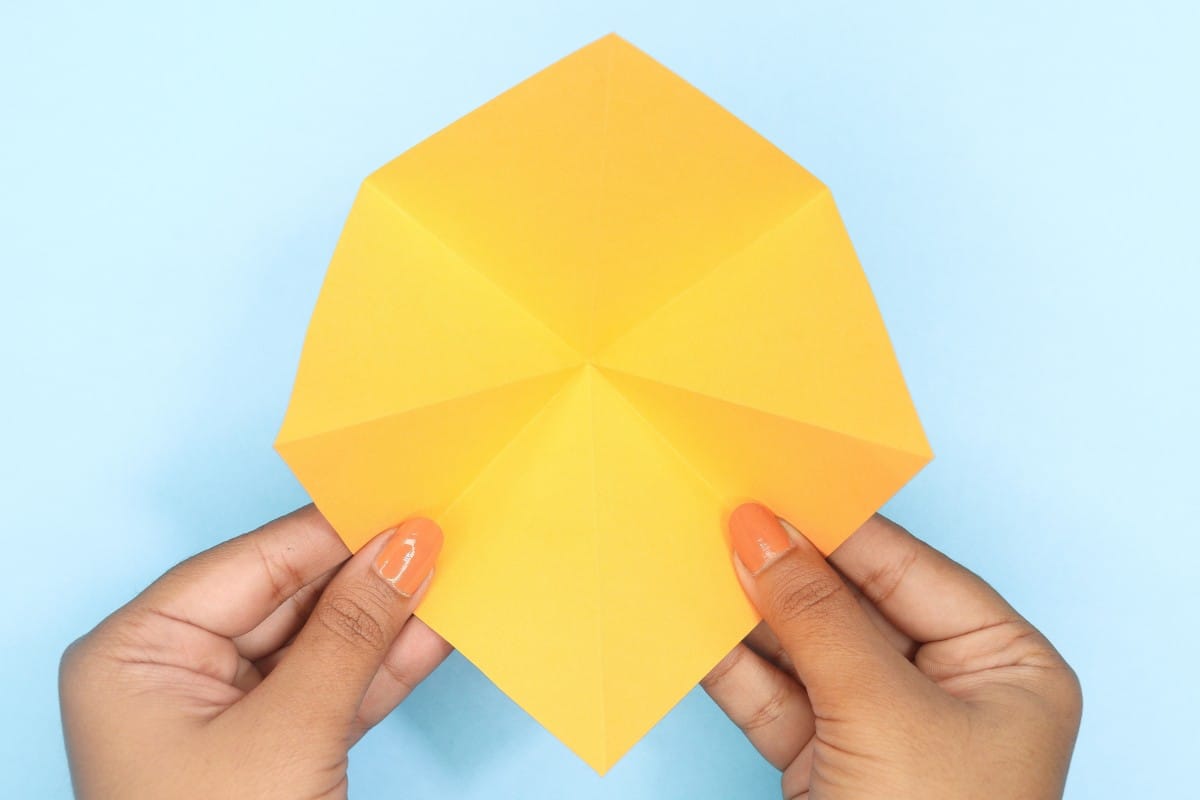
Pop in the center using your index finger.
Step 13

13
Rotate the paper to make it resemble a diamond.
Step 14
14
Bring in the left and right edges together.
Step 15

15
Bring the left and right edges together.
Step 16
16
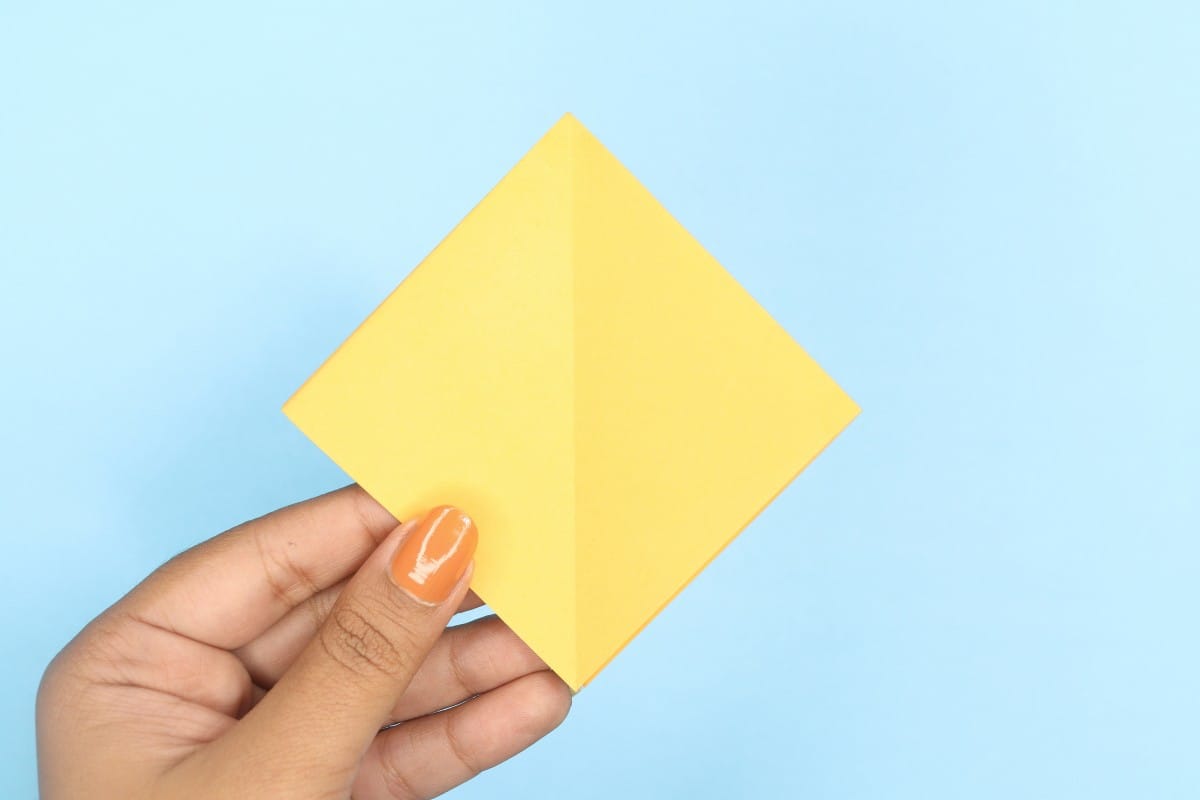
After bringing the left and right edges towards the center, your paper will form a diamond shape!
Step 17
17
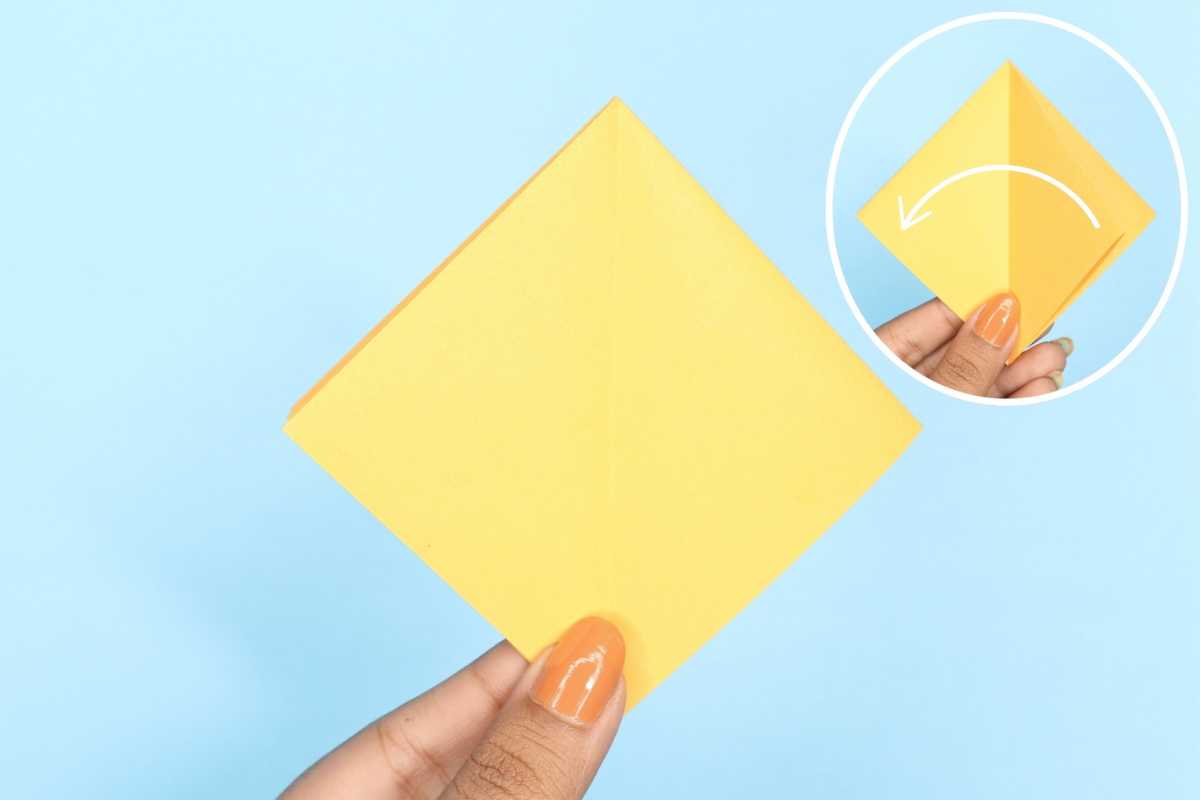
Flip the right side of the flap to the left.
Step 18
18
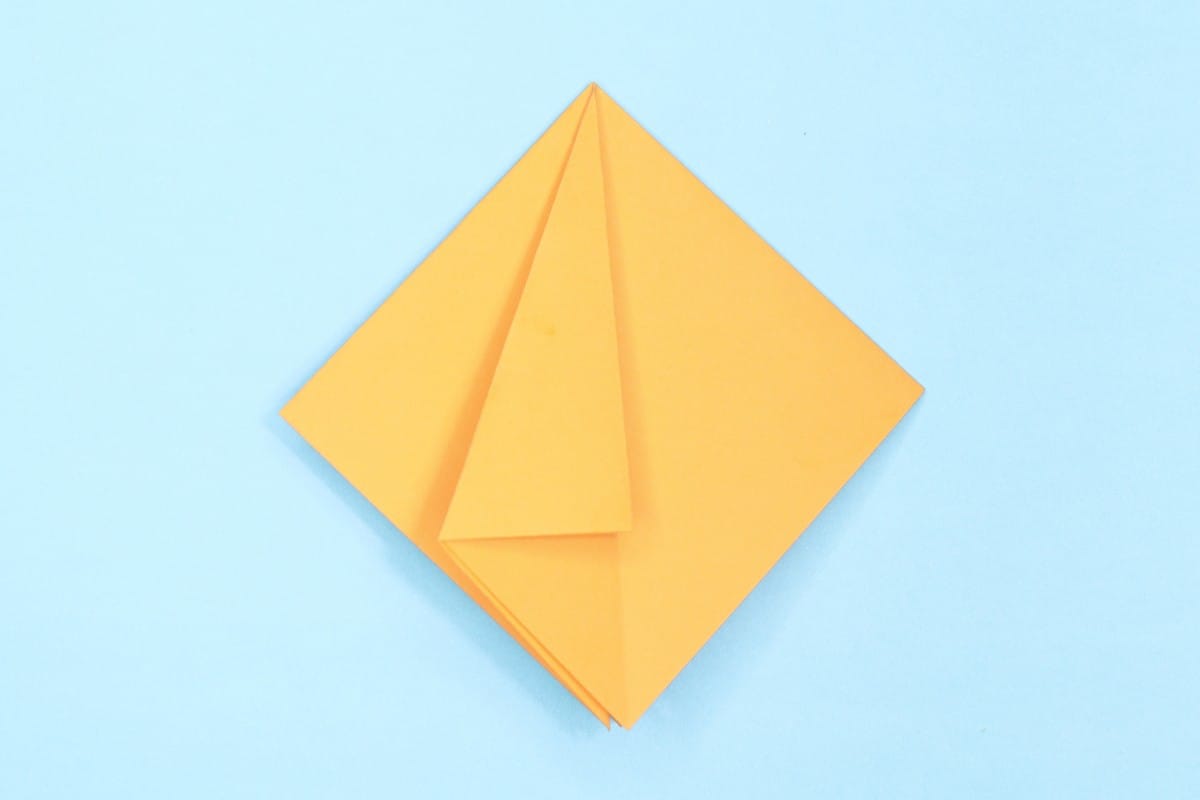
Fold diagonally the left corner to the middle.
Step 19
19
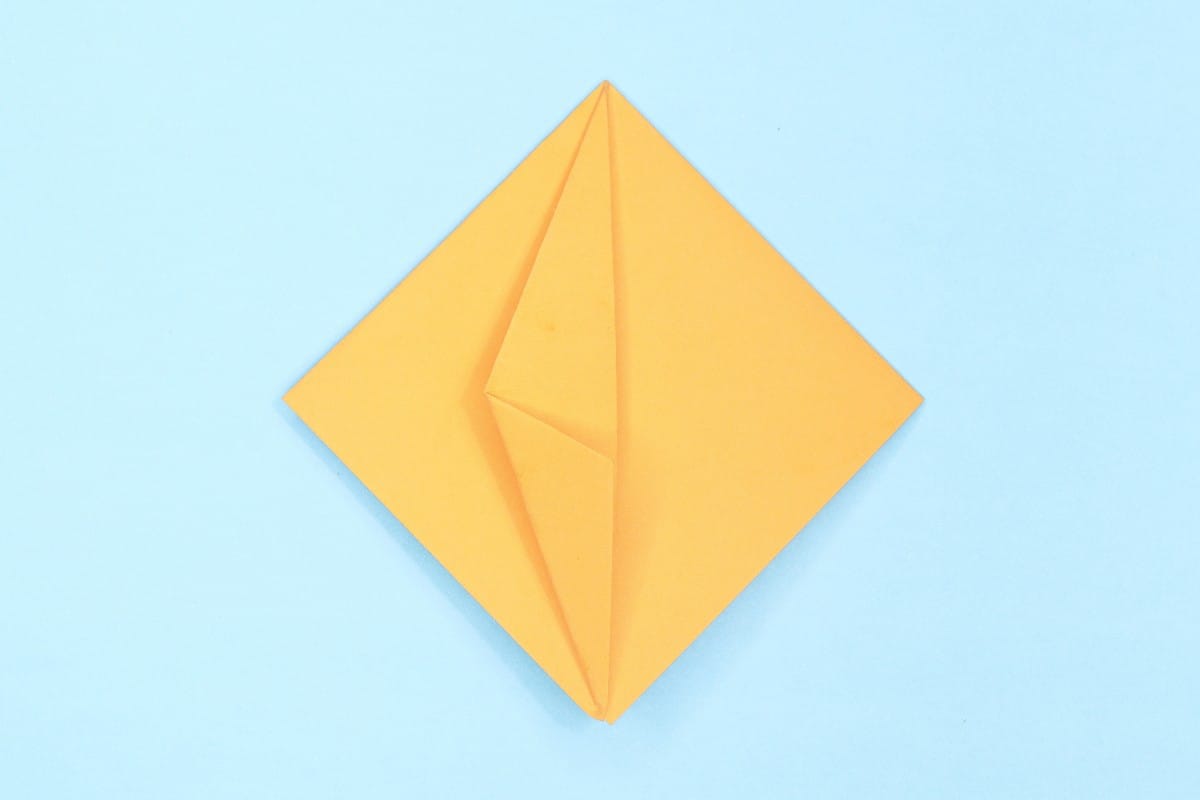
Fold the bottom left edge to the middle.
Step 20
20
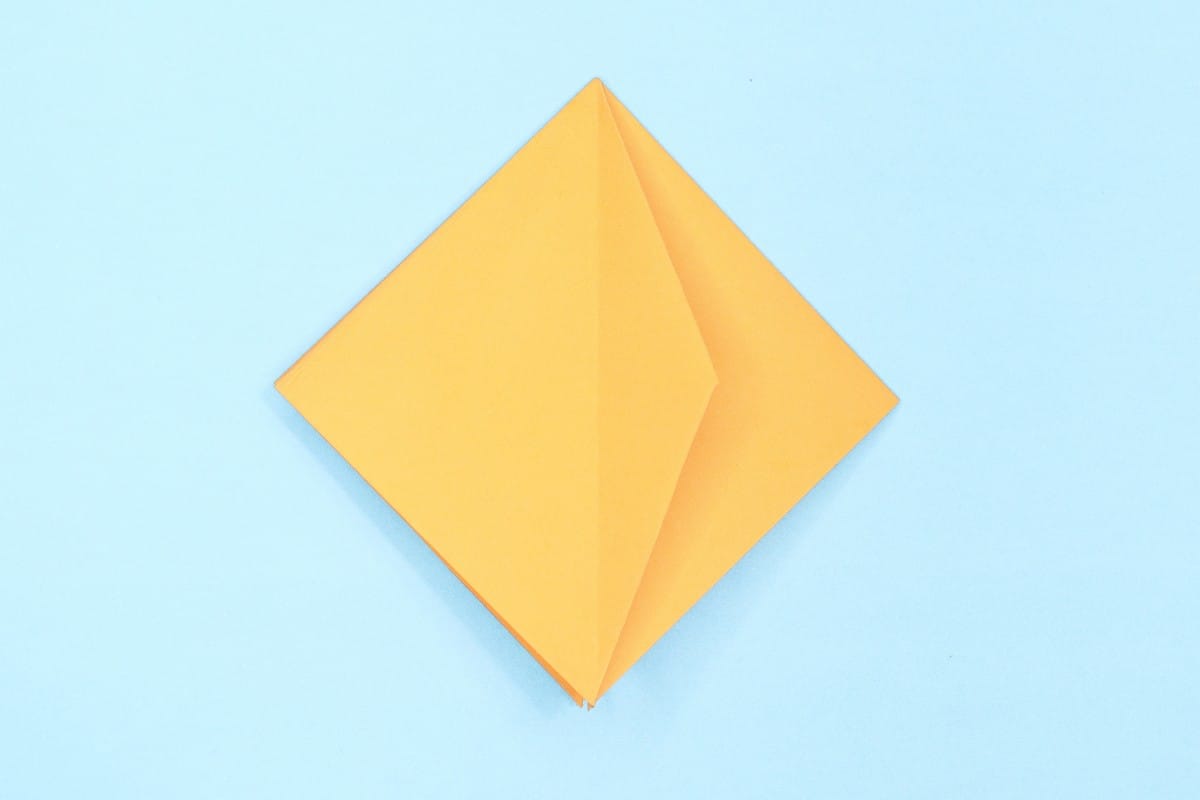
Flip that flap back to the right.
Step 21
21
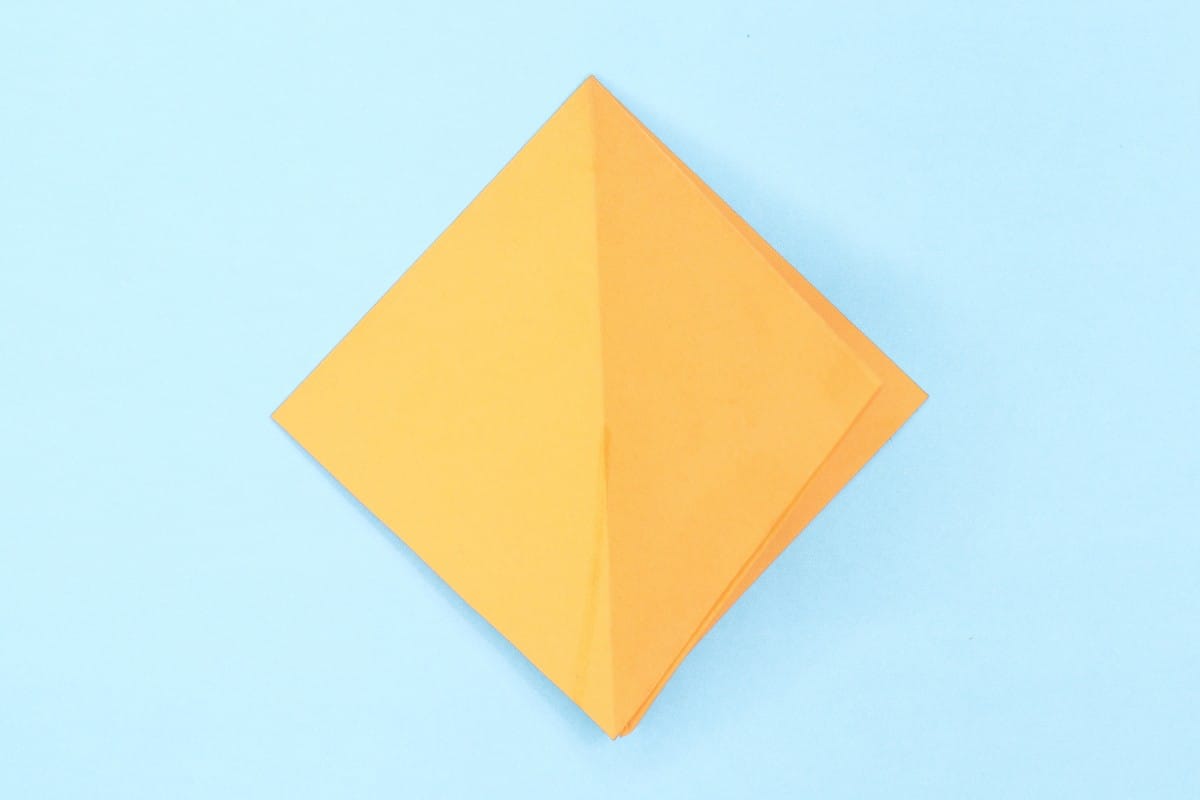
Flip the left side of the flap to the right.
Step 22
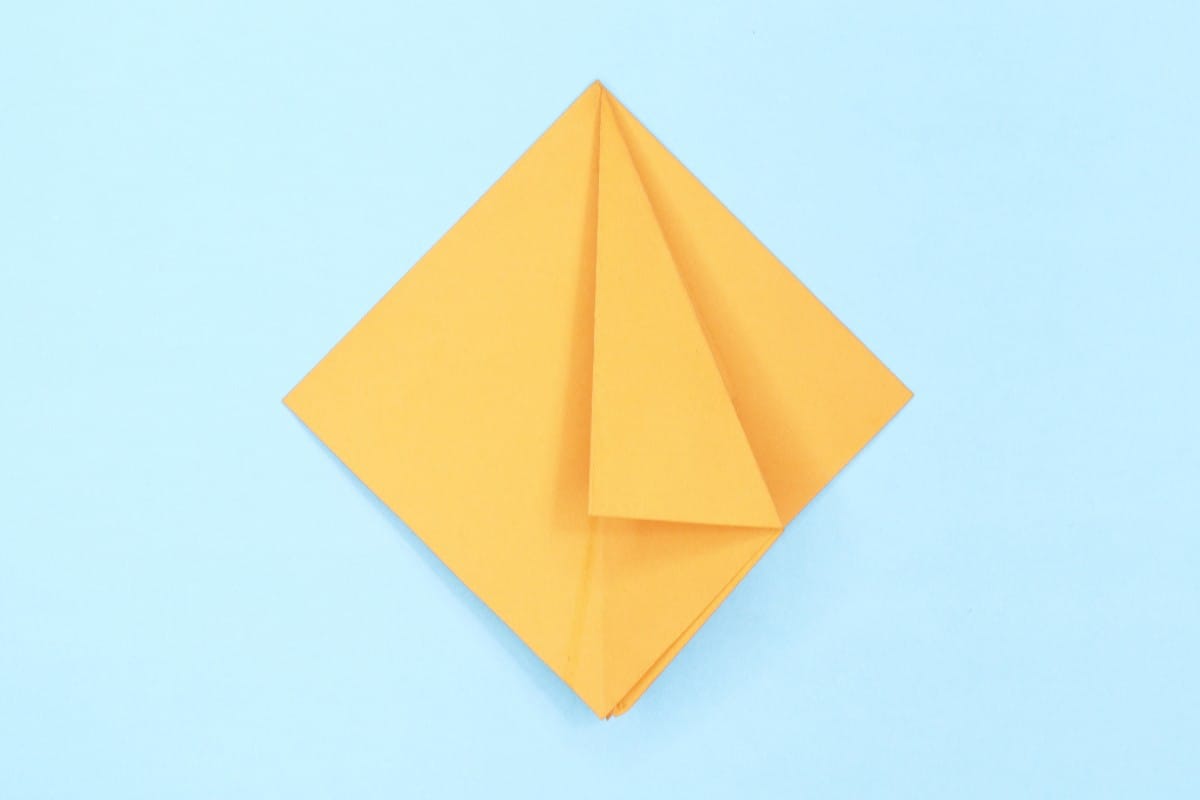
22
Fold diagonally the right corner to the middle.
Step 23
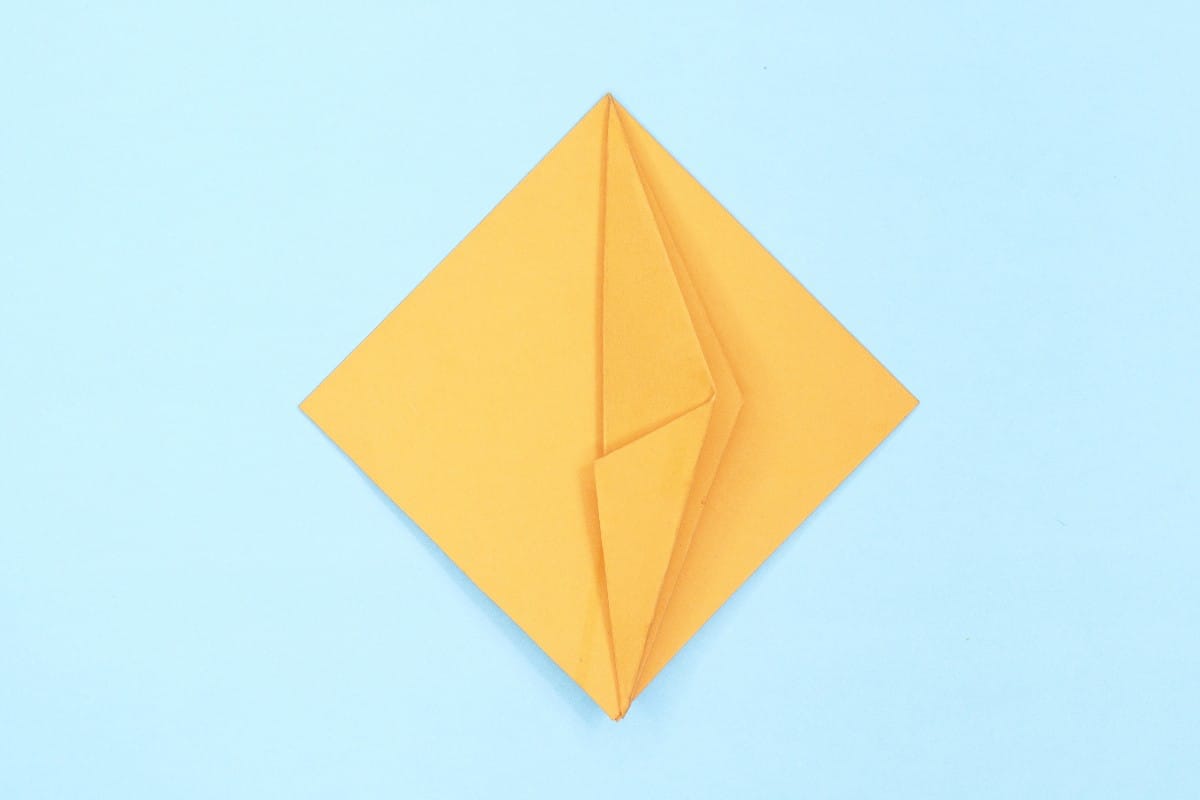
23
Fold the bottom left edge to the middle.
Step 24
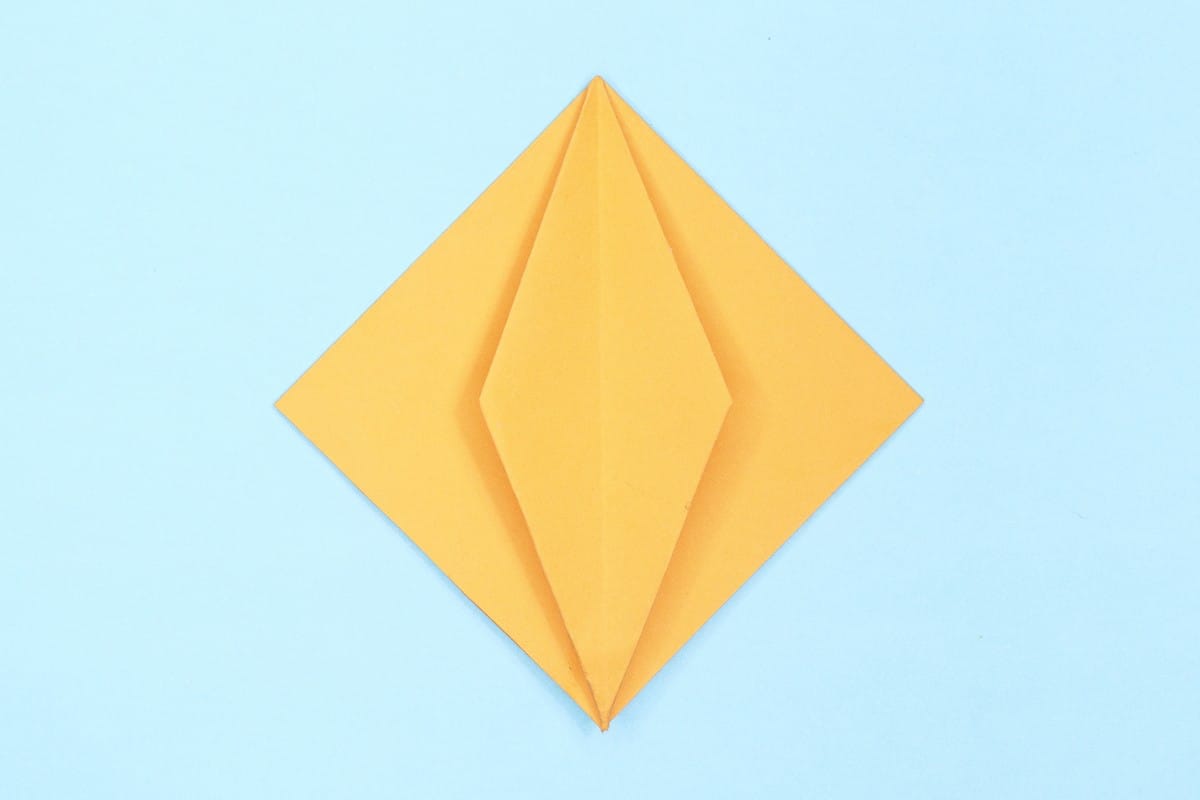
24
Flip that flap back to the left.
Step 25

25
Turn the paper over.
Step 26

26
Fold the small portion of right corner slightly to the left.
Step 27

27
Fold the small portion of left corner slightly to the right.
Step 28

28
Fold the top corner down about a thumb’s width.
Step 29
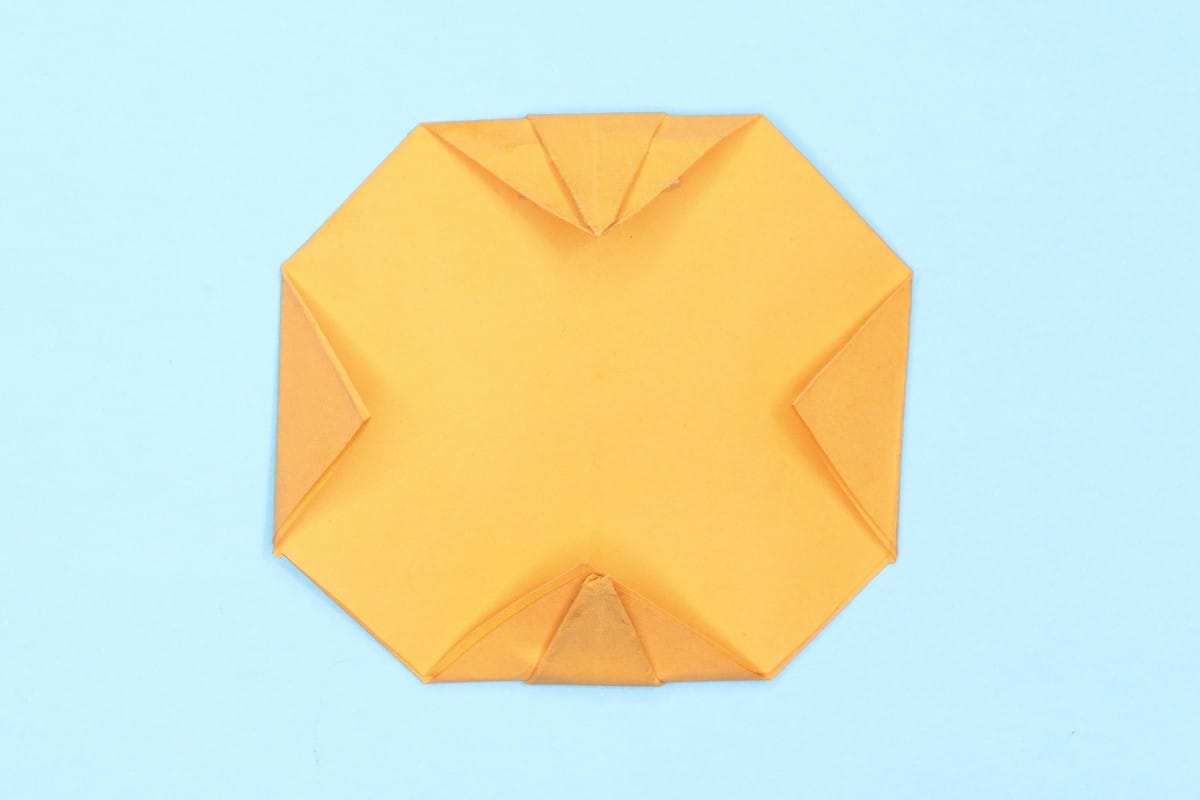
29
Next fold the bottom corner upward about a thumb’s corner as well.
Step 30
30
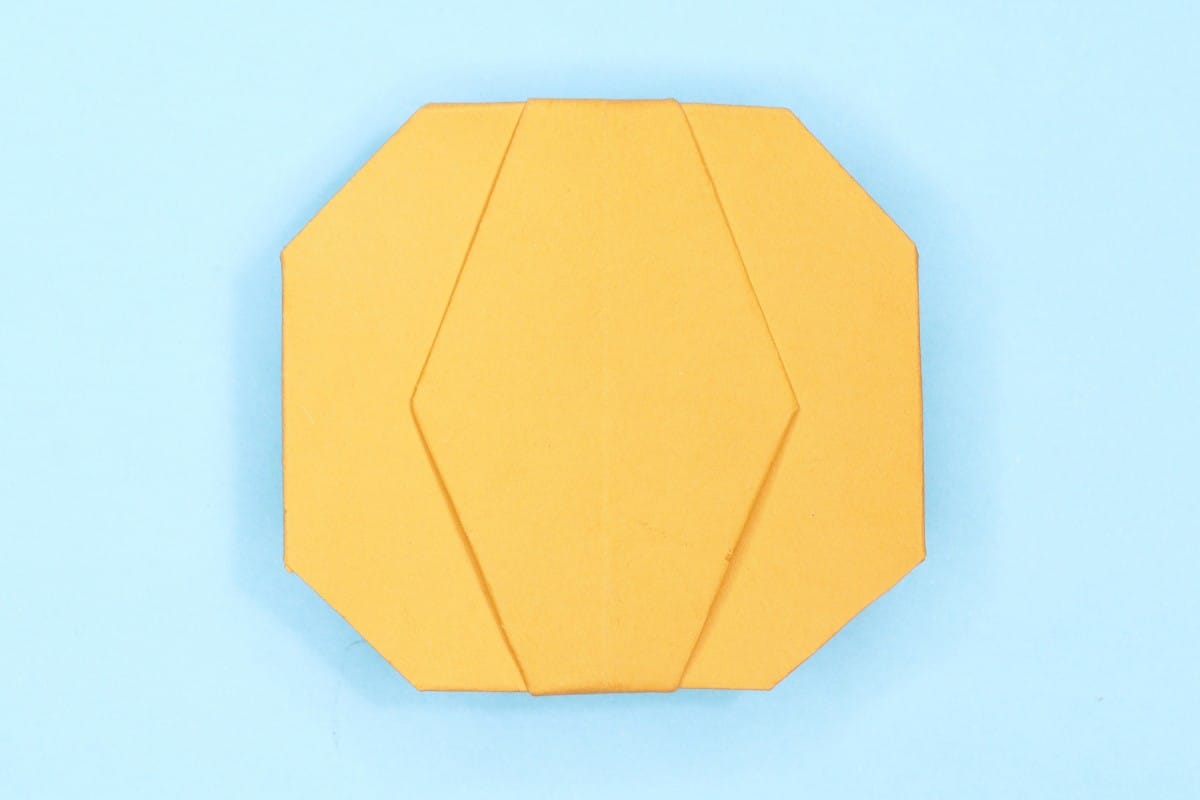
Turn the paper over.
Step 31
31
Attach a cute little stem to your pumpkin — now it’s ready to shine with its own character!
Share and Comment
We would love to see your creations! Scroll down to the comments section and share a photo of your origami.
Leave a Reply